
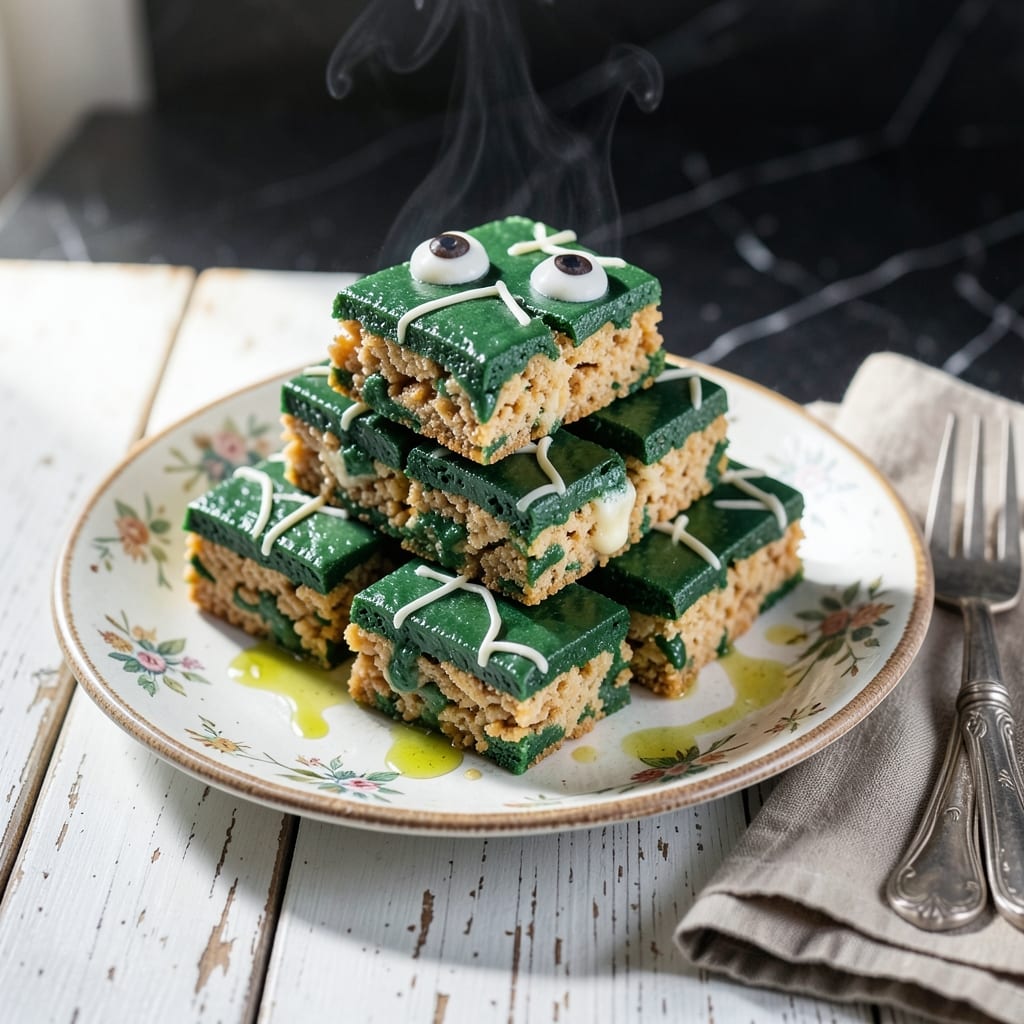
This Halloween, transform classic Rice Krispie treats into a spooky centerpiece with a Frankenstein twist. The process remains simple, but the presentation delivers show-stopping results.
With just a few additions like green food coloring and candy decorations, you’ll create a treat that’s as fun to make as it is to eat. Vegetarian-friendly and ready in 30 minutes or less.
Ingredients for Frankenstein Rice Krispie Treats
A few extra ingredients turn classic treats into a Halloween masterpiece. Fun and easy.
| Ingredient | Amount | Notes |
|---|---|---|
| Rice Krispies Cereal 🥣 | 6 cups | Classic variety preferred |
| Marshmallows 🍬 | 10 oz | Mini or regular size |
| Unsalted Butter 🧈 | 3 tbsp | For melting marshmallows |
| Green Food Coloring 🎨 | 1 tsp | Gel or liquid variety |
| Vanilla Extract 🌿 | ½ tsp | Pure extract preferred |
| Salt 🧂 | ¼ tsp | Fine grain for balance |
| White Chocolate Chips 🍫 | ½ cup | For Frankenstein bolt decorations |
| Black Icing Gel ⚫ | 1 tbsp | For facial details |
| Mini Chocolate Chips 🍫 | ¼ cup | For eyes and mouth |
| Pretzel Sticks 🥨 | 4 pieces | For bolt connectors |
| Candy Eyes 👀 | 8 pieces | Optional for extra spookiness |
The cereal is the base, so Kellogg’s Rice Krispies are the gold standard—generic brands can be a little denser. Butter quality matters here since it’s carrying the flavor; Land O’Lakes or store-brand unsalted both work great. For the green food coloring, gel paste from Wilton gives more vibrant color without thinning the mixture. Most grocery stores carry all of this in the baking aisle (or cereal aisle, obviously).
No green food coloring? Matcha powder at one-third the amount works but adds flavor. White chocolate not your thing? Almond bark melts just as well for the bolts. If you can’t find candy eyes, mini M&Ms or chocolate-covered raisins make fine substitutes. The marshmallows can be swapped for jet-puffed if that’s your preferred brand (they melt a little smoother).
Store treats in an airtight container at room temperature for up to 3 days. They’ll soften over time, so eat them fresh for best texture. The decorations hold best if you add them right before serving—prevents melting or shifting during storage.
Why You’ll Love This Recipe
- Five-Ingredient Magic: I love that this only needs Rice Krispies, marshmallows, butter, green coloring, and vanilla—no fancy shopping required.
- Buttery Sweetness: The melted butter and marshmallows coat every crispy piece, with vanilla adding just the right depth.
- Party-Ready Fun: Honestly, these are my go-to for Halloween or spooky movie nights—kids and adults both grab seconds.
- Budget-Friendly Batch: One box of cereal and a bag of marshmallows makes a whole tray, so I’m not breaking the bank for a crowd.
Step-by-Step Instructions for Frankenstein Rice Krispie Treats
Here’s my method for turning classic treats into a spooky masterpiece that’ll steal the show.
Step 1: Create the Green Marshmallow Base
In a large pot, melt the 3 tbsp Unsalted Butter over low heat until just bubbling. Add the 10 oz Marshmallows and stir constantly until completely smooth—this should take about 5-7 minutes.
Remove from heat and immediately stir in the 1 tsp Green Food Coloring, 0.5 tsp Vanilla Extract, and 0.25 tsp Salt. The color will deepen as it sits. Here’s the thing—work quickly before the mixture starts to set.
Fold in all 6 cups Rice Krispies Cereal until evenly coated. The cereal should glisten with that vibrant green hue. Press the mixture into a greased 9×13-inch pan using buttered hands or a spatula, creating an even layer.
Step 2: Shape the Frankenstein Head
Once the mixture is cool enough to handle (about 10 minutes), use your hands to shape it into a rectangular head on a parchment-lined surface. I like to make it slightly rounded at the top for that classic Frankenstein look.
Press gently but firmly—you want it to hold its shape but not become too dense. If the mixture sticks to your hands, dampen them slightly with water. The head should be about 1-inch thick for the right proportion.
Let it cool completely at room temperature for 20-30 minutes until firm to the touch. This ensures it won’t crumble when you add the decorations.
Step 3: Add the Facial Features
Melt the 0.5 cup White Chocolate Chips in the microwave in 20-second intervals, stirring between each, until smooth. Use this as “glue” for the decorations. I know it seems weird, but white chocolate sets faster than melted marshmallow and holds decorations better.
Arrange the 8 pieces Candy Eyes near the top of the head for that wild Frankenstein stare. Use the 0.25 cup Mini Chocolate Chips to create a jagged mouth and eyebrows—press them in slightly so they adhere as the chocolate sets.
For the scars, pipe thin lines of the 1 tbsp Black Icing Gel across the forehead and cheek. Let the chocolate set for 15 minutes before moving to the next step.
Step 4: Attach the Bolt Neck Accessories
Break the 4 pieces Pretzel Sticks in half so you have 8 short pieces. These will serve as the connectors for the bolts. Dip one end of each pretzel piece into the remaining melted white chocolate and press two pieces vertically into each side of the head, about 1 inch apart.
Now, take small clusters of the 0.5 cup White Chocolate Chips (you may need to melt a few more) and shape them into bolt heads. Press these onto the exposed ends of the pretzel sticks. The white chocolate will harden in about 10 minutes, securing everything in place.
Real talk: if a bolt feels wobbly, prop it up with a small piece of parchment paper until the chocolate sets completely. Patience here prevents a Frankenstein meltdown.
Pro Tips For Making Frankenstein Rice Krispie Treats
- Melt Butter Low: Keep the heat on medium-low when melting the butter—high heat will burn the marshmallows before they even soften, and you’ll end up with bitter, sad Frankenstein treats.
- Color the Marshmallows: Add the green food coloring to the marshmallows while they’re melting, not after. I learned this the hard way—stirring it into the finished mixture leaves streaks instead of that even monster green.
- Press While Warm: Spread and press the mixture into the pan right after mixing, while it’s still pliable. Wait too long and it’ll start to set, making it impossible to shape without crushing the Rice Krispies.
- Use Vanilla Last: Stir in the vanilla extract after removing the marshmallow mixture from the heat—adding it earlier can make the vanilla taste harsh instead of adding that warm, sweet depth.
Make-Ahead Tips for This frankenstein rice krispie treats
Prep Ahead Strategy
Mix your 6 cups Rice Krispies Cereal with melted marshmallow base 1 day ahead and store in an airtight container. The next day, simply shape and decorate. This works because the cereal stays crisp for 24 hours when sealed properly. 💡
Decorating Shortcut
Pre-melt your 0.5 cup White Chocolate Chips and store in a squeeze bottle at room temperature. When ready to decorate, reheat in the microwave for 10-15 seconds to restore the perfect consistency. This saves 5-10 minutes of prep time.
Color Boost Tip
For deeper green color, add your 1 tsp Green Food Coloring to the marshmallows while they’re still hot. The color develops more intensely during this phase. I use Wilton gel paste for the most vibrant results.
Storage Solutions
Keep undecorated treats in a single layer in an airtight container for up to 3 days. Add decorations just before serving to prevent melting or shifting. This maintains both texture and appearance. ❄️
Bolt Assembly Hack
Pre-assemble your bolts by attaching pretzel sticks to white chocolate bolt heads on parchment paper. Once set, simply press these complete units into your Frankenstein head. This approach prevents chocolate from dripping during assembly.
Last-Minute Touch
Add facial details with black icing gel right before serving. This prevents smudging during storage or transport. The gel sets quickly, so your monster will look fresh for the party.
Nutrition Facts
Frequently Asked Questions
Can I use regular marshmallows instead of mini?
Use 40 regular marshmallows to equal 10 oz. They melt the same way. Just cut them in half for faster melting if needed.
How do I make the green color more vibrant?
Use gel food coloring instead of liquid for a deeper hue. Add it while marshmallows are still hot for best results. Wilton brand works great.
Can I make these gluten-free?
Yes! Swap regular Rice Krispies for gluten-free crispy rice cereal. Check that all other ingredients (like chocolate) are certified gluten-free.
What if my decorations won’t stick?
Melted white chocolate works best as “glue” for decorations. Let it set for 10-15 minutes before moving treats. Press decorations in firmly.

- Fresh Turmeric Rice Recipe: Golden Grains with Earthy Warmth - October 7, 2026
- French Onion Brown Rice Recipe: Umami-Rich Grains With Caramelized Depth - October 7, 2026
- Rice Noodle Soup Recipe: Aromatic Broth with Silky Strands - October 7, 2026