
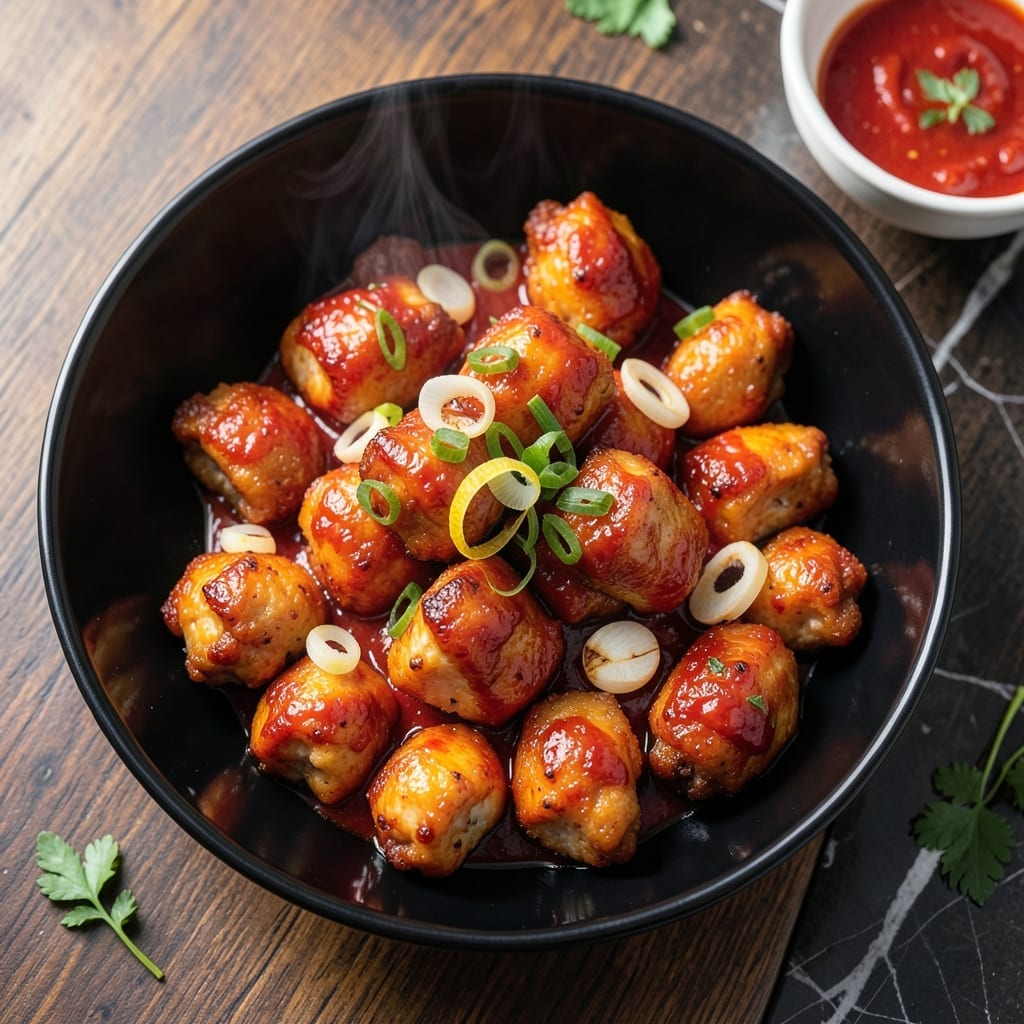
I’ve burned through more takeout menus than I care to admit trying to find the perfect firecracker chicken. This version nails that sweet-spicy kick without the greasy aftermath.
The secret is a double-fry method that locks in juicy meat while creating a shatteringly crispy crust. Tossed in a glossy chili-garlic sauce, it delivers the bold flavors you crave from your favorite Indo-Chinese spot.
No fancy equipment here—just a wok, some patience, and a tolerance for heat. The sauce comes together in minutes while the chicken fries, so you’re not stuck babysitting the stove.
Serve it over steamed rice with extra green onions. Fair warning: you’ll want seconds.
Ingredients for Firecracker Chicken
Simple ingredients for that bold Indo-Chinese takeout flavor you crave at home.
| Ingredient | Amount | Notes |
|---|---|---|
| Boneless Chicken Thighs 🍗 | 1 ½ lb | Cut into bite-sized pieces |
| Cornstarch 🌾 | ½ cup | For crispy coating |
| All-Purpose Flour 🌾 | ½ cup | Lightly coats the chicken |
| Salt 🧂 | 1 tsp | Kosher or sea salt |
| Black Pepper 🌶️ | ½ tsp | Freshly ground preferred |
| Garlic Cloves 🧄 | 4 cloves | Minced for sauce |
| Fresh Ginger 🌿 | 1 tbsp | Grated or minced |
| Soy Sauce 🫒 | 3 tbsp | Low-sodium if preferred |
| Rice Vinegar 💧 | 2 tbsp | Balances the sweetness |
| Chili Garlic Sauce 🌶️ | 3 tbsp | Adjust for heat preference |
| Honey 🍯 | 2 tbsp | For sweet-spicy balance |
| Brown Sugar 🍚 | 2 tbsp | Packed lightly |
| Vegetable Oil 🫒 | 4 cups | For deep frying |
| Green Onions 🧅 | 4 whole | Thinly sliced for garnish |
| Dried Red Chili Peppers 🌶️ | 4 whole | Optional for extra heat |
The chicken is the star here. Thighs stay juicier than breasts during double-frying—look for skinless, boneless at Whole Foods or your regular market. Fresh ginger and garlic are non-negotiable (the jarred stuff doesn’t cut it). For the chili garlic sauce, Lee Kum Kee or Koon Chun brands are my go-to at any Asian grocery store.
No chili garlic sauce? Sriracha plus minced garlic gets you 80% there. Swap honey for agave or maple syrup if needed. Out of rice vinegar? Apple cider vinegar works in a pinch. The cornstarch is key for that shatteringly crisp crust—don’t skip it. And if you’re avoiding gluten, swap the soy sauce for tamari.
This tastes best fresh, but leftovers keep 3-4 days in the fridge. Reheat in a wok or skillet to crisp up the chicken. The sauce thickens as it cools—thin with a splash of water if needed. Always garnish with fresh green onions (worth the extra minute).
Why You’ll Love This Recipe
- Minimal Effort: I toss the chicken in cornstarch and flour, and that’s half the work done—no fancy prep here.
- Crave-Worthy Crunch: That double coating of cornstarch and flour gives it a crispy bite that’s honestly hard to resist.
- Feeds a Crowd: Boneless thighs stretch farther than breast meat, so it’s my go-to for filling up hungry friends.
- Budget Hero: Chicken thighs are cheap, and a little cornstarch goes a long way—this dish never breaks the bank.
Step-by-Step Instructions for Firecracker Chicken
Here’s the method I use for crispy, saucy chicken that’s better than takeout every time.
Step 1: Coat the Chicken for Maximum Crispiness
Cut the 1.5 lb Boneless Chicken Thighs into bite-sized pieces and pat them dry with paper towels. This step is crucial—wet chicken won’t crisp up properly. In a bowl, whisk together the 0.5 cup Cornstarch, 0.5 cup All-Purpose Flour, 1 tsp Salt, and 0.5 tsp Black Pepper until evenly combined.
Dredge each piece of chicken in the starch mixture, pressing gently to adhere. Shake off any excess—you want a thin, even coating that will fry up light and crispy. Set the coated pieces on a plate and let them rest for 5 minutes while you heat the oil.
Step 2: Deep-Fry to Golden Perfection
In a large, heavy pot or Dutch oven, heat the 4 cups Vegetable Oil to 350°F. Use a deep-fry thermometer to monitor the temperature—if the oil isn’t hot enough, the chicken will absorb too much oil and turn greasy instead of crispy.
Working in batches to avoid overcrowding, carefully lower the chicken into the hot oil. Fry for 4-5 minutes, turning occasionally, until the pieces are golden brown and cooked through. Drain on a wire rack or paper towels. The chicken should be crispy on the outside and juicy inside.
Step 3: Make the Sweet and Spicy Sauce
In a separate saucepan, combine the 3 tbsp Soy Sauce, 2 tbsp Rice Vinegar, 3 tbsp Chili Garlic Sauce, 2 tbsp Honey, and 2 tbsp Brown Sugar. Stir well and bring to a gentle simmer over medium heat.
Add the minced 4 cloves Garlic Cloves and grated 1 tbsp Fresh Ginger, then simmer for 2-3 minutes until the sauce thickens slightly and becomes glossy. If you like extra heat, toss in the 4 whole Dried Red Chili Peppers now. Taste and adjust the sweetness or spice level as needed.
Step 4: Toss and Garnish for Serving
Add the crispy chicken to the saucepan and toss gently to coat every piece evenly in the sticky, spicy-sweet sauce. Cook for an additional 1-2 minutes to let the flavors meld together and the chicken absorb some of that incredible sauce.
Transfer to a serving platter and garnish with the thinly sliced 4 whole Green Onions. Serve immediately while the chicken is still crispy and the sauce is hot and glossy. This dish is best enjoyed fresh, so gather everyone around to dig in right away.
Pro Tips For Making Firecracker Chicken
- Pat Dry First: I learned this the hard way—wet chicken steams instead of crisping. Press each thigh between paper towels until bone-dry before dredging.
- Double Dredge: After the first flour coating, dip again in cornstarch for that extra-crispy shell that holds up to the sauce.
- Skip the Overcrowding: Resist the urge to cram the pan. Cook in batches so each piece fries, not steams—about 4 thighs at a time in a 12-inch skillet.
- Rest Before Sauce: Give the fried chicken a 2-minute rest on a rack before tossing in sauce. It keeps the coating from turning soggy.
Troubleshooting firecracker chicken
Oil Temperature Issues
If your chicken turns out greasy instead of crispy, your oil likely wasn’t hot enough. Use a thermometer to maintain 350°F—I swear by my Taylor Classic for accuracy. Overcrowding the pot also drops the temperature, so fry in small batches. 🌡️
Sauce Too Thin
For a thicker sauce, simmer it for an extra 2-3 minutes before adding the chicken. A cornstarch slurry (1 tsp cornstarch mixed with 1 tbsp water) works wonders too. Stir constantly to prevent burning.
Chicken Not Crispy
The double-fry method is key, but if you’re short on time, ensure each piece gets 4-5 minutes in hot oil. Pat the chicken very dry before coating—moisture is the enemy of crispiness. I use paper towels for this step.
Sauce Overpowering
If the sauce tastes too strong, balance it with a splash of rice vinegar or honey. Taste as you go—this dish should be bold but not overwhelming. Adjust in ½ tsp increments to avoid overshooting.
Burnt Garlic
Garlic burns easily in hot sauce. Add it at the end of the sauce simmer (last 1-2 minutes) to preserve its flavor. Keep the heat at medium and stir frequently. Burnt garlic turns bitter and ruins the dish. 🔥
Soggy Leftovers
To revive leftovers, spread them on a baking sheet at 400°F for 5-7 minutes. This crisps the chicken without drying it out. Microwaving works in a pinch, but use 30-second bursts and stir between each.
Nutrition Facts
Frequently Asked Questions
Can I use chicken breast instead of thighs?
You can, but thighs stay juicier during frying. If using breasts, reduce frying time by 1-2 minutes to prevent dryness. Brining the breast pieces for 30 minutes in saltwater first helps retain moisture.
How do I make it less spicy?
Reduce the chili garlic sauce to 1 tablespoon and omit the dried chilies. Add an extra 1 tablespoon honey for balance. Taste the sauce before adding chicken and adjust as needed.
Can I bake instead of frying?
Yes! Toss coated chicken with 2 tablespoons oil and bake at 425°F for 20-25 minutes, flipping halfway. It won’t be as crispy but still delicious. Finish under the broiler for 1-2 minutes for extra crunch.
How long will leftovers keep?
Store in an airtight container in the fridge for up to 3-4 days. Reheat in a skillet over medium heat for 3-4 minutes to maintain crispiness. Avoid microwaving if possible.

- Jollof Rice Sauce Recipe: West African Tomato and Spice Infusion - September 25, 2026
- Japanese Rice Soup Recipe: Umami-Rich Comfort in a Bowl - September 25, 2026
- Homemade Cream Of Rice Recipe: Silk-Smooth Breakfast in Minutes - September 25, 2026