
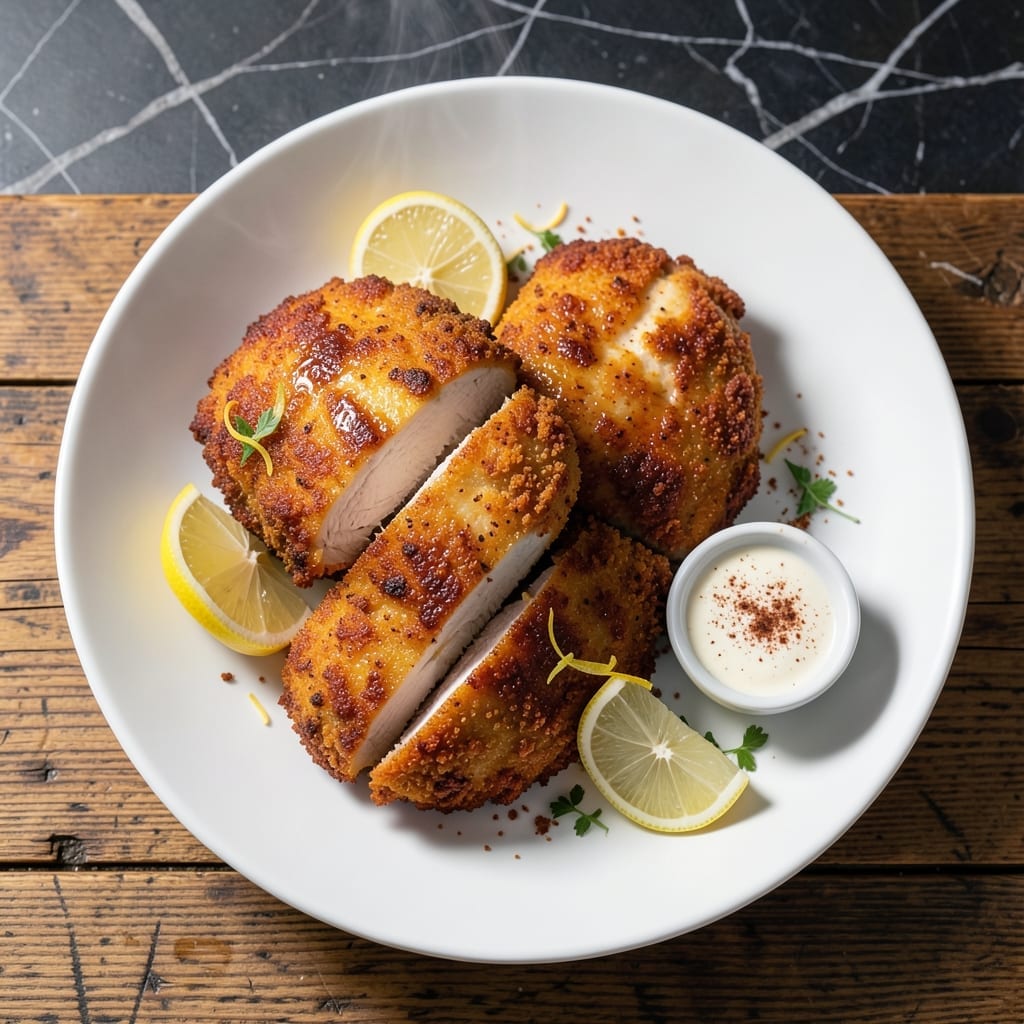
This recipe delivers the crispy chicken cutlets that made Harvey’s famous, with a signature spice blend that’s impossible to resist.
I’ve perfected the technique for achieving that golden, crunchy coating every time. The secret lies in a precise marinating process followed by a double-dipping breading method.
What you’ll get is tender chicken inside with a shatteringly crispy exterior that stays crunchy even after resting. The spice mix adds just the right amount of zing without overpowering.
Serve these cutlets hot with your favorite dipping sauce for a meal that brings the Harvey’s experience to your kitchen. The results speak for themselves.
Ingredients for Harveys Chicken
Pantry staples plus a quick stop at the butcher counter. Nothing exotic, just flavor-packed essentials.
| Ingredient | Amount | Notes |
|---|---|---|
| Chicken Breast Cutlets 🍗 | 1 ½ lb | Boneless, skinless, pounded to 1/4-inch thickness |
| Buttermilk 🥛 | 1 cup | For marinating chicken |
| All-Purpose Flour 🌾 | 1 cup | For first breading layer |
| Large Eggs 🥚 | 2 whole | Beaten for egg wash |
| Panko Breadcrumbs 🍞 | 2 cups | For crispy outer coating |
| Paprika 🌶️ | 1 tbsp | Sweet or smoked variety |
| Garlic Powder 🧄 | 1 tbsp | For signature spice blend |
| Onion Powder 🧅 | 1 tbsp | Balances the spice mix |
| Salt 🧂 | 1 ½ tsp | Diamond Crystal kosher preferred |
| Black Pepper 🌶️ | 1 tsp | Freshly ground for best flavor |
| Cayenne Pepper 🔥 | ¼ tsp | Adjust to heat preference |
| Vegetable Oil 🫒 | 2 cups | For frying, high smoke point |
| Hot Sauce 🌶️ | 1 tbsp | For buttermilk marinade |
The chicken cutlets are everything here. Butcher-cut or DIY from chicken breasts—pound them thin and even for consistent cooking. I grab mine from Whole Foods or Costco (their organic breasts are perfect for this). The buttermilk is non-negotiable for that signature tenderness, and full-fat works best. If you’re in a pinch, regular milk with a splash of vinegar works, but the real stuff is worth it.
No buttermilk? Plain yogurt thinned with milk gets you close. Panko is key for the crunch, but regular breadcrumbs work if that’s all you’ve got. The spice blend is flexible—swap smoked paprika for regular if you want more depth, or add a pinch of dried thyme for complexity. The cayenne can be skipped if you’re heat-averse, but the garlic and onion powders are doing heavy lifting, so don’t omit those.
Marinate the chicken for at least 4 hours (overnight is ideal). Once breaded, fry immediately or rest on a rack for 15 minutes to set the coating. Leftover cutlets reheat well in a 400°F oven for 10-12 minutes—keeps the crunch intact.
Why You’ll Love This Recipe
- 30-Minute Magic: I can have crispy, golden cutlets on the table faster than takeout arrives.
- That Panko Crunch: The buttermilk soak makes the chicken so tender it practically melts inside that shatter-crisp panko shell.
- Freezer to Table: I double the batch, freeze half, and reheat in the oven for a quick dinner later—no soggy leftovers.
- Budget Stretcher: Chicken breast cutlets and pantry staples mean I’m feeding four for less than the cost of one delivery meal.
Step-by-Step Instructions for Crispy Coated Chicken Cutlets
Here’s the method that guarantees a golden, crunchy exterior with juicy, tender meat inside.
Step 1: Marinate the Chicken Breast Cutlets
In a large bowl, whisk together the 1 cup Buttermilk and 1 tbsp Hot Sauce. Add all 1.5 lb Chicken Breast Cutlets to the buttermilk mixture, ensuring each piece is fully submerged. Cover and refrigerate for at least 1 hour, or up to 4 hours for maximum tenderness.
This buttermilk marinade not only tenderizes the chicken but also helps the breading adhere better. The hot sauce adds a subtle tang and a hint of heat that balances perfectly with the spices. Don’t skip this step—it’s what makes the chicken incredibly juicy.
Step 2: Prepare the Breading Station
Set up three shallow dishes. In the first, add the 1 cup All-Purpose Flour. In the second, beat the 2 whole Large Eggs until smooth. In the third, combine the 2 cups Panko Breadcrumbs, 1 tbsp Paprika, 1 tbsp Garlic Powder, 1 tbsp Onion Powder, 1.5 tsp Salt, 1 tsp Black Pepper, and 0.25 tsp Cayenne Pepper. Stir to mix evenly.
The key to crispy chicken is the panko breadcrumbs—they create a lighter, crunchier coating than regular breadcrumbs. The spice blend in the breading ensures every bite is packed with flavor. Make sure each dish is wide enough to accommodate the cutlets without overcrowding.
Step 3: Bread the Chicken Cutlets
Remove the chicken from the buttermilk marinade, letting any excess drip off. Dredge each piece in the flour, shaking off any excess, then dip it into the beaten eggs, allowing any excess to drip off. Finally, press each cutlet firmly into the panko mixture, ensuring it’s fully coated on both sides. Place the breaded cutlets on a wire rack set over a baking sheet.
Pressing the chicken into the panko mixture helps the coating adhere better and creates those beautiful, crispy ridges. Let the breaded cutlets rest for 10 minutes before frying—this helps the coating set and prevents it from falling off during cooking.
Step 4: Fry to Golden Perfection
In a large, heavy-bottomed skillet, heat the 2 cups Vegetable Oil over medium-high heat until it reaches 350°F. Use a deep-fry thermometer to monitor the temperature—this is crucial for even cooking and a crispy exterior.
Carefully place 2-3 breaded cutlets in the hot oil, being careful not to overcrowd the pan. Fry for 3-4 minutes per side until the coating is deep golden brown and crispy. Transfer the fried cutlets to a wire rack or paper towel-lined plate to drain any excess oil. Repeat with the remaining cutlets, allowing the oil to return to 350°F between batches.
Step 5: Rest and Serve
Let the fried cutlets rest for 5 minutes before serving. This allows the juices to redistribute, ensuring the chicken stays moist and tender. Serve immediately while the coating is still crispy.
The cutlets should have a beautiful golden-brown crust that cracks slightly when bitten into, revealing juicy, flavorful chicken underneath. Pair with your favorite dipping sauce or serve alongside a fresh salad for a complete meal.
Pro Tips For Making Harveys Chicken
- Pound the Cutlets: Use a meat mallet or rolling pin to even out the chicken breasts to ½-inch thickness—I learned this the hard way after burning the thin edges while the thick parts stayed raw.
- Buttermilk Soak Overnight: Give the cutlets a full 12-hour soak in buttermilk if you can; it keeps them juicy and the coating sticks better than a quick dip.
- Skip Cold Chicken: Let the buttermilk-soaked cutlets sit at room temperature for 15 minutes before breading—cold chicken makes the oil temp drop and turns the crust greasy.
- Double Dredge: Dip in flour, then egg, then panko, and repeat once more; the extra layer makes that crunch last, even if it sounds like overkill.
Flavor Customization for harveys chicken
Spice Level Adjustments
For milder flavor, reduce the cayenne pepper to ⅛ tsp or omit entirely. The garlic and onion powders still provide plenty of taste without heat. I often make this version for my kids.
Extra Crispy Version
Add ½ cup crushed cornflakes to the panko mixture for extra crunch. The cornflakes create an even crispier texture that stays golden longer. Press the coating firmly onto each cutlet.
Herb-Infused Twist
Mix 1 tbsp dried thyme or rosemary into the panko blend. This adds an aromatic depth that pairs beautifully with the existing spices. Fresh herbs work too—just use 2 tbsp finely chopped. 🌿
Sweet Heat Variation
Add 1 tbsp brown sugar to the spice mix for a sweet-spicy balance. The sugar caramelizes slightly during frying, creating a subtle glaze. This works especially well with the cayenne for a sweet heat kick.
Citrus Zing
Stir 1 tsp lemon zest into the panko mixture. The citrus brightens the spices and adds a fresh note. I love this version in summer—it feels lighter and more vibrant.
You can also add 1 tsp orange zest for a different citrus profile. 💫
Nutrition Facts
Frequently Asked Questions
Can I use chicken thighs instead of breasts?
Yes, but pound them to ¼-inch thickness for even cooking. Thighs stay juicier but may need an extra 1-2 minutes frying.
What oil works best for frying?
Any high-smoke-point oil like vegetable, canola, or peanut oil works. Avoid olive oil as it burns at 350°F.
How do I keep the coating crispy after frying?
Rest on a wire rack, not paper towels. Keep warm in a 200°F oven up to 30 minutes before serving.
Can I bake instead of fry?
Bake at 400°F for 15-20 minutes, flipping halfway. Spray with oil first for extra crispiness.

- Jollof Rice Sauce Recipe: West African Tomato and Spice Infusion - September 25, 2026
- Japanese Rice Soup Recipe: Umami-Rich Comfort in a Bowl - September 25, 2026
- Homemade Cream Of Rice Recipe: Silk-Smooth Breakfast in Minutes - September 25, 2026