
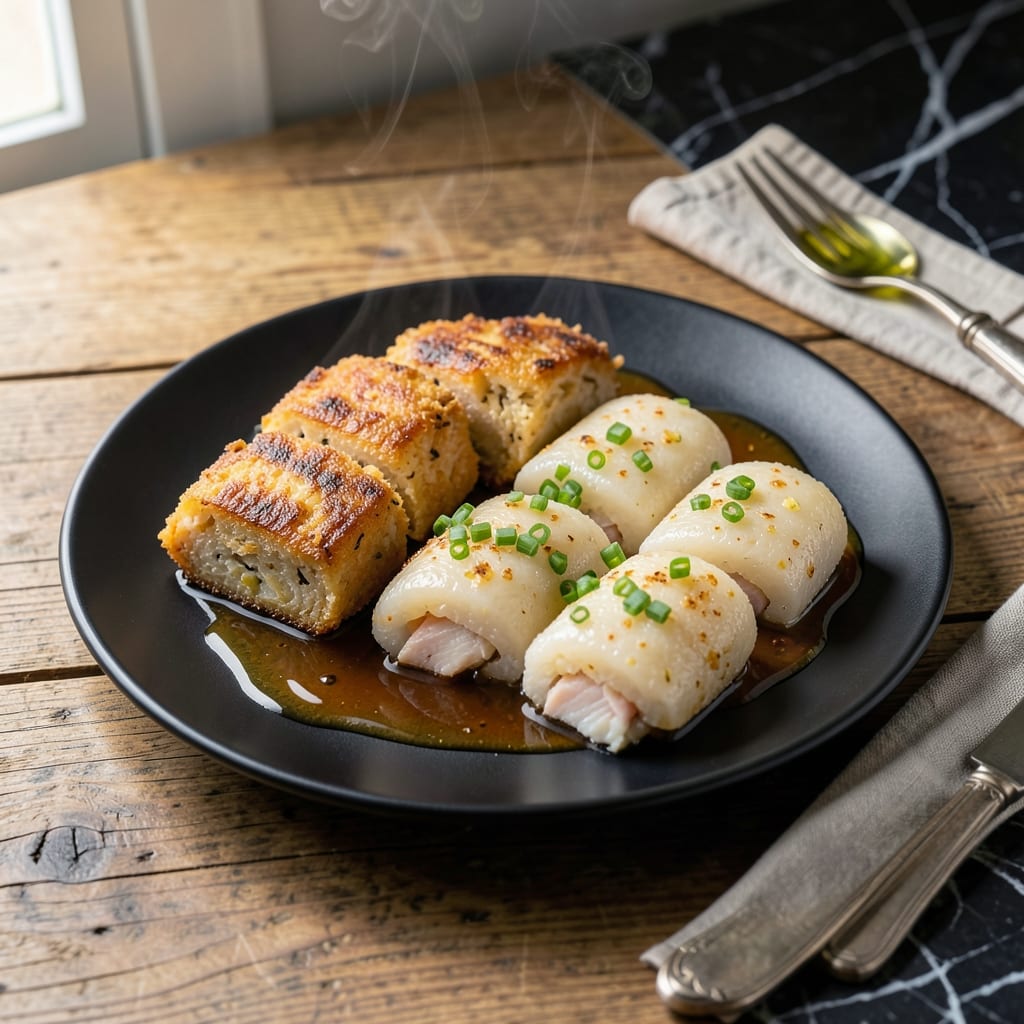
This dish delivers crispy fish cake edges and chewy rice cake centers in every bite. The contrast between textures makes each mouthful uniquely satisfying.
I’ve refined the frying time to ensure the fish cakes turn golden while the rice cakes stay soft. The secret is maintaining medium-high heat and not overcrowding the pan.
Ingredients for Fish Cake and Rice Cake
White fish, rice cakes, and pantry staples create this textured, satisfying dish with minimal effort.
| Ingredient | Amount | Notes |
|---|---|---|
| White Fish Fillets 🐟 | 1 lb | Boneless, skinless, finely chopped |
| Korean Rice Cakes 🍙 | 14 oz | Cylindrical tteok preferred |
| All-Purpose Flour 🌾 | ½ cup | For binding fish mixture |
| Egg 🥚 | 1 whole | Lightly beaten for cohesion |
| Green Onions 🧅 | 4 whole | Thinly sliced, green parts only |
| Garlic Cloves 🧄 | 3 cloves | Minced for flavor base |
| Soy Sauce 🫒 | 2 tbsp | Low-sodium preferred |
| Sesame Oil 🫒 | 1 tbsp | Toasted for aroma |
| Vegetable Oil 🫒 | ½ cup | For frying fish cakes |
| Salt 🧂 | ½ tsp | Kosher or sea salt |
| Black Pepper 🌶️ | ¼ tsp | Freshly ground preferred |
| Sugar 🍚 | 1 tsp | Granulated, balances savory |
| Red Pepper Flakes 🔥 | ½ tsp | Optional for heat |
| Sesame Seeds 🌰 | 1 tbsp | Toasted, for garnish |
The fish quality is critical here. Wild-caught cod or pollock work best—look for firm, translucent fillets at Whole Foods or your local fishmonger. Avoid pre-ground fish, as the texture suffers. For rice cakes, Korean markets carry the best cylindrical tteok, but H Mart or Asian grocery stores work too (just avoid the sweet dessert varieties).
No white fish? Shrimp or scallops make excellent substitutes—chop them finely. Out of rice cakes? Thick-cut squid or octopus can mimic the chew (available at specialty seafood counters). For gluten-free, swap the flour for cornstarch at half the amount. The soy sauce can be replaced with tamari for a gluten-free option.
Fish cakes keep in the fridge for 2 days but are best eaten fresh. Rice cakes soften over time, so soak them in cold water for 10 minutes if making ahead. Leftovers reheat well in a dry pan—3-4 minutes per side to recrispen.
Why You’ll Love This Recipe
- One-Bowl Mix: I just dump the fish, flour, egg, and green onions in one bowl, mix, and shape—no extra dishes to wash.
- Crispy Outside, Soft Inside: The fish cakes get this golden crust while the rice cakes stay chewy, and the green onions add a fresh pop.
- Weeknight Hero: Honestly, it’s my go-to when I need something fast but still want that restaurant-quality bite.
- Stretches Far: A pound of fish and a pack of rice cakes feed my whole family, with leftovers that reheat like a dream.
Step-by-Step Instructions for Fish Cake and Rice Cake
Follow this method precisely to achieve the promised crispy edges and chewy centers every time.
Step 1: Prepare the Fish Cake Mixture
Finely chop the 1 lb white fish fillets until they resemble ground meat. I recommend using a chef’s knife and rocking it through the fillets for even texture. The smaller the pieces, the better they’ll bind together.
In a large bowl, combine the chopped fish with the 0.5 cup all-purpose flour, 1 whole egg, 0.5 tsp salt, 0.25 tsp black pepper, 1 tsp sugar, and 0.5 tsp red pepper flakes. Mix thoroughly until the mixture becomes sticky and cohesive. The egg and flour work together to create the binding that holds the cakes together during frying.
Step 2: Form and Cook the Fish Cakes
Heat 0.5 cup vegetable oil in a large skillet over medium-high heat until shimmering. While the oil heats, shape the fish mixture into small, flat patties about 2 inches in diameter. I find it easiest to use wet hands to prevent sticking.
Carefully place the patties in the hot oil, working in batches to avoid crowding. Cook for 3-4 minutes per side until golden brown and crispy. The edges should develop a deep golden crust while the centers remain tender. Transfer cooked fish cakes to a paper towel-lined plate to drain excess oil.
Step 3: Prepare the Rice Cakes
While the fish cakes cook, soak the 14 oz Korean rice cakes in warm water for 10 minutes to soften if they’re very firm. Drain well. In a separate pan, heat the 1 tbsp sesame oil over medium heat.
Add the drained rice cakes along with the 3 cloves minced garlic cloves, 4 whole thinly sliced green onions, and 2 tbsp soy sauce. Stir-fry for 5-7 minutes until the rice cakes are heated through and slightly chewy. The rice cakes should absorb the sauce and develop a glossy sheen.
Step 4: Combine and Garnish
Arrange the crispy fish cakes on a serving platter alongside the rice cakes. The contrast between the golden-brown fish cakes and the glossy rice cakes creates visual appeal while delivering on the texture promise.
Sprinkle the entire dish with 1 tbsp sesame seeds for added crunch and aroma. The sesame seeds add a nutty flavor that complements both components. Serve immediately while the fish cakes are still crispy and the rice cakes are warm and chewy.
Pro Tips For Making Fish Cake And Rice Cake
- Chill the Fish Mix: After blending the fish with flour and egg, refrigerate the mixture for 20-30 minutes—I learned this the hard way when my first batch fell apart in the pan.
- Soak the Rice Cakes: If using dried Korean rice cakes, soak them in warm water for 15 minutes until soft, or they’ll stay chewy and undercooked in the middle.
- Skip Overmixing: Fold the green onions into the fish cake batter just until combined—overworking it makes the cakes dense and tough.
- Use Cold Oil: Test the oil with a pinch of batter before frying; if it sizzles immediately, it’s ready, but if it burns, lower the heat and wait 2 minutes.
Pro Cooking Tips for This Dish
Perfect Oil Temperature
Use a candy thermometer to monitor your vegetable oil—it should hit 350-375°F before adding fish cakes. I keep a Taylor Classic in my kitchen drawer for this. If oil isn’t hot enough, fish cakes absorb oil and turn greasy instead of crispy. 🌡️
Batch Frying Secret
Never overcrowd your skillet—leave 1 inch between each fish cake. Overcrowding drops oil temperature, causing uneven cooking. I fry in batches of 4-5 cakes in my 12-inch cast iron to maintain consistent heat.
Rice Cake Soaking
For frozen rice cakes, soak in warm water for 15 minutes. Fresh ones need just 5-7 minutes. I test by pressing one—it should yield slightly but not be mushy. Drain thoroughly before stir-frying to prevent steaming.
Pressing Technique
Form fish cakes 1 inch thick for even cooking. I press gently with damp hands to avoid sticking. If mixture feels too loose, chill for 15 minutes before shaping—this helps the flour and egg bind properly.
Crispy Finish
For extra crunch, dust fish cakes with 1 tbsp cornstarch before frying. This creates a delicate crust that stays crispy longer. I learned this trick from my Korean grandmother—it makes all the difference. 💛
Sauce Timing
Add soy sauce to rice cakes only after they’ve cooked for 2 minutes. Early addition makes them soggy. I swirl the pan to coat evenly, letting the sauce reduce slightly for a glossy finish.
Nutrition Facts
Frequently Asked Questions
Can I use frozen fish fillets?
Yes, thaw them completely in the fridge overnight. Pat dry before chopping to prevent excess moisture in your mixture. Frozen fillets work just as well as fresh when handled properly.
Why soak the rice cakes first?
Soaking softens hard rice cakes for even cooking. Skip this for pre-softened varieties. 10 minutes in warm water is ideal for most types. Drain well to avoid a watery stir-fry.
How do I keep fish cakes from breaking apart?
Chill the mixture for 15 minutes before shaping. Use wet hands to form patties, and avoid flipping too soon—they need 3-4 minutes per side to set properly.
Can I make this gluten-free?
Swap all-purpose flour for cornstarch at half the amount. Use tamari instead of soy sauce. The texture remains crispy with these simple substitutions.

- Jollof Rice Sauce Recipe: West African Tomato and Spice Infusion - September 25, 2026
- Japanese Rice Soup Recipe: Umami-Rich Comfort in a Bowl - September 25, 2026
- Homemade Cream Of Rice Recipe: Silk-Smooth Breakfast in Minutes - September 25, 2026