
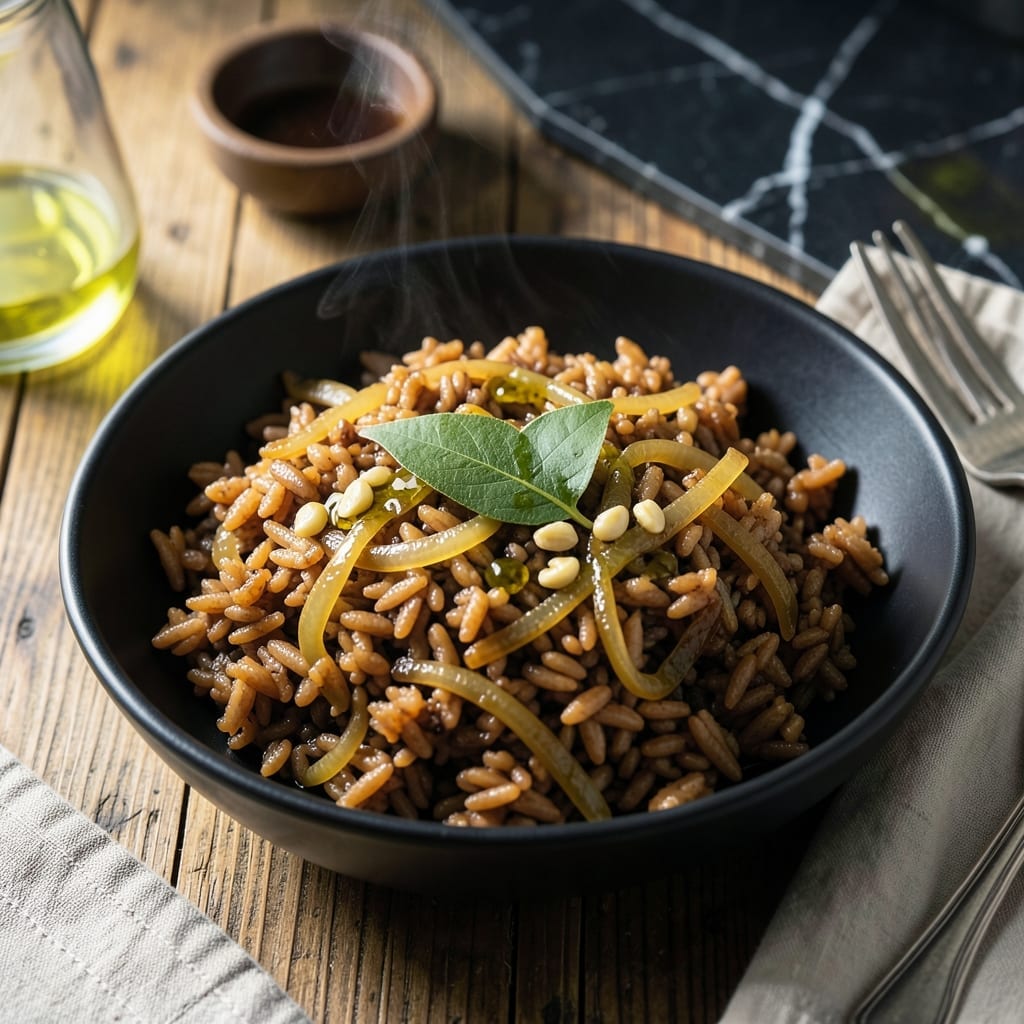
This recipe transforms ordinary brown rice into a dish with nutty depth and complex flavor that stands on its own. The technique is simple yet precise, ensuring each grain absorbs maximum taste without turning mushy.
By toasting the rice before cooking and using a specific liquid ratio, you’ll achieve perfectly tender grains with a subtle chew. The method works consistently, whether you’re making a side dish or a base for hearty mains.
What emerges is brown rice that’s far from bland—rich, aromatic, and satisfying enough to serve as a complete vegan meal. The process takes about 45 minutes, with most of that time being hands-off.
This approach works for meal prep too, as the rice holds its texture and flavor for days. The results speak for themselves every single time.
Ingredients for Flavorful Brown Rice
Simple pantry staples create brown rice with rich, aromatic depth in every bite.
| Ingredient | Amount | Notes |
|---|---|---|
| Brown Rice 🌾 | 2 cups | Long-grain preferred for texture |
| Olive Oil 🫒 | 2 tbsp | Extra-virgin for richness |
| Garlic Cloves 🧄 | 4 cloves | Minced for even flavor distribution |
| Yellow Onion 🧅 | 1 whole | Finely diced, about 1 cup |
| Vegetable Broth 🥕 | 3 ½ cups | Low-sodium for better control |
| Bay Leaf 🌿 | 1 whole | Dried, for infusion |
| Dried Thyme 🍃 | ½ tsp | Crushed to release oils |
| Salt 🧂 | 1 tsp | Diamond Crystal kosher salt |
| Black Pepper 🌶️ | ½ tsp | Freshly ground for best flavor |
| Lemon Juice 🍋 | 1 tbsp | Freshly squeezed for brightness |
| Fresh Parsley 🌿 | ¼ cup | Chopped, for garnish |
| Toasted Almonds 🌰 | ¼ cup | Sliced, for crunch |
The rice quality matters here—long-grain brown rice gives the best texture. I source mine from Whole Foods or Trader Joe’s (their organic has great consistency). The broth should be low-sodium so you control the seasoning. For the almonds, raw is fine if you toast them yourself—just watch they don’t burn. Fresh herbs make a difference, but dried parsley works in a pinch.
No vegetable broth? Water with a bouillon cube gets you close. Short on time? Pre-minced garlic from a jar saves minutes (use 1 tbsp). Want more depth? Add 1 tsp smoked paprika with the aromatics. For nut-free, swap almonds for toasted pumpkin seeds. The lemon juice can be bottled, but fresh adds a brighter note.
Cooked rice keeps 4-5 days in the fridge, freezes for 3 months. Store in airtight containers to preserve moisture. Reheat with a splash of water or broth to revive the texture. The toasting step is non-negotiable—don’t skip it.
Why You’ll Love This Recipe
- One Pot Wonder: I just toss everything in a single pot—rice, broth, garlic, onion—and walk away.
- Garlic-Infused Bites: The garlic and onion sautéed in olive oil make every grain taste rich and aromatic.
- Meal Prep Hero: It keeps beautifully for days, so I make a big batch for lunches all week.
- Pocket-Friendly Staple: Brown rice and veggie broth stretch my grocery budget without sacrificing flavor.
Step-by-Step Instructions for Flavorful Brown Rice
This method ensures perfectly cooked grains with maximum flavor in every bite.
Step 1: Sauté Aromatics for a Flavor Base
Heat the 2 tbsp Olive Oil in a medium saucepan over medium heat. Add the finely diced Yellow Onion and cook for 4-5 minutes until it becomes translucent and begins to soften. This creates a sweet, aromatic foundation for the dish.
Stir in the 4 cloves Garlic Cloves and cook for an additional 30-60 seconds until fragrant. Be careful not to let the garlic brown—it should just release its aroma. The combination of onion and garlic builds depth that infuses into every grain.
Step 2: Toast the Brown Rice for Nutty Depth
Add the 2 cups Brown Rice to the saucepan and stir to coat it in the oil and aromatics. Toast the rice for 2-3 minutes, stirring frequently, until it becomes slightly fragrant and takes on a light golden hue.
This toasting step is crucial—it enhances the natural nuttiness of the brown rice and prevents it from turning mushy. You’ll notice the grains start to look slightly opaque as they absorb the flavors from the pan.
Step 3: Simmer with Broth and Herbs
Pour in the 3.5 cups Vegetable Broth, then add the 1 whole Bay Leaf, 0.5 tsp Dried Thyme, 1 tsp Salt, and 0.5 tsp Black Pepper. Stir well to combine and bring the mixture to a gentle boil.
Once boiling, reduce the heat to low, cover the saucepan, and let it simmer for 40-45 minutes. The rice is done when all the liquid is absorbed and the grains are tender with a slight bite. Resist the urge to stir during cooking—this can break the grains and release excess starch.
Step 4: Rest and Finish with Brightness
Remove the saucepan from heat and let the rice sit, covered, for 10 minutes. This resting period allows the grains to steam and becomes fully tender. Fluff the rice gently with a fork to separate the grains.
Discard the bay leaf, then stir in the 1 tbsp Lemon Juice. This adds a bright, citrusy note that balances the earthy flavors of the rice and herbs. The lemon also enhances the overall freshness of the dish.
Step 5: Garnish and Serve
Transfer the rice to a serving dish and sprinkle with the 0.25 cup Fresh Parsley and 0.25 cup Toasted Almonds. The parsley adds a pop of color and freshness, while the almonds provide a satisfying crunch.
Serve immediately while warm. Each bite should deliver tender, flavorful rice with layers of aromatic depth, finished with a bright, nutty contrast from the garnishes.
Pro Tips For Making Flavorful Brown Rice
- Toast the Rice: Heat the brown rice in olive oil for 2-3 minutes before adding liquid—this brings out a nutty depth that plain boiling can’t touch. I learned this the hard way after years of bland rice.
- Sauté Aromatics Slow: Cook the garlic and onion in olive oil until soft and just golden, about 5 minutes. Rushing this step leaves them raw-tasting and the rice flavorless.
- Use Warm Broth: Pour in vegetable broth that’s hot or at least room temperature—cold broth slows cooking and can make the rice gummy. Sounds minor, but it actually changes the outcome.
- Rest Before Serving: Let the rice sit covered for 10 minutes off the heat after cooking—steam redistributes and fluffs the grains. I skip this when I’m lazy, but the dish is noticeably better when I don’t.
Serving Suggestions for This flavorful brown rice
Plated Presentation
Serve this in a wide, shallow bowl to showcase the rice’s texture and garnishes. The toasted almonds and fresh parsley add visual contrast against the golden-brown grains. I love using a white ceramic dish for a clean, elegant look.
Protein Pairings
Top with grilled tofu or chickpeas for a complete vegan meal. The rice’s nutty flavor pairs beautifully with lemon-herb marinated tempeh. For non-vegans, grilled chicken or baked salmon works wonderfully.
Vegetable Sides
Balance the dish with steamed broccoli or roasted Brussels sprouts. The bitterness of greens like sautéed kale contrasts nicely with the rice’s richness. A simple cucumber-tomato salad adds freshness.
Sauce Drizzles
Enhance with a drizzle of tahini sauce or lemon-tahini dressing. A spoonful of pesto adds herby brightness. For heat lovers, sriracha or chili oil brings a spicy kick. 🔥
Fresh Herb Garnish
Beyond parsley, try cilantro or chives for different flavor profiles. A sprinkle of toasted sesame seeds adds an Asian-inspired touch. Fresh herbs should always be added just before serving.
Temperature Tip
Serve warm but not piping hot—around 140°F lets the flavors shine. If reheating, add a splash of vegetable broth to restore moisture. The rice’s texture holds up well for meal prep. ✨
Nutrition Facts
Frequently Asked Questions
Why toast the rice before cooking?
Toasting enhances the natural nuttiness and prevents mushiness. It also helps the grains absorb flavors better during cooking.
Can I use water instead of broth?
Yes, but add 1 bouillon cube to 3.5 cups water for similar flavor depth. The broth adds richness that water alone can’t provide.
How do I know when it’s done?
The rice is ready when all liquid is absorbed and grains are tender with a slight bite, after about 40-45 minutes. Don’t stir while cooking.
Can I make this ahead of time?
It keeps 4-5 days in the fridge or 3 months frozen. Reheat with a splash of broth to restore moisture.

- Gambia Jollof Rice Recipe: West African One-Pot Spice Fusion - October 5, 2026
- Cream of Wild Rice Soup Recipe Minnesota: Northwoods Creaminess With Foraged Grains - October 5, 2026
- Frozen Cauliflower Fried Rice Recipe: Quick Low-Carb Wok Magic - October 5, 2026