
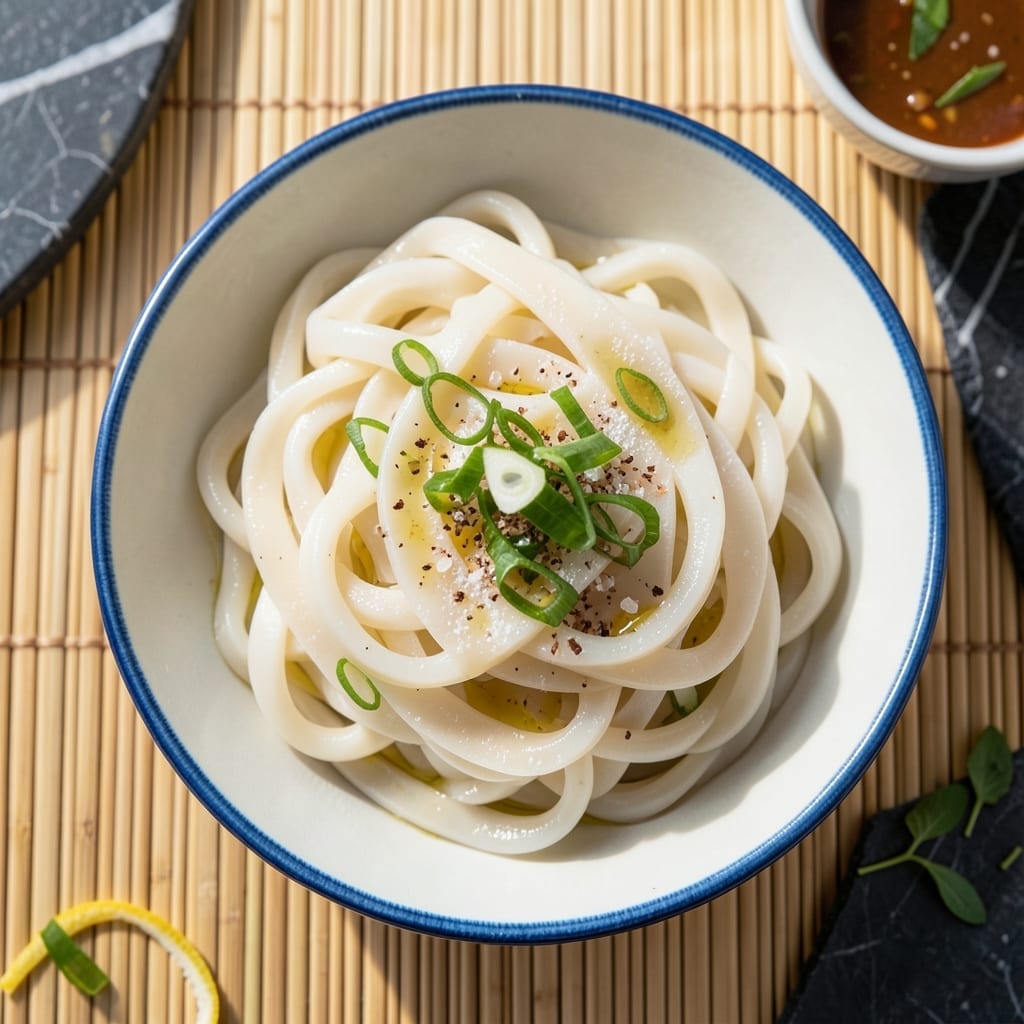
Making fresh rice noodles at home transforms store-bought versions completely. This homemade method delivers chewy, pillowy noodles with authentic texture and flavor.
The process requires just rice flour, water, and a little patience. Proper kneading and resting develop the right elasticity, while rolling and cutting create uniform strands.
These noodles absorb sauces beautifully, making them perfect for stir-fries, soups, or salad bowls. Their fresh quality elevates any Asian-inspired dish.
With basic techniques and simple ingredients, you’ll achieve restaurant-worthy results in your own kitchen.
Ingredients for Fresh Rice Noodles
Just rice flour, water, and a touch of starch create these pillowy noodles.
| Ingredient | Amount | Notes |
|---|---|---|
| Rice Flour 🌾 | 2 cups | Fine white rice flour preferred |
| Water 💧 | ¾ cup | Warm, about 110°F |
| Tapioca Starch 🌾 | ¼ cup | For elasticity and chew |
| Salt 🧂 | ½ tsp | Fine sea salt |
| Neutral Oil 🫒 | 1 tsp | For dough handling |
| Cornstarch 🌾 | 2 tbsp | For dusting work surface |
| Sesame Oil 🫒 | ½ tsp | For finishing, optional |
The rice flour quality is non-negotiable here. Bob’s Red Mill or Erawan brand from Asian markets deliver the finest texture. Avoid glutenous rice flour—it’s a different product entirely and will ruin the texture. Tapioca starch (sometimes labeled cassava starch) is essential for that signature chew. Whole Foods or Amazon carry it if your grocery store doesn’t.
No tapioca starch? Potato starch at the same amount works in a pinch, though the texture will be slightly less elastic. For a gluten-free option, ensure your rice flour is certified (some brands process in facilities with wheat). The water temperature matters—too hot kills the dough, too cold prevents proper activation of the starches.
Fresh noodles keep in an airtight container for 2 days in the fridge. For longer storage, dust with extra cornstarch, seal tightly, and freeze for up to 1 month. Cook from frozen—no need to thaw. Always work with damp towels to prevent drying during prep.
Why You’ll Love This Recipe
- No Fuss Mixing: I just stir rice flour, tapioca starch, water, and a pinch of salt—no fancy techniques or hard-to-find ingredients.
- Pure Rice Flavor: The combo of rice flour and tapioca starch gives that clean, slightly chewy taste that store-bought just can’t match.
- Weeknight Hero: It’s my go-to for quick stir-fries or soups, and honestly, it’s faster than driving to the Asian market for pre-made.
- Budget Stretch: A bag of rice flour and tapioca starch makes pounds of noodles for pennies—leftovers keep beautifully in the fridge.
Step-by-Step Instructions for Fresh Rice Noodles
Master the technique for creating these delicate noodles with the perfect chewy texture at home.
Step 1: Prepare the Dough Base
In a large mixing bowl, combine the 2 cups Rice Flour, 0.25 cup Tapioca Starch, and 0.5 tsp Salt. Whisk until fully incorporated—this ensures even distribution of the starch and salt, which are critical for elasticity and flavor.
Create a well in the center and add the 0.75 cup Water and 1 tsp Neutral Oil. The water should be warm, about 110°F, to help activate the starches. Use a wooden spoon or silicone spatula to stir until a shaggy, thick batter forms.
Step 2: Knead the Dough to Smooth Perfection
Transfer the batter to a work surface dusted with 1 tbsp Cornstarch. The dough will be sticky at first, but resist the urge to add more cornstarch prematurely. Knead for 8-10 minutes until the dough becomes smooth, elastic, and slightly tacky—this development is key for chewy noodles.
If the dough sticks to your hands, dust them lightly with additional Cornstarch, but use sparingly. The dough should feel pliable, not dry or crumbly. Once smooth, shape it into a log, wrap it in plastic, and let it rest for 30 minutes at room temperature to relax the gluten-free structure.
Step 3: Roll and Cut the Noodles
Divide the rested dough into 4 equal portions. Work with one piece at a time, keeping the rest covered to prevent drying. Dust your work surface again with Cornstarch and roll the dough as thin as possible—aim for 1/8-inch thickness or less for authentic rice noodles.
Use a sharp knife or pizza cutter to slice the rolled dough into ¼-inch wide strips. For even strands, fold the dough loosely like a letter before cutting. Toss the cut noodles immediately in the remaining 1 tbsp Cornstarch to prevent sticking while you finish rolling and cutting the rest.
Step 4: Cook the Noodles to Tenderness
Bring a large pot of water to a rolling boil. Add the noodles in batches to avoid overcrowding—they’ll cook quickly, in just 1-2 minutes. Stir gently to separate the strands. The noodles are done when they float to the surface and turn translucent white.
Drain immediately using a fine-mesh sieve or slotted spoon. Rinse briefly under cold water to stop the cooking process and remove excess starch. Toss with 0.5 tsp Sesame Oil if using to prevent sticking and add a subtle aromatic finish.
Serve immediately in your favorite stir-fry or soup, or store in the refrigerator for up to 2 days in an airtight container with a damp paper towel to maintain moisture.
Pro Tips For Making Fresh Rice Noodles
- Steam the Batter: Spread the rice flour and tapioca starch batter thin on a greased tray and steam for 3-4 minutes—this sets the texture before rolling.
- Use Hot Water: Mix the rice flour with hot water first to eliminate lumps and create a smooth, workable batter.
- Avoid Over-Kneading: Once the dough comes together, stop kneading to prevent tough noodles that lose their chewy bite.
- Oil the Surface: Brush the steamed sheets with neutral oil before cutting to keep them from sticking together.
Perfect Pairings for This Recipe
Stir-Fry Partners
Pair these noodles with a Thai basil chicken stir-fry—the fragrant herbs and savory sauce cling beautifully. I love adding bell peppers and snap peas for color and crunch. Toss everything together for 2-3 minutes over high heat to keep the noodles chewy. 🌶️
Soup Stars
Drop fresh noodles into hot pho broth just before serving—they cook in 30 seconds. The pillowy texture absorbs the aromatic star anise and cinnamon notes perfectly. Garnish with bean sprouts and Thai basil for an authentic bowl.
Vietnamese Fresh Rolls
Use blanch-cooled noodles as the base for gỏi cuốn. Fill with shrimp, lettuce, and mint, then wrap in rice paper. The noodles add hearty texture that contrasts with the crisp veggies. Serve with peanut dipping sauce. 🌟
Salad Base
Toss chilled noodles with shredded cabbage, carrots, and cilantro for a refreshing salad. A lime dressing with fish sauce and honey ties everything together. The noodles hold up well to bold flavors.
Dipping Sauces
Serve with sweet chili sauce or a tangy rice vinegar dip with garlic and red pepper flakes. I always make extra sauce—these noodles beg to be dipped. A 1:1 ratio of soy sauce and hoisin works too.
Nutrition Facts
Frequently Asked Questions
Why is tapioca starch used in the dough?
Tapioca starch adds elasticity and that signature chewy texture. Without it, the noodles would be brittle and fall apart during cooking.
Can I make these without a pasta machine?
A rolling pin works perfectly. Roll the dough as thin as possible (1/8-inch) for authentic results. Just dust with cornstarch to prevent sticking.
How do I prevent them from sticking together?
Toss cut noodles in cornstarch immediately. Cook in batches with plenty of boiling water, stirring gently to separate. Rinse after cooking to remove excess starch.
Can I freeze fresh rice noodles?
Yes! Dust with extra cornstarch, seal in an airtight container, and freeze for up to 1 month. Cook straight from frozen—no thawing needed.

- Furikake Rice Seasoning Recipe: Umami-Packed Japanese Blend for Any Meal - October 7, 2026
- Knorr Vegetable Soup Mix Rice Recipe: Savory One-Pot Side Dish - October 7, 2026
- Lebanese Lentil and Rice Soup Recipe: Mujadara-Inspired Warmth in a Bowl - October 7, 2026