
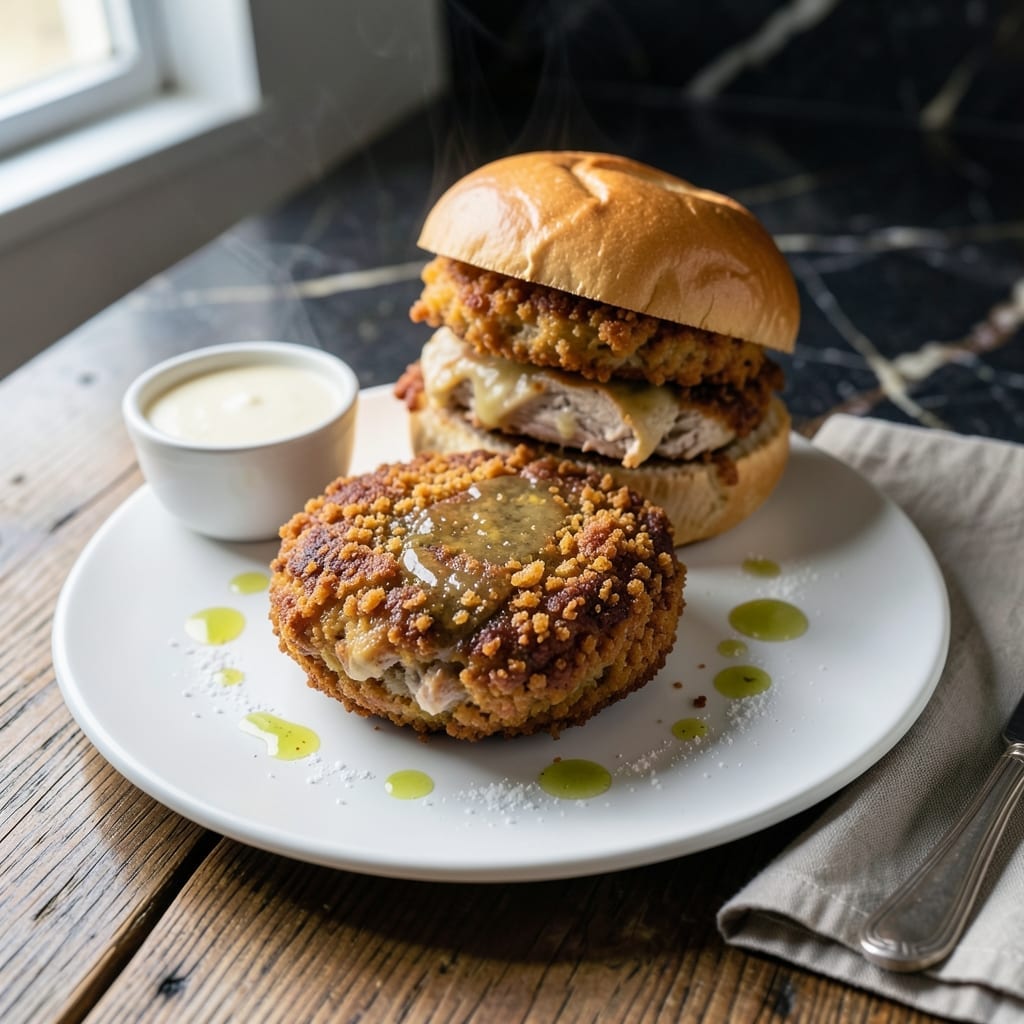
This pan-fried chicken patty delivers extra crispy results without the mess of deep frying. I developed this method after years of testing to achieve that perfect crunch with minimal oil.
The secret is a double-dredge breading process combined with precise heat control. This ensures the coating stays crispy while the chicken cooks through evenly. It’s efficient and foolproof.
You’ll get golden-brown patties with a shatteringly crisp exterior and juicy interior. The technique works with any cut of chicken and requires only basic kitchen tools.
Serve on buns with your favorite toppings or enjoy as a main dish. This approach guarantees professional-quality results every time.
Ingredients for Fried Chicken Patty
These ingredients create that shatteringly crisp, juicy pan-fried perfection you’ve been craving.
| Ingredient | Amount | Notes |
|---|---|---|
| Boneless, Skinless Chicken Breasts 🍗 | 1 ½ lb | Pounded to 1/2-inch thickness |
| All-Purpose Flour 🌾 | 1 ½ cups | Divided for dredging and batter |
| Large Eggs 🥚 | 2 whole | Beaten for breading wash |
| Buttermilk 🥛 | ½ cup | Full-fat for extra crispiness |
| Panko Breadcrumbs 🍞 | 1 ½ cups | For ultra-crispy texture |
| Cornstarch 🌾 | ¼ cup | Enhances crunch in coating |
| Garlic Powder 🧄 | 1 tsp | For seasoning the breading |
| Onion Powder 🧅 | 1 tsp | Adds depth to flavor |
| Paprika 🌶️ | 1 tsp | Sweet or smoked variety |
| Salt 🧂 | 1 ½ tsp | Diamond Crystal kosher preferred |
| Black Pepper 🌶️ | ½ tsp | Freshly ground for best flavor |
| Vegetable Oil 🫒 | ½ cup | High smoke point for frying |
| Cayenne Pepper 🔥 | ¼ tsp | Optional for heat |
The chicken is everything here. Boneless, skinless breasts from Costco or Whole Foods work best—look for uniform thickness so they cook evenly. Pounding them to 1/2-inch ensures even crisping. The buttermilk? Full-fat is non-negotiable (the acid tenderizes the chicken and helps the coating cling). Panko breadcrumbs are the secret to that extra crunch—regular breadcrumbs just won’t cut it.
No buttermilk? Whole milk plus 1 tbsp vinegar or lemon juice per cup gets you there. Swap panko for crushed saltines in a pinch, but the texture won’t be as dramatic. The cornstarch can be arrowroot powder if that’s what you’ve got. For heat, cayenne or red pepper flakes work interchangeably. If you’re avoiding gluten, use gluten-free flour and panko—but the texture changes slightly.
Breading stays crispest if you fry the patties fresh, but you can hold them in a 200°F oven for up to 15 minutes. Leftovers? Store in the fridge for 3-4 days, then reheat in the oven or air fryer to revive the crunch. Don’t microwave—they’ll turn soggy.
Why You’ll Love This Recipe
- 20-Minute Meal: I can go from raw chicken to golden patties faster than the kids can argue over who gets the last one.
- That Crispy Crunch: The panko and buttermilk combo gives this unmistakable crunch with a juicy center that’s honestly hard to beat.
- Feeds the Freezer: I double the batch and freeze half—perfect for those nights when even thinking about cooking feels like too much.
- Budget Stretcher: Boneless chicken breasts on sale plus pantry staples means I’m serving up something special without the takeout price.
Step-by-Step Instructions for Extra Crispy Chicken Patties
Here’s how I achieve that perfect crunch without submerging the chicken in oil.
Step 1: Pound and Season the Chicken Breasts
Place the 1.5 lb boneless, skinless chicken breasts between two sheets of plastic wrap. Using a meat mallet, pound them to an even ½-inch thickness. This ensures even cooking and prevents dry spots in thicker areas.
Season both sides generously with 1.5 tsp salt, 0.5 tsp black pepper, 1 tsp garlic powder, 1 tsp onion powder, and 0.25 tsp cayenne pepper. The seasoning should adhere well to the moist surface. Let them rest for 5 minutes while you prepare the breading station.
Step 2: Prepare the Three-Stage Breading Station
In a shallow dish, whisk together the 1.5 cups all-purpose flour and 0.25 cup cornstarch. The cornstarch is the secret to extra crispiness. In a second dish, beat the 2 whole large eggs with the 0.5 cup buttermilk until smooth.
In a third dish, combine the 1.5 cups panko breadcrumbs with 1 tsp paprika. The paprika adds color and a subtle smoky flavor. I like to spread each component in an even layer—this makes dredging easier and more efficient.
Step 3: Bread the Chicken for Maximum Crunch
Dredge each chicken breast in the flour mixture first, pressing firmly so it adheres completely. Shake off any excess—you want a thin, even coating. Next, dip it into the egg-buttermilk mixture, letting any excess drip off for 5 seconds.
Finally, press the chicken into the panko mixture, applying gentle pressure to ensure the crumbs stick. Flip and repeat on the other side. The panko’s larger flakes create that signature crispy texture. Place the breaded patties on a wire rack to rest for 10 minutes—this helps the coating set.
Step 4: Pan-Fry to Golden Perfection
Heat the 0.5 cup vegetable oil in a large skillet over medium-high heat until shimmering. To test, drop in a pinch of panko—it should sizzle immediately. Carefully add the breaded chicken patties, being mindful not to overcrowd the pan.
Cook for 4-5 minutes per side until deep golden brown and the internal temperature reaches 165°F. The crust should be crisp and the crumbs should adhere firmly. If the oil starts to smoke, reduce the heat slightly. Transfer the patties to a paper towel-lined plate to drain any excess oil.
Pro Tips For Making Fried Chicken Patty
- Pound the Breasts: Use a rolling pin or meat mallet to evenly flatten the chicken breasts to ½-inch thickness—I learned this the hard way after too many dry, overcooked centers.
- Soak in Buttermilk: Let the chicken sit in the buttermilk for at least 30 minutes (60 if you’ve got time), it actually changes the outcome by keeping the meat juicy and helping the coating stick.
- Skip the Overcrowding: Fry in batches with space between patties, or they’ll steam instead of crisp. I used to rush this part and wondered why my crust never got that golden crunch everyone raves about.
- Double Coat Panko: After the egg dip, press the panko hard into the meat, then repeat the egg and panko for a thicker crust that stays put. Sounds weird, but it works.
Essential Equipment for This Recipe
The Right Pan
For perfect searing, use a heavy-bottomed stainless steel skillet or cast iron pan. I swear by my Lodge 12-inch cast iron—it distributes heat evenly and holds temperature beautifully. Avoid nonstick for this recipe as it doesn’t get hot enough for that crispy crust. 🔥
Thermometer is Key
An instant-read thermometer is non-negotiable for checking internal temperature. I use the ThermoWorks ThermoPop—it’s accurate, fast, and affordable. Aim for 165°F in the thickest part of the patty for perfectly cooked chicken.
Wire Rack Setup
Rest your breaded patties on a wire cooling rack set over a baking sheet. This allows air circulation so the coating doesn’t get soggy. I use the OXO Good Grips cooling rack—it’s sturdy and easy to clean.
Oil Management
Use a splatter screen to contain oil pops while frying. Also keep a paper towel-lined plate ready for draining. I prefer Bounty for its absorbency—it soaks up excess oil without falling apart.
Breading Station
Set up three shallow dishes for your dredging station. I like Pyrex glass pie plates—they’re wide, stable, and easy to clean. Have a fork or tongs ready for flipping patties during the breading process.
Extras for Success
A meat mallet helps pound chicken to even thickness. For seasoning, keep Diamond Crystal kosher salt on hand—it’s my go-to for consistent flavor. These tools make the process foolproof and professional-quality every time.
Nutrition Facts
Frequently Asked Questions
Can I use chicken thighs instead of breasts?
Thighs stay juicier and are more forgiving with cooking times. Pound them to ½-inch thickness for even cooking. They may need an extra 1-2 minutes per side.
How do I keep the breading from falling off?
Press firmly when coating and let patties rest on a wire rack for 10 minutes before frying. This helps the breading adhere. Also, avoid moving them too soon after adding to the pan.
What oil works best for frying?
Use oils with a high smoke point like vegetable, canola, or peanut oil. Avoid olive oil as it can burn at medium-high heat. About ½ cup is perfect for pan-frying.
Can I bake these instead of frying?
Yes! Bake at 400°F for 20-25 minutes, flipping halfway. For extra crispiness, spray with oil before baking. The texture will be slightly different but still delicious.

- Jollof Rice Sauce Recipe: West African Tomato and Spice Infusion - September 25, 2026
- Japanese Rice Soup Recipe: Umami-Rich Comfort in a Bowl - September 25, 2026
- Homemade Cream Of Rice Recipe: Silk-Smooth Breakfast in Minutes - September 25, 2026