
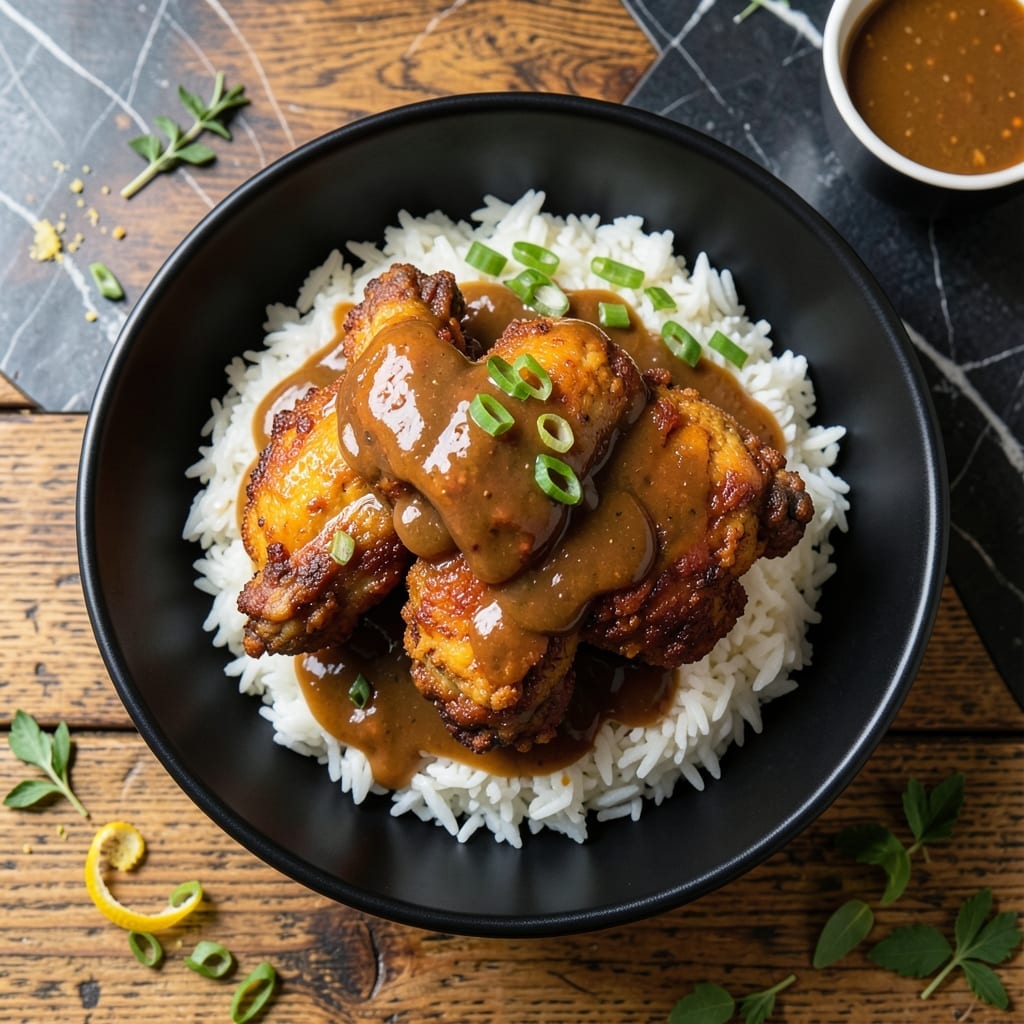
There’s a reason this dish graces Southern tables every Sunday—crispy fried chicken, rich gravy, and fluffy rice create a meal that feels like home. I perfected this method in my Charleston kitchen, where cast iron and patience are the only tools you need.
The chicken achieves its crispy coating through a buttermilk soak and hot oil at the right temperature. The gravy, built from pan drippings, delivers deep, savory flavor without the fuss. Steamed rice soaks up every drop, turning simple ingredients into comfort.
Each bite delivers contrast: the crunch of the crust, the tenderness of the meat, and the creamy gravy binding it all together. This is the kind of dish that turns weeknight dinner into a celebration.
Serve it straight from the skillet for a meal that satisfies completely.
Ingredients for Fried Chicken with Gravy and Rice
Cast iron, buttermilk, and a handful of pantry staples bring this Southern classic to life.
| Ingredient | Amount | Notes |
|---|---|---|
| Chicken Thighs 🍗 | 2 lb | Boneless, skin-on preferred |
| Buttermilk 🥛 | 2 cups | Full-fat for best flavor |
| All-Purpose Flour 🌾 | 2 cups | For dredging chicken |
| Cornstarch 🌽 | ½ cup | For extra crispiness |
| Salt 🧂 | 2 tsp | Kosher or sea salt |
| Black Pepper 🌶️ | 1 tsp | Freshly ground preferred |
| Paprika 🌶️ | 1 tsp | Smoked or sweet variety |
| Garlic Powder 🧄 | 1 tsp | Not garlic salt |
| Vegetable Oil 🫒 | 4 cups | For frying (peanut oil works too) |
| Whole Milk 🥛 | 1 cup | For gravy base |
| All-Purpose Flour 🌾 | ¼ cup | For gravy thickening |
| Chicken Broth 🍲 | 1 cup | Low-sodium preferred |
| Long-Grain White Rice 🍚 | 1 ½ cups | Uncooked, rinsed before cooking |
| Butter 🧈 | 2 tbsp | Unsalted for gravy |
The chicken is everything here. Thighs with skin on give you that perfect crispy crust—breasts dry out faster. I grab mine from Whole Foods or the local butcher, but any grocery store will do. Buttermilk is non-negotiable for the soak (the acid tenderizes the meat). For the flour, all-purpose works best—no need for specialty stuff (worth the extra minute to sift it though).
No buttermilk? Whole milk plus 1 tbsp vinegar per cup gets you close. Want gluten-free? Cornstarch plus almond flour (half and half) makes a great crust. The paprika can be swapped for cayenne if you like heat. Out of chicken broth? Water plus bouillon cube works in a pinch. And if you’re avoiding dairy, oat milk is my go-to for the gravy.
Leftovers keep 3-4 days in the fridge, but the chicken is best eaten fresh—it loses that crispiness. The gravy thickens as it cools, so thin with a splash of milk before reheating. Rice freezes well for up to 3 months (portion it first).
Why You’ll Love This Recipe
- One Bowl Magic: I mix the buttermilk and flour right in the same bowl I’ll fry in—no extra dishes, just crispy chicken thighs with minimal cleanup.
- Crispy Meets Creamy: The cornstarch in the coating gives that shatter-crisp crust, while the buttermilk keeps the inside juicy. Honestly, it’s the best of both worlds.
- Feeds the Crew: This recipe stretches easily—double the thighs, and you’ve got a hearty dinner for six or leftovers that reheat surprisingly well.
- Budget Hero: Chicken thighs are cheap, and the flour-cornstarch mix is pantry basic. I spend less than $10 and still get a meal that feels like a weekend treat.
Step-by-Step Instructions for Fried Chicken with Gravy and Rice
This is how I make crispy fried chicken with creamy gravy over fluffy rice. Simple, foolproof, and delicious.
Step 1: Marinate the Chicken Thighs
In a large bowl, combine the 2 lb Chicken Thighs with the 2 cups Buttermilk. Make sure every piece is fully coated. I like to press the chicken down into the buttermilk so it’s completely submerged—this ensures maximum flavor penetration.
Cover the bowl and refrigerate for at least 4 hours, but overnight is even better. The buttermilk tenderizes the chicken while adding a subtle tang that balances the richness. You’ll notice the chicken plumps up as it absorbs the liquid, which means it’s working.
Step 2: Dredge and Fry to Crispy Perfection
In a shallow dish, mix the 2 cups All-Purpose Flour, 0.5 cup Cornstarch, 2 tsp Salt, 1 tsp Black Pepper, 1 tsp Paprika, and 1 tsp Garlic Powder. The cornstarch is the secret to that ultra-crispy coating. Remove the chicken from the buttermilk, letting any excess drip off, then dredge it in the flour mixture, pressing firmly so the coating adheres well.
Heat the 4 cups Vegetable Oil in a large, heavy pot to 350°F. Fry the chicken in batches to avoid crowding—this keeps the oil temperature steady. Cook for 6-7 minutes per side until the coating is deep golden brown and the internal temperature reaches 165°F. Drain on a wire rack so the chicken stays crispy, not soggy.
Step 3: Cook the Rice While Chicken Fries
Rinse the 1.5 cups Long-Grain White Rice under cold water until the water runs clear. This removes excess starch and prevents gummy rice. In a medium pot, combine the rice with 3 cups water and bring to a boil.
Once boiling, reduce the heat to low, cover, and simmer for 15-18 minutes until the water is absorbed and the rice is tender. Remove from heat and let it sit covered for 5 minutes. Fluff with a fork before serving—this separates the grains and gives you that perfect, light texture.
Step 4: Make the Creamy Gravy
After frying, pour off all but ¼ cup of the oil from the pot, leaving behind all those delicious browned bits. Place the pot over medium heat and whisk in the 0.25 cup All-Purpose Flour. Cook for 1-2 minutes until the mixture turns a light golden color—this is your roux, and it’s the base of your gravy.
Slowly whisk in the 1 cup Chicken Broth and 1 cup Whole Milk, a little at a time, to avoid lumps. Add the 2 tbsp Butter and bring to a simmer. Cook for 5-7 minutes until the gravy thickens and coats the back of a spoon. Taste and adjust seasoning with salt and black pepper if needed. The gravy should be creamy, rich, and full of that fried chicken flavor.
Step 5: Assemble and Serve
Spoon a generous portion of rice onto each plate, then top with the crispy fried chicken. Ladle the creamy gravy over the chicken and rice, letting it soak into the rice just a bit. The contrast of the crispy chicken, creamy gravy, and fluffy rice is what makes this dish so satisfying.
Serve immediately while everything is hot. The chicken should stay crispy for a few minutes, but don’t let it sit too long—the gravy will soften that perfect crust. Dig in and enjoy the layers of texture and flavor in every bite.
Pro Tips For Making Fried Chicken With Gravy And Rice
- Double-Dredge the Thighs: Dip the buttermilk-soaked thighs in flour once, let them rest 2 minutes, then dredge again for that extra-crispy crust that holds up to the gravy.
- Check Oil Temp: I learned this the hard way—if the oil isn’t at 350°F before adding the chicken, you’ll get greasy, sad pieces instead of golden, crunchy ones.
- Salt the Buttermilk: Sounds weird, but it works: add 1 teaspoon of salt to the buttermilk marinade to season the chicken all the way through, not just on the surface.
- Use Drippings for Gravy: After frying, pour off all but 2 tablespoons of oil, then use those browned bits and cornstarch to make a gravy that tastes like the chicken’s flavorful twin.
Storing and Reheating This Recipe
Refrigerator Storage
Let this dish cool for no more than 2 hours before storing components separately in airtight containers. The chicken stays crispiest when kept on a wire rack over a tray in the fridge for up to 4 days. I learned this trick at The Smoky Pig. ❄️
Gravy Storage
The gravy thickens as it cools, so store it in a separate container. It keeps well for 3-4 days in the refrigerator. Before reheating, thin with a splash of whole milk to restore its creamy consistency.
Rice Storage
Cooked rice can be refrigerated in a sealed container for up to 5 days. For longer storage, portion it into freezer bags and freeze for 3 months. Leave 1 inch headspace to prevent freezer burn.
Reheating Chicken
To revive crispiness, use an oven or air fryer. Place chicken on a wire rack in a 375°F oven for 10-12 minutes until heated through. Avoid microwaving—it turns the coating soggy.
Reheating Gravy
Warm gravy in a saucepan over low heat, stirring occasionally. Add 1-2 tbsp milk if needed. For quick reheating, microwave in 30-second intervals, stirring between each.
Reheating Rice
Sprinkle 1 tbsp water over rice and microwave covered for 1-2 minutes. For larger portions, steam in a pot with ¼ cup water over medium heat for 5 minutes. 💡
Nutrition Facts
Frequently Asked Questions
Can I use chicken breasts instead of thighs?
Thighs stay juicier, but breasts work if pounded to ½-inch thickness. Reduce frying time to 5-6 minutes per side to prevent dryness. Brining helps too.
How do I keep the chicken crispy when serving?
Drain on a wire rack, not paper towels. Serve immediately or hold in a 200°F oven on a rack for up to 20 minutes. Gravy goes on last.
What if my gravy is too thin?
Mix 1 tbsp cornstarch with 1 tbsp cold water, then whisk into simmering gravy. Cook for 2-3 minutes until thickened. Avoid over-stirring.
Can I make this gluten-free?
Swap all-purpose flour for a 1:1 gluten-free blend in both dredging and gravy. Add ½ tsp xanthan gum to the coating for better adhesion.

- Beaten Rice Recipe: Fluffy Grains With Nutty Depth - September 25, 2026
- Machboos Rice Recipe: Bahraini Spiced One-Pot Tradition - September 25, 2026
- Recipe For Zucchini Rice Casserole: Cheesy Bake With Garden Freshness - September 25, 2026