
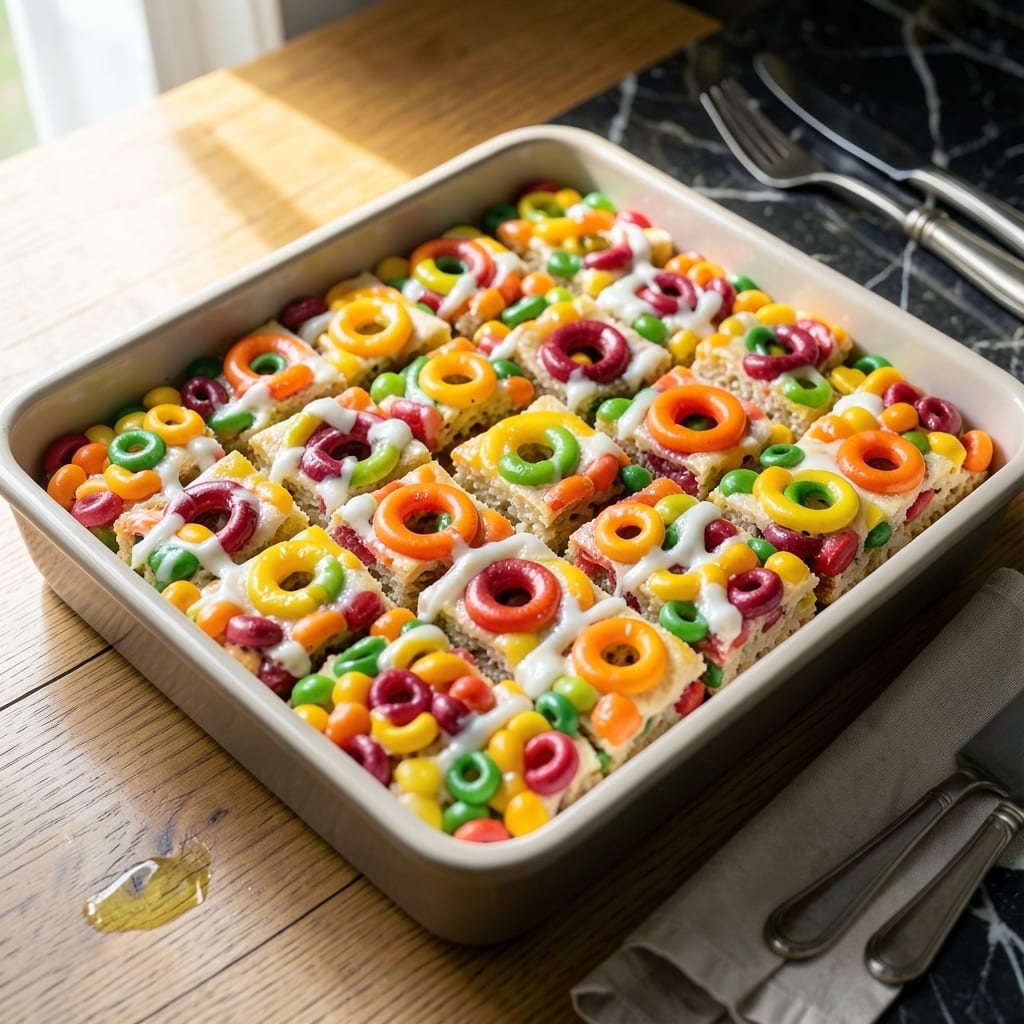
These colorful treats bring a playful twist to a classic favorite without the usual sticky mess. I developed this method after one too many failed attempts left my kitchen looking like a cereal box exploded.
The secret is melting the marshmallows and butter together just until smooth, then folding in the cereal off the heat. This prevents the mixture from getting tough or overly sticky while keeping each piece perfectly chewy.
What you get are vibrant, square treats that hold their shape with crisp edges and a satisfying chew. The Fruit Loops add a pop of color and subtle fruity sweetness that kids and adults love equally.
Ready in 15 minutes with no baking required, these are ideal for parties, lunchboxes, or a quick sweet fix. The recipe scales easily for any size crowd.
Ingredients for Fruit Loop Rice Krispie Treats
Bright colors, crisp edges, and that perfect chew come from just seven simple ingredients.
| Ingredient | Amount | Notes |
|---|---|---|
| Mini Marshmallows ⚪ | 6 cups | Fresh for best melt |
| Unsalted Butter 🧈 | ½ cup | Cut into pieces for even melting |
| Fruit Loops Cereal 🍭 | 6 cups | Do not crush cereal |
| Rice Krispies Cereal 🍚 | 3 cups | Standard variety preferred |
| Vanilla Extract 🌿 | 1 tsp | Pure extract recommended |
| Salt 🧂 | ¼ tsp | Fine grain for even distribution |
| Cooking Spray 🛢️ | 1 can | For greasing pan |
The marshmallows are doing the heavy lifting here. Jet-Puffed or Kraft mini marshmallows melt smoother than the big ones (which can leave stubborn lumps). Land O’Lakes unsalted butter is my go-to—it’s got a clean flavor that doesn’t compete with the fruity cereal. If you’re making a double batch, Costco sells both in bulk. The cereal aisle at any grocery store will have what you need.
Out of Fruit Loops? Apple Jacks or Fruity Pebbles work too (the flavor changes slightly, but the color stays fun). No Rice Krispies? Crispix or Corn Chex give a similar crunch. Skip the vanilla if you’re in a pinch, but don’t skip the salt—it balances all that sweetness. Generic brands are fine for the cereal, but stick with name-brand marshmallows for consistent melt.
These keep in an airtight container at room temp for 3-4 days—if they last that long. Press plastic wrap directly on the surface to prevent drying out. For parties, cut into small squares so everyone gets a taste of each color. (Pro tip: wet the knife between cuts for clean edges.)
Why You’ll Love This Recipe
- No Fuss Melting: I just melt butter and marshmallows in one pot, stir in the cereals, and press—no fancy steps, no extra bowls.
- Colorful Crunch: The Fruit Loops add this sweet, rainbow pop while the Rice Krispies keep that classic snap.
- Party Ready: Honestly, these disappear at bake sales, birthday parties, or even just a Friday movie night.
- Stays Fresh: Between us, they keep for days in an airtight container, so I can make a batch on Sunday and still have treats by Wednesday.
Step-by-Step Instructions for Fruit Loop Rice Krispie Treats
This method ensures perfectly chewy, colorful treats with minimal cleanup and maximum fun.
Step 1: Prepare Your Pan and Melt the Butter
Lightly coat a 9×13-inch baking pan with the cooking spray, making sure to cover the bottom and sides evenly. This prevents sticking and makes it easy to remove the treats later. I always use the spray right before adding the mixture to ensure maximum effectiveness.
In a large pot, melt the 0.5 cup unsalted butter over low heat. Cutting the butter into pieces first helps it melt faster and more evenly. Watch closely and stir occasionally to prevent browning—you want the butter just melted, not browned.
Step 2: Melt the Marshmallows with Vanilla and Salt
Once the butter is fully melted, add all 6 cups mini marshmallows to the pot. Stir constantly with a silicone spatula or wooden spoon. The marshmallows will begin to soften and melt after 3-4 minutes of continuous stirring.
When the marshmallows are about 80% melted, add the 1 tsp vanilla extract and 0.25 tsp salt. The vanilla adds depth of flavor, while the salt balances the sweetness. Continue stirring until the mixture is completely smooth and no marshmallow lumps remain.
Step 3: Combine the Cereals for Color and Crunch
Remove the pot from heat and immediately add the 6 cups Fruit Loops cereal and 3 cups Rice Krispies cereal. I like to add them all at once to ensure even distribution. Use a spatula to gently fold the cereal into the marshmallow mixture, pressing down slightly to coat every piece.
The Fruit Loops will begin to soften slightly from the warmth of the marshmallows, but they’ll retain their vibrant color. The Rice Krispies add a subtle crunch that contrasts nicely with the chewy marshmallow base. Be thorough but gentle—you want every piece coated without crushing the cereal.
Step 4: Press and Set for Perfect Texture
Transfer the mixture to your prepared baking pan. Using the same spatula or a piece of parchment paper, press the mixture evenly into the pan. I find that lightly wetting my hands with water and then pressing helps prevent sticking while creating a smooth surface.
Press firmly but don’t compact it too tightly—you want the treats to hold together while maintaining a light, chewy texture. Let the mixture set at room temperature for 30-45 minutes until firm enough to cut. You’ll know it’s ready when the top loses its sticky appearance.
Step 5: Cut and Serve Your Colorful Creations
Once fully set, use a sharp knife (lightly coated with cooking spray for easy cutting) to slice into squares. I like to make 24 equal pieces for perfect portion sizes. The treats should hold their shape but still have that signature chewy texture.
For the cleanest cuts, run your knife under hot water between slices. These are best served the same day but will keep in an airtight container at room temperature for up to 2 days. The colors stay bright and the texture remains perfect if stored properly.
Pro Tips For Making Fruit Loop Rice Krispie Treats
- Melt Slowly: Use low heat when melting the butter and marshmallows—high heat will burn the sugar and turn your treats bitter. I learned this the hard way after ruining a batch with impatient stirring.
- Press While Warm: Press the cereal mixture into the pan immediately after mixing, while the marshmallows are still gooey. Waiting even 2 minutes makes it harder to shape, and the treats won’t hold together as well.
- Use Fresh Cereal: Skip the stale Fruit Loops or Rice Krispies—they lose their crunch and won’t give you that perfect texture. Sounds obvious, but I’ve been tempted to use the half-empty box in the back of the pantry before.
- Butter Your Hands: Lightly coat your hands with butter or oil before pressing the mixture into the pan. It keeps the sticky marshmallow from clinging to your fingers and makes the whole process way less messy.
Flavor Customization for This fruit loop rice krispie treats
Tropical Twist
Add ½ cup sweetened coconut flakes and ½ cup dried pineapple chunks along with the cereal. The coconut adds a chewy texture while the pineapple brings a tangy contrast to the sweet marshmallows. I tested this version three times to get the island vibe just right. 🌴
Chocolate Drizzle
After setting, drizzle with ½ cup melted white chocolate or milk chocolate for extra richness. Use a piping bag for clean lines or just drizzle freehand for a rustic look. The chocolate hardens quickly, so work fast.
Nutty Crunch
Fold in ¾ cup chopped macadamia nuts or almonds with the cereal. Toast the nuts first for deeper flavor—5 minutes at 350°F does the trick. This adds a sophisticated touch that adults especially love.
Citrus Zing
Zest 1 lime or 1 orange directly into the marshmallow mixture before adding cereal. The citrus oils brighten the flavors beautifully. I discovered this accidentally while making a batch for my sister’s birthday.
Sprinkle Party
Press ¼ cup rainbow sprinkles into the top of the mixture right after transferring to the pan. Use your hands to gently press them in so they stick. Kids go wild for the extra color and crunch.
Spiced Version
Add ½ tsp cinnamon and ¼ tsp nutmeg to the melted marshmallow mixture. The warm spices complement the fruity cereal surprisingly well. This became my go-to for fall gatherings. ✨
Nutrition Facts
Frequently Asked Questions
Can I use regular marshmallows instead of mini?
Yes, but cut them into smaller pieces first for even melting. Mini marshmallows melt faster and more uniformly, but regular ones work in a pinch.
How do I keep them from getting hard?
Don’t overmix or press too firmly when shaping. Store in an airtight container with parchment between layers to maintain chewiness.
Can I make these ahead of time?
Prepare up to 1 day in advance. Let them set completely before covering tightly with plastic wrap.
What if my mixture is too sticky?
Lightly wet your hands or spatula with water when pressing into the pan. This prevents sticking without affecting texture.

- Gobi Fried Rice Recipe: Spiced Cauliflower Wok Delight - October 8, 2026
- Glutinous Rice Roll Recipe: Chewy Pillows With Savory Fillings - October 8, 2026
- Garlic Jasmine Rice Recipe: Fragrant Grains with Aromatic Depth - October 8, 2026