
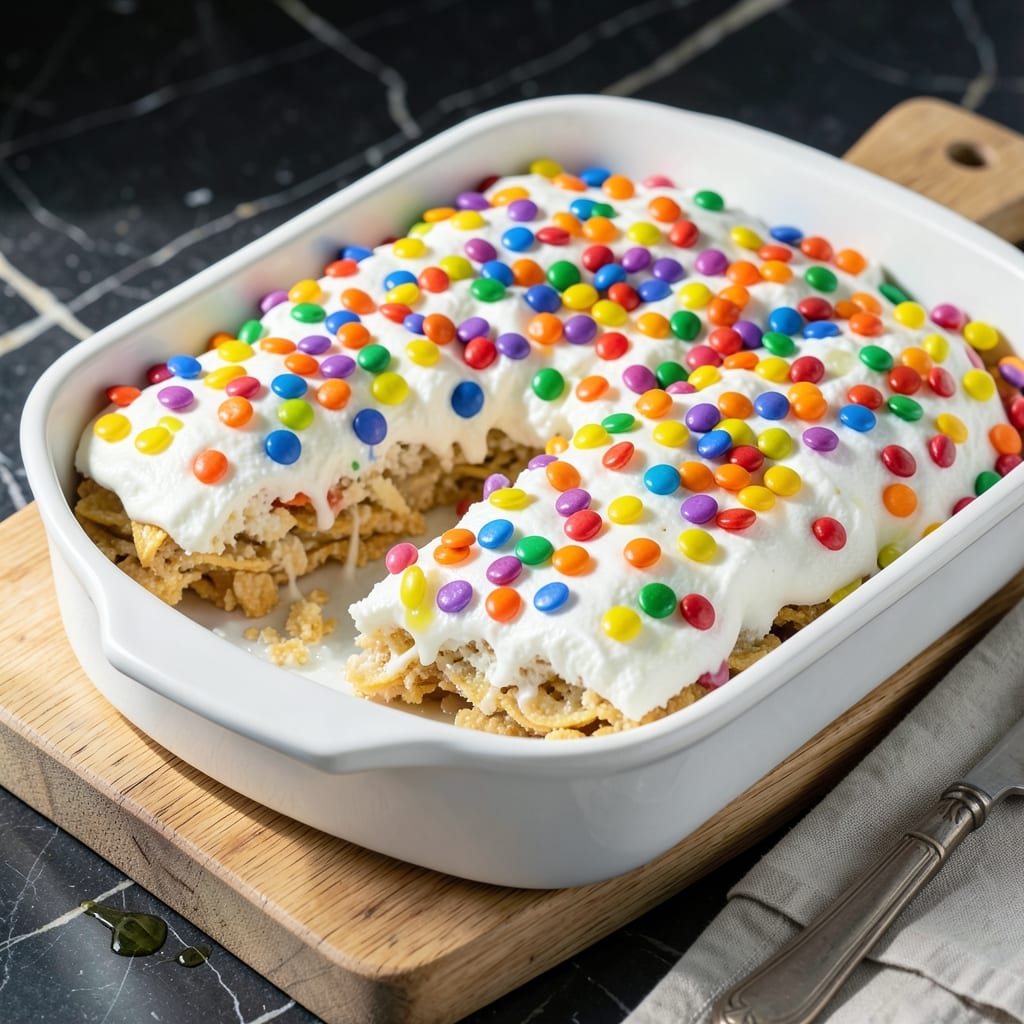
These colorful treats combine the nostalgia of Rice Krispies with the vibrant crunch of Fruity Pebbles for a playful twist on a classic. The marshmallow fluff creates an ultra-gooey texture that binds everything together without being overly sweet.
I developed this recipe after testing multiple cereal-to-marshmallow ratios to achieve the perfect balance of chewiness and crunch. The Fruity Pebbles add bursts of fruity flavor while keeping their signature bright colors throughout the mixture.
The result is a batch of square treats that stay soft for days, with a satisfying snap from the cereal in every bite. They’re ideal for parties, lunchboxes, or whenever you need a cheerful pick-me-up.
No special equipment is needed—just a pot, a spatula, and a baking dish to set them in.
Ingredients for Fruity Pebble Rice Krispie Treats with Marshmallow Fluff
Bright cereals meet gooey fluff for a nostalgic, colorful, no-bake treat everyone loves.
| Ingredient | Amount | Notes |
|---|---|---|
| Rice Krispies Cereal 🥣 | 5 cups | Classic variety, not puffed rice |
| Fruity Pebbles Cereal 🌈 | 2 cups | Colorful, fruit-flavored pieces |
| Marshmallow Fluff ⚪ | 10 oz | Use full container for best texture |
| Unsalted Butter 🧈 | ½ cup | Melted for binding cereal |
| Vanilla Extract 🌿 | 1 tsp | Pure extract for best flavor |
| Salt 🧂 | ¼ tsp | Fine grain, enhances sweetness |
| Vegetable Oil 🫒 | 1 tsp | For greasing baking dish |
The cereal is everything here. Rice Krispies give you that classic snap, while Fruity Pebbles add the rainbow magic (and that nostalgic flavor). I grab mine from Target or Walmart—any brand works, but the name-brand stuff has bolder colors. The marshmallow fluff is key; Jet-Puffed is my go-to. It melts smoother than regular marshmallows for that ultra-gooey texture.
No marshmallow fluff? 10 oz of mini marshmallows works in a pinch (melt them down with the butter). Want even more crunch? Add 1 extra cup of Fruity Pebbles. Swap Rice Krispies for Cocoa Krispies for a chocolate twist. The vanilla is optional but recommended—use the real stuff, not imitation. And don’t skip the salt; it balances all that sweetness perfectly.
These keep beautifully at room temp in an airtight container for 3-4 days. They’re even better the next day once everything fully sets. For longer storage, freeze for up to 2 months (thaw at room temp before serving). Cut them into squares only after they’re completely cool and set.
Why You’ll Love This Recipe
- Five Minute Magic: I can melt the butter and fold in the marshmallow fluff and cereals faster than the kettle boils.
- Crunchy Rainbow Bite: That first snap of Rice Krispies, then the fruity pop of Pebbles, all wrapped in fluffy vanilla-kissed sweetness—honestly, it’s addictive.
- Party Tray Hero: I’ve taken these to bake sales, birthday parties, and random Tuesday picnics—always the first thing to disappear.
- Budget Stretch: A box of cereal and a jar of fluff feed a crowd for pennies, and leftovers (if any) stay soft for days.
Step-by-Step Instructions for Fruity Pebble Rice Krispie Treats With Marshmallow Fluff
Here’s the method I use to create these colorful, crispy treats with perfect texture every time.
Step 1: Prepare the Pan and Melt the Butter
Start by greasing a 9×13-inch baking dish with the 1 tsp Vegetable Oil. I use a paper towel to spread it evenly across the bottom and sides, making sure every surface is coated. This prevents the treats from sticking later.
In a large pot, melt the 0.5 cup Unsalted Butter over low heat. Watch for the butter to completely liquefy and just start to foam around the edges. Don’t let it brown—this could give an unwanted toasted flavor to your finished product.
Step 2: Create the Marshmallow Base
Once the butter is melted, stir in the 10 oz Marshmallow Fluff. Use a silicone spatula and fold it in gently. The mixture will look chunky at first, but after 2-3 minutes of constant stirring, it should melt into a smooth, glossy liquid.
Add the 1 tsp Vanilla Extract and 0.25 tsp Salt, stirring for another 30 seconds to combine. Here’s the thing—the salt might seem like a small amount, but it’s essential for balancing the sweetness of the marshmallow and cereal.
Step 3: Mix in the Cereal
Remove the pot from heat and immediately add the 5 cups Rice Krispies Cereal and 2 cups Fruity Pebbles Cereal. I like to add the Rice Krispies first, then the Fruity Pebbles on top, so the colors stay vibrant rather than getting muddied.
Use your spatula to fold everything together gently. You want every piece of cereal coated in the marshmallow mixture, but don’t overmix or the Fruity Pebbles will start to bleed their colors. The mixture is ready when you see no more dry cereal at the bottom of the pot.
Step 4: Press and Set the Treats
Transfer the cereal mixture to your prepared baking dish. Using your spatula or the back of a greased measuring cup, press the mixture evenly into the pan. I press firmly but not too hard—you want the treats to hold together, but pressing too much makes them dense instead of light and crispy.
Let the treats set at room temperature for 1-2 hours until completely cool and firm to the touch. This waiting period is crucial—if you cut them too soon, they’ll fall apart. You’ll know they’re ready when the top feels slightly firm and doesn’t stick to your finger when touched.
Step 5: Cut and Serve
Once fully set, use a sharp knife to cut the treats into 12 equal squares. For clean cuts, I run the knife under hot water between each slice. This prevents the marshmallow from sticking to the blade and dragging the cereal with it.
Serve immediately or store in an airtight container at room temperature for up to 3 days. These are best the day they’re made, when the cereal still has a satisfying crunch. Each bite should deliver that perfect combination of crispy texture and gooey marshmallow with bursts of fruity color.
Pro Tips For Making Fruity Pebble Rice Krispie Treats With Marshmallow Fluff
- Melt Butter Slowly: Use low heat when melting the butter to prevent browning—burnt butter will turn your treats bitter. I learned this the hard way after ruining a batch with overzealous heat.
- Press While Warm: Press the cereal mixture into the pan immediately after combining with marshmallow fluff, while it’s still sticky and pliable. Waiting even 2 minutes makes it harder to shape.
- Use Fresh Cereal: Skip the stale Rice Krispies or Fruity Pebbles—old cereal won’t crisp up right and turns the treats chewy instead of snappy. Fresh boxes make a real difference.
- Grease Everything: Butter your spatula, hands, and pan before pressing the mix—it’s messy, but it’s the only way to avoid half your treats sticking to the tools. Sounds obvious, but I forget every time.
Essential Equipment for Perfect Results
Large Pot
A heavy-bottomed 4-6 quart pot is essential for melting the butter and marshmallow fluff evenly without scorching. I swear by my Cuisinart MultiClad—it conducts heat beautifully and gives me the control I need. The wide base also makes folding in the cereal much easier. 🔥
Silicone Spatula
Use a heat-resistant silicone spatula to fold everything together. I prefer the OXO Good Grips style with a flexible head to scrape every last bit of marshmallow from the pot. It also helps press the mixture into the pan without crushing the cereal.
Baking Dish
A 9×13-inch baking dish gives the perfect thickness for these treats. I use a metal pan because it cools faster than glass, helping the treats set quicker. Lightly greased with vegetable oil, it ensures easy release when cutting into squares.
Measuring Cups
Accurate measurements matter here. I keep a set of nested dry measuring cups handy for the cereals and a liquid measuring cup for the butter. The Fruity Pebbles can be tricky—they settle in the bag, so fluff them up before scooping.
Sharp Knife
For clean cuts, a long, sharp chef’s knife is key. I run mine under hot water between slices to prevent sticking. The Mercer Culinary brand holds its edge through multiple batches. Press straight down—no sawing motion—to keep the squares neat.
Cooling Rack
Once pressed into the pan, I place it on a wire cooling rack to allow air circulation underneath. This prevents the bottom from getting soggy as the treats set. After 1-2 hours, they’ll be firm enough to cut without falling apart. ⏰
Nutrition Facts
Frequently Asked Questions
Can I use regular marshmallows instead of fluff?
Yes, substitute 10 oz mini marshmallows for fluff. Melt them slowly with butter to prevent burning. The texture will be slightly firmer but still delicious.
How do I keep the colors from bleeding?
Add Fruity Pebbles last and fold gently. Avoid overmixing once colors start blending. Use a silicone spatula for minimal crushing.
Why are my treats too hard?
Over-pressing or using too much marshmallow causes density. Press just enough to bind and use exact measurements. Let them cool completely before cutting.
Can I make these gluten-free?
Use certified gluten-free Rice Krispies and Fruity Pebbles. Check marshmallow fluff labels too, as some brands contain gluten.

- Gobi Fried Rice Recipe: Spiced Cauliflower Wok Delight - October 8, 2026
- Glutinous Rice Roll Recipe: Chewy Pillows With Savory Fillings - October 8, 2026
- Garlic Jasmine Rice Recipe: Fragrant Grains with Aromatic Depth - October 8, 2026