
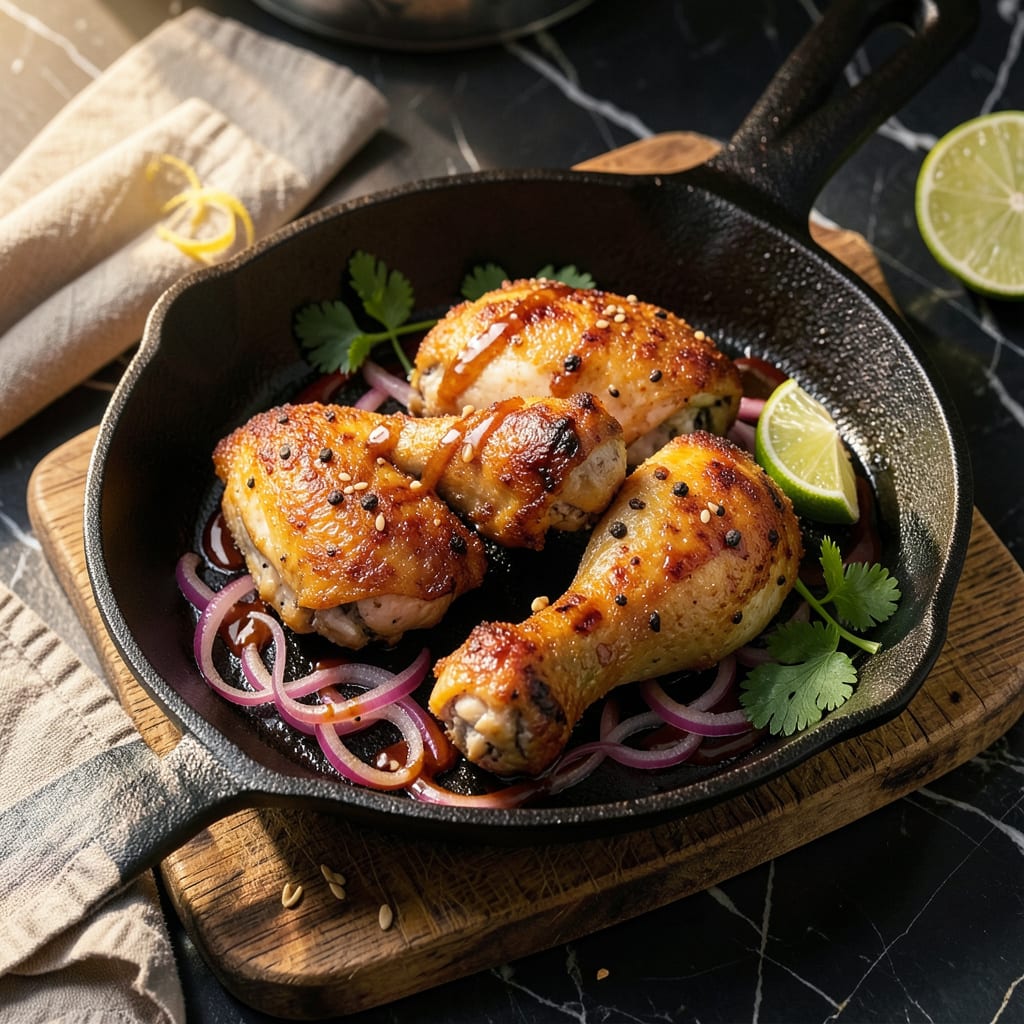
There’s nothing quite like biting into perfectly fried chicken—crispy on the outside, juicy inside, with layers of herb-infused flavor in every bite. I’ve burned through more batches than I’d like to admit, but this method finally nails that golden balance between texture and taste. The secret starts with the marinade, where simple ingredients work together to transform ordinary chicken into something extraordinary.
Most fried chicken recipes skip the marinating step, but that’s where the magic happens. Letting the chicken soak in a blend of herbs, citrus, and aromatics doesn’t just add flavor—it actually helps the meat stay moist during frying. I use a mix of buttermilk and fresh herbs that tenderizes while infusing every piece with bright, savory notes. Even 30 minutes makes a difference, though overnight is ideal for maximum flavor penetration.
When it’s time to fry, we’re talking golden perfection without the greasy mess. The right oil temperature and a simple flour coating create that shatteringly crisp crust we all crave. I’ll walk you through exactly how to maintain that sweet spot where the chicken cooks through evenly while developing that irresistible crunch. No special equipment needed—just a thermometer and some patience.
This isn’t just fried chicken—it’s your new go-to for weeknight dinners, game day spreads, or whenever you need a meal that feels special but comes together easily. Serve it with classic sides or get creative with dipping sauces. Either way, you’re in for chicken that disappears faster than you can make it.
📚 In This Guide
- What You’ll Need
- Instructions
- Tips and Common Mistakes
What Youll Need
- ● Marinated chicken: 2 lbs (900g) bone-in, skin-on thighs or drumsticks (or 1.5 lbs/680g boneless breasts) — marinated for at least 4 hours (overnight for best flavor!) 🍗
- ● Oil for frying: 2–3 cups (480–720ml) neutral oil with a high smoke point (vegetable, canola, or peanut oil work great)
- ● Frying setup: Deep skillet, cast-iron pan, or Dutch oven (10–12″ wide, 3–4″ deep) — avoid nonstick for even browning
- ○ Candy/deep-fry thermometer (optional but highly recommended for perfect temp control 🌡️)
- ● Tongs or slotted spoon (heat-resistant!)
- ○ Dredging station (optional for extra crisp): 1 cup (120g) all-purpose flour or cornstarch
- ● 1 tsp salt + ½ tsp black pepper (or your favorite spice blend)
- ● Safety & prep: Paper towels or wire rack (for draining excess oil)
- ● Splatter guard (if frying indoors)
- ● Kitchen timer (to avoid overcooking ⏰)
- ● Serving: Lemon wedges, fresh herbs (parsley/cilantro), or dipping sauce (try garlic aioli or spicy mayo!)
Step-by-Step Instructions for Frying Marinated Chicken
This method guarantees that perfect balance of crispy exterior and juicy interior every time.
Prepare Your Chicken for Frying
Remove the marinated chicken from the refrigerator and let it sit at room temperature for 15-20 minutes. This takes the chill off so the chicken cooks more evenly. While waiting, pat each piece dry with paper towels—this is crucial for achieving that crispy crust we’re after.
I always use a wire rack set over a baking sheet to hold the chicken pieces while they come to temperature. This setup allows air to circulate around the chicken, keeping the surface dry and ready for frying. Don’t skip this drying step; moisture is the enemy of crispiness.
Heat the Oil to the Perfect Temperature
Pour 1-2 inches of oil into a heavy-bottomed skillet or Dutch oven. I prefer using a deep, wide pan that gives the chicken pieces room to cook without crowding. Heat the oil over medium-high heat until it reaches 350°F on a deep-fry thermometer.
Here’s the thing—if you don’t have a thermometer, you can test the oil by dropping in a small piece of bread. It should sizzle immediately and turn golden brown in about 30 seconds. Maintaining the right temperature is key: too cool and the chicken will absorb oil and become greasy; too hot and the outside will burn before the inside cooks through.
Fry the Chicken in Batches
Carefully place the chicken pieces in the hot oil, skin-side down first if using bone-in pieces. Don’t overcrowd the pan—leave at least 1 inch of space between pieces. I usually cook in batches of 3-4 pieces depending on the size of my pan.
Fry for 6-8 minutes per side until the chicken is golden brown and the internal temperature reaches 165°F. You’ll know it’s ready when the crust is crispy and the juices run clear when pierced with a knife. Use tongs to turn the chicken gently—don’t pierce it with a fork, as this lets precious juices escape.
Drain and Rest for Maximum Crispiness
Transfer the fried chicken to a clean wire rack set over a paper towel-lined baking sheet. This setup lets excess oil drip away while keeping the crust crispy. If you place the chicken directly on paper towels, the steam will make the crust soggy.
Let the chicken rest for 5-10 minutes before serving. This brief rest allows the juices to redistribute throughout the meat, ensuring every bite is moist and flavorful. I know it’s tempting to dig in right away, but this step makes a noticeable difference in both texture and flavor.
Serve While Hot and Crispy
Serve the chicken immediately while it’s still hot and at its crispiest. The contrast between the shatteringly crisp crust and the juicy, herb-infused meat is what makes this dish so satisfying. I like to serve it with simple sides that don’t compete with the chicken’s flavors.
If you need to keep the chicken warm for a few minutes, place it on a wire rack in a 200°F oven. This maintains the crispiness better than covering it, which would trap steam. Remember, the crust is at its absolute best right out of the fryer, so time your cooking to serve immediately if possible.
Tips and Common Mistakes for Perfectly Crispy, Juicy Fried Chicken
Getting that ideal balance of shatteringly crisp crust and tender, flavorful meat comes down to a few key details. Here’s what I’ve learned from years of frying chicken at home.
The Temperature Factor: Maintaining that 350°F oil temperature in Step 2 is absolutely critical. If the oil dips below this when you add the chicken, the crust will absorb oil and become greasy instead of crispy. I use a clip-on thermometer to monitor constantly, adjusting the heat as needed. Too hot and the outside burns before the inside reaches 165°F—too cool and you’ll end up with soggy chicken.
Drying is Everything: In Step 1, when you’re patting the chicken dry after its 15-20 minutes at room temperature, be thorough. Any moisture left on the surface will create steam pockets in the hot oil, leading to uneven browning and spots where the crust won’t crisp properly. I use three layers of paper towels and press firmly on all sides.
Batch Cooking Wisdom: When frying in batches during Step 3, don’t rush between loads. Let the oil recover to 350°F before adding the next batch—this usually takes about 2-3 minutes. Adding chicken to oil that’s not fully reheated will drop the temperature too much, resulting in oily chicken. I keep a second thermometer in the oil to monitor recovery time accurately.
Resting for Perfection: Those 5-10 minutes of resting time in Step 4 aren’t just about redistributing juices—they’re crucial for the crust too. The residual heat continues cooking the chicken gently while the crust sets up. If you cut into it immediately, you’ll lose both moisture and crispness. I set a timer to resist the temptation to serve too soon.
Pro Tips for Frying Marinated Chicken
- Getting that ideal balance of shatteringly crisp crust and tender, flavorful meat comes down to a few key details. He…
- The Temperature Factor: Maintaining that 350°F oil temperature in Step 2 is absolutely critical. If the oil dips belo…
- Drying is Everything: In Step 1, when you’re patting the chicken dry after its 15-20 minutes at room temperature, be …
Frequently Asked Questions
Got questions about frying marinated chicken to perfection? You’re not alone! Here are the most common queries—answered quickly so you can get back to cooking that juicy, crispy masterpiece.
How long should I marinate chicken before frying?
For maximum flavor, marinate boneless cuts (like thighs or breasts) for 4–12 hours in the fridge. Whole pieces or bone-in chicken can soak 12–24 hours. Avoid marinating longer than 24 hours—acidic ingredients (lemon, vinegar) can turn the meat mushy. Pro tip: Even 30 minutes helps in a pinch!
Can I fry marinated chicken without flour or breading?
Absolutely! Skip the coating for a lighter, crispy-skin-only result. Pat the chicken very dry before frying to avoid steaming. For extra crunch, sear skin-side down first in hot oil (350–375°F) until golden. Just know: breading helps lock in moisture for juicier meat.
Why is my fried marinated chicken soggy instead of crispy?
Sogginess usually means low oil temp (below 325°F) or overcrowding the pan. Fry in batches, and let excess marinade drip off before cooking. If using batter, ensure it’s ice-cold when hitting the oil. Drain fried chicken on a wire rack (not paper towels) to keep it crisp!
What’s the best oil for frying marinated chicken?
Neutral, high-smoke-point oils work best: peanut, vegetable, or canola oil (smoke point: 400°F+). Avoid olive oil—it burns at high temps. For flavor, add a small splash of sesame oil to the marinade (not the frying oil). Reuse oil only 2–3 times for best quality.
Can I bake or air-fry marinated chicken instead?
Yes! For baking, use 400°F for 20–25 minutes (turn halfway). For air-frying, 375°F for 12–15 minutes (spray with oil for crispiness). Both methods work but won’t match deep-frying’s crunch. Brushing with honey or butter before baking adds a glossy, caramelized finish.
Mastering frying marinated chicken is all about balance—crispy skin, juicy meat, and bold flavors! 🍗✨ With the right marinade, technique, and patience, you’ll turn simple ingredients into a showstopping dish every time. Whether it’s for a weeknight dinner or a weekend feast, this method guarantees crowd-pleasing results.
Ready to put your skills to the test? Grab that skillet and try a new marinade combo—maybe lemon-garlic or spicy honey next!—or share your golden creation with friends. Happy frying! 🔥

- Jollof Rice Sauce Recipe: West African Tomato and Spice Infusion - September 25, 2026
- Japanese Rice Soup Recipe: Umami-Rich Comfort in a Bowl - September 25, 2026
- Homemade Cream Of Rice Recipe: Silk-Smooth Breakfast in Minutes - September 25, 2026