
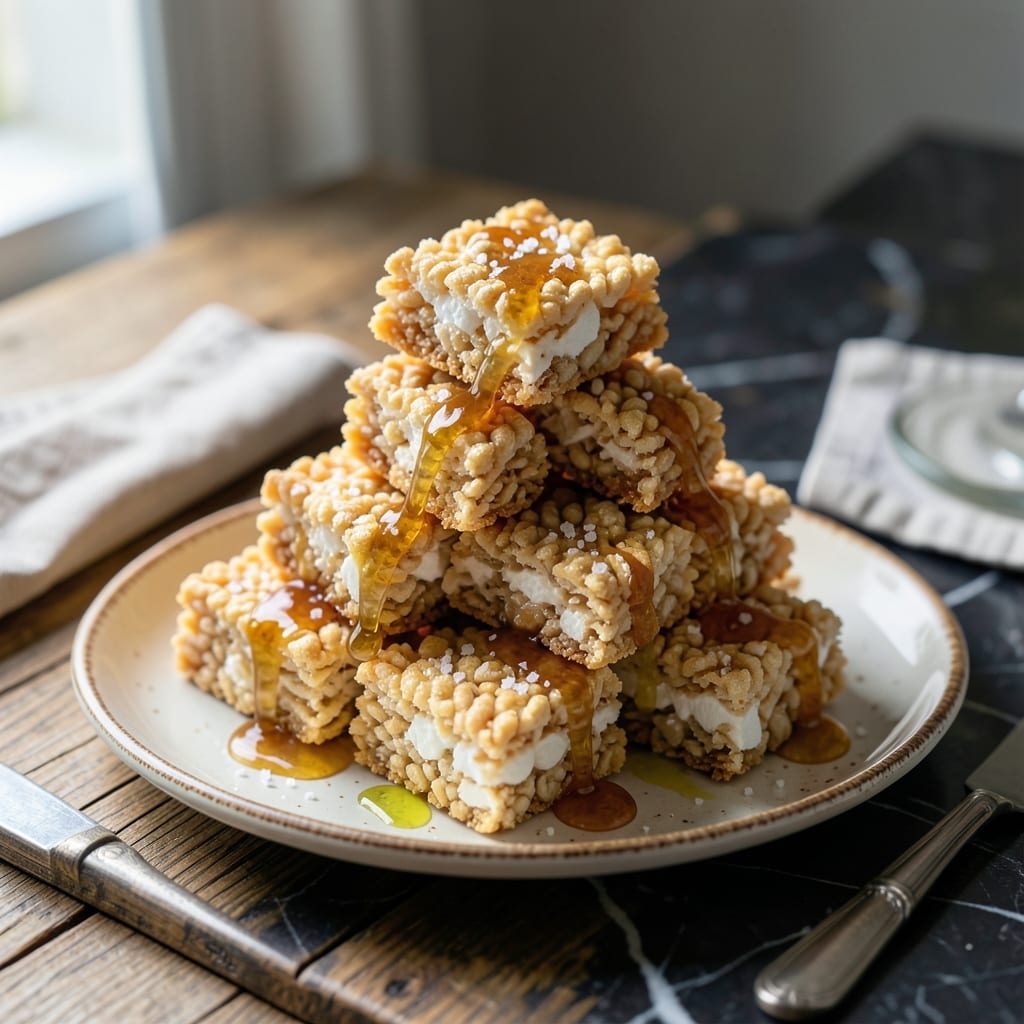
This recipe transforms classic rice crispy treats into something extraordinary without extra effort. I developed this version after realizing how much joy comes from small creative twists on familiar favorites.
The key is perfectly melting the marshmallows with butter until smooth before mixing with crispy rice cereal. This ensures every bite has that signature crunch we all love, with the ideal sticky-sweet balance.
What emerges are golden squares with that nostalgic snap, crackle, and pop we remember from childhood, but with a professional touch. The texture stays consistent whether you cut them immediately or let them set.
Endless variations make these treats adaptable for any occasion. The base recipe remains foolproof while inviting experimentation.
Ingredients for Fun Rice Crispy Treats
Six ingredients transform classic cereal into golden marshmallow clouds with perfect crunch.
| Ingredient | Amount | Notes |
|---|---|---|
| Crispy Rice Cereal 🥣 | 6 cups | Classic brand preferred |
| Miniature Marshmallows ⚪ | 10 oz | Fresh for best melt |
| Unsalted Butter 🧈 | 3 tbsp | For smooth melting |
| Vanilla Extract 🌿 | 1 tsp | Pure for best flavor |
| Sea Salt 🧂 | ¼ tsp | Fine grain preferred |
| Light Corn Syrup 💧 | 1 tbsp | Optional for extra stick |
| Powdered Sugar 🍚 | ¼ cup | For dusting finish |
The marshmallows are the star here. Jet-Puffed or Kraft brands melt the smoothest—store brands can be gummy. Use fresh marshmallows (they get stale fast in the bag). For the cereal, Kellogg’s Rice Krispies give that iconic snap, but any crispy rice cereal works. Butter quality matters less here since it’s just for melting, but unsalted keeps the flavor clean.
No corn syrup? Honey or maple syrup works at the same amount (skip for strict vegetarians). Want extra flavor? Add a pinch of cinnamon or a splash of almond extract with the vanilla. The powdered sugar dusting is optional but adds a nice finish—skip if you prefer less sweetness. For a fun twist, mix in mini chocolate chips after combining.
These keep at room temp for 2-3 days in an airtight container. They’re best the same day but still delicious later. For longer storage, freeze for up to 1 month—just thaw at room temp before serving. The texture stays perfect whether cut immediately or set for hours.
Why You’ll Love This Recipe
- One-Bowl Wonder: I melt the butter and marshmallows in the same pot I mix everything in—no extra dishes, no fuss.
- Vanilla Salt Magic: The vanilla extract and sea salt turn the gooey sweetness into something a little more grown-up.
- Party or Lunchbox: I’ve packed these for school treats and served them at birthdays—equally adored both times.
- Stays Fresh: They keep for days in an airtight container, so I can make a batch Sunday and snack all week.
Step-by-Step Instructions for Fun Rice Crispy Treats
Here’s the method I use to create perfectly crispy treats with that classic snap, crackle, and pop.
Step 1: Melt the Butter and Prepare the Marshmallow Base
In a large, heavy-bottomed pot, melt the 3 tbsp unsalted butter over low heat. I use low heat to prevent the butter from browning, which would add unwanted nuttiness to the recipe. Add the 10 oz miniature marshmallows and stir continuously with a silicone spatula.
The marshmallows will begin to collapse and melt after 3-4 minutes. At this point, stir in the 1 tsp vanilla extract, 0.25 tsp sea salt, and 1 tbsp light corn syrup. The mixture should be completely smooth and glossy, with no visible marshmallow lumps. This smooth base ensures your treats will be perfectly cohesive.
Step 2: Incorporate the Crispy Rice Cereal
Remove the pot from heat and immediately add all 6 cups crispy rice cereal. I add it all at once to ensure even coating. Using a spatula, gently fold the cereal into the melted marshmallow mixture until every piece is thoroughly coated.
This step requires a light touch—press too hard and you’ll crush the cereal, losing that signature crispiness. The mixture is ready when the cereal glistens with the marshmallow coating and you hear that faint crackling sound as the hot mixture meets the cereal. Work quickly, as the mixture will begin to set as it cools.
Step 3: Press and Shape the Treats
Transfer the mixture to a parchment-lined 9×13-inch baking dish. Using the spatula or lightly buttered hands, press the mixture evenly into the dish. I prefer using my hands for this step, as it allows me to feel the texture and ensure even distribution without compacting the cereal too much.
Press just firmly enough to shape the treats but not so hard that you compress the cereal—this maintains the airy texture. For extra crispiness, avoid pressing down repeatedly. Let the mixture sit for 5 minutes to cool slightly before the final step.
Step 4: Finish with Powdered Sugar for Extra Flavor
Once the treats have cooled for 5 minutes, dust the top evenly with the 0.25 cup powdered sugar. I use a fine-mesh sieve for an even, professional-looking finish. This not only adds a touch of sweetness but also enhances the visual appeal.
Allow the treats to cool completely in the pan for at least 30 minutes before cutting into squares. This cooling time is crucial—it allows the marshmallow to set properly, ensuring clean cuts and that perfect crispy texture. Once cooled, cut into squares and serve. Each bite should deliver that nostalgic crunch with a soft, gooey center.
Pro Tips For Making Fun Rice Crispy Treats
- Melt Butter Low: Keep the heat on medium-low when melting butter for marshmallows—I learned this the hard way after burning two batches. The sugar in marshmallows scorches fast.
- Use Fresh Cereal: Stale crispy rice cereal makes for sad, soggy treats. Open a new box for maximum crunch, especially if yours has been sitting open for weeks.
- Skip the Overmixing: Stir just until the cereal is fully coated, then stop. Overworking the mixture crushes the cereal and turns your treats dense instead of light and airy.
- Press While Warm: Press the mixture into the pan immediately after combining—it sets fast. Use buttered hands or a spatula, and don’t wait or it’ll harden before you can shape it.
Storing and Reheating This Dish
Room Temperature Storage
Let your treats cool completely before storing. I place mine in an airtight container with parchment between layers to prevent sticking. They stay fresh at room temperature for 2-3 days, though honestly, they never last that long in my Boston kitchen. 💛
Refrigerator Storage
For longer freshness, store in the fridge in a sealed container. The cold can make them slightly firmer, but they’ll soften at room temperature in 30 minutes. I avoid refrigeration unless it’s humid—moisture is the enemy of that perfect crunch.
Freezer Storage
Wrap individual squares tightly in plastic wrap, then place in a freezer bag. They freeze beautifully for up to 1 month. Thaw at room temperature for 1-2 hours before serving—they’ll taste just like the day you made them.
Reviving Stale Treats
If your treats lose their freshness, place them in a 300°F oven for 5 minutes to restore some crispness. Watch closely—they can soften quickly. I learned this trick after my first batch sat out too long during a family gathering.
Packaging for Gifts
Stack cooled treats in a parchment-lined tin with wax paper between layers. They’ll stay fresh for 48 hours at room temperature. I love gifting these in vintage tins I find at Boston flea markets. 💫
Nutrition Facts
Frequently Asked Questions
How do I prevent my treats from getting too hard?
Don’t overmix or press too firmly when shaping. Use low heat when melting marshmallows to avoid hardening.
Can I use regular marshmallows instead of mini?
Yes, but cut them into smaller pieces first for even melting. Mini marshmallows melt faster and more uniformly.
What’s the best way to add mix-ins like chocolate chips?
Let the mixture cool slightly after adding cereal, then fold in extras. This prevents melting or sinking.
How do I make them extra crispy?
Use fresh cereal and press lightly when shaping. Avoid humidity by storing in an airtight container.

- Cream of Wild Rice Soup Recipe: Earthy Grains in Silky Broth - October 9, 2026
- Filipino Garlic Rice Recipe: Crispy Fried Aroma With Every Bite - October 9, 2026
- Gobi Manchurian Rice Recipe: Indo-Chinese Fusion in One Bowl - October 9, 2026