
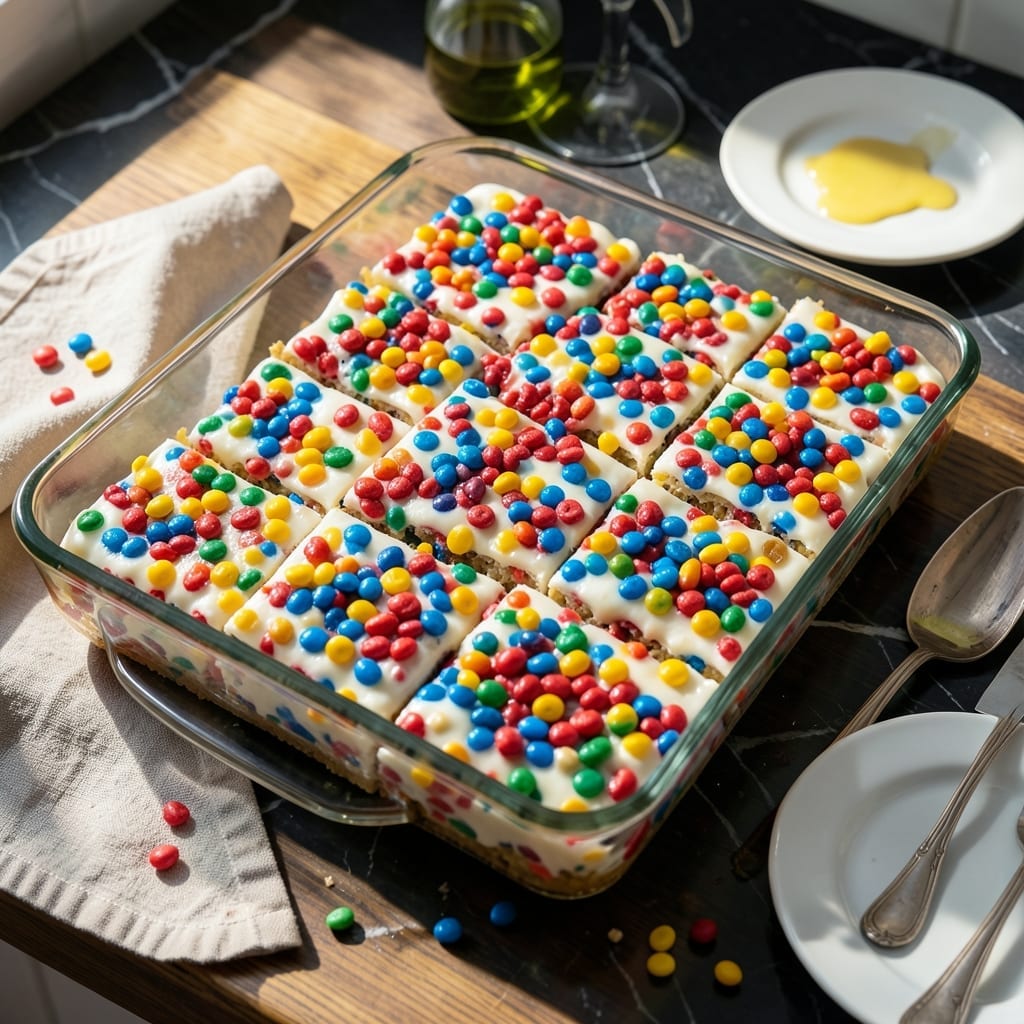
I’ve taken the classic treat and given it a bright, colorful upgrade that’s just as easy to make. This version keeps all the gooey, crispy goodness you love while adding a fun fruity twist.
With just a few simple ingredients and 10 minutes of prep, you’ll have a batch of vibrant, chewy squares that taste like a party in your mouth. The secret is in the fruity cereal that replaces traditional Rice Krispies.
Ingredients for Fruity Rice Krispie Treats
Just six simple ingredients for a colorful twist on a nostalgic favorite.
| Ingredient | Amount | Notes |
|---|---|---|
| Mini Marshmallows ⚪ | 10 oz | Or use 40 regular marshmallows |
| Butter 🧈 | ¼ cup | Salted or unsalted works |
| Fruity Pebbles Cereal 🥣 | 6 cups | Or any fruity cereal |
| Vanilla Extract 🌿 | 1 tsp | Pure extract preferred |
| Salt 🧂 | ¼ tsp | Fine grain for even mixing |
| Cooking Spray 🛢️ | 1 can | For greasing pan |
The cereal is the star here. Fruity Pebbles give that classic flavor and vibrant color, but any fruity cereal works—Trix or Fruit Loops are great too. I grab mine from Target or whichever store has the best sale that week. The marshmallows melt faster if they’re fresh (that soft, squishy kind), so check the date on the bag.
No fruity cereal? Regular Rice Krispies plus rainbow sprinkles get you close to the fun look. Want extra gooeyness? Add an extra cup of marshmallows. The vanilla boosts the flavor, but you can skip it in a pinch. Salt might seem weird, but it balances the sweetness—don’t leave it out (worth the extra minute).
These keep well in an airtight container for 3-4 days. Store at room temp—they’ll get sticky in the fridge. Cut them with a plastic knife (don’t skip this part) for clean squares.
Why You’ll Love This Recipe
- One Bowl Wonder: I melt the butter and marshmallows in the same pot I mix everything in—no extra dishes, just easy cleanup.
- Nostalgic Crunch: The Fruity Pebbles give that bright, cereally sweetness with a satisfying snap in every bite.
- Party Ready: I pack these for school events, and they’re always the first to disappear from the dessert table.
- Budget Friendly: A box of cereal and a bag of mini marshmallows make a whole batch—way cheaper than store-bought treats.
Step-by-Step Instructions for Fruity Rice Krispie Treats
Here’s the method I’ve perfected—simple, foolproof, and always colorful.
Step 1: Prepare Your Workspace and Tools
Lightly coat a 9×13-inch baking pan with the cooking spray, making sure to cover the bottom and sides completely. This prevents sticking and makes cleanup a breeze. I also spray my rubber spatula—I learned the hard way that marshmallow mixture clings fiercely to ungreased tools.
Measure out all your ingredients before starting. Having the 6 cups Fruity Pebbles Cereal, 10 oz Mini Marshmallows, 0.25 cup Butter, 1 tsp Vanilla Extract, and 0.25 tsp Salt ready to go keeps the process smooth and stress-free.
Step 2: Melt and Flavor the Base
In a large pot, melt the 0.25 cup Butter over low heat. Watch it carefully—you want it just melted, not browned. As soon as it’s liquid, add the 10 oz Mini Marshmallows and stir constantly with a wooden spoon.
This step takes about 5-7 minutes. The marshmallows will start to melt and the mixture will become smooth and glossy. When it’s almost fully melted, stir in the 1 tsp Vanilla Extract and 0.25 tsp Salt. The vanilla adds depth, while the salt balances the sweetness perfectly.
Step 3: Combine with Cereal
Remove the pot from heat and immediately add all 6 cups Fruity Pebbles Cereal. Working quickly (the mixture sets fast!), use your greased spatula to fold everything together until every piece is evenly coated. You’ll notice the vibrant colors of the cereal start to peek through the marshmallow layer.
Here’s the thing—don’t overmix. Just fold until combined, which should take about 30-45 seconds. Overworking makes the treats dense instead of light and crispy. The mixture should look glossy and hold together when pressed.
Step 4: Press and Set the Treats
Transfer the mixture to your prepared pan. Using your greased spatula or the bottom of a greased measuring cup, press it down firmly and evenly. I aim for about ½-inch thickness throughout—this gives the perfect ratio of crispy edges to chewy centers.
Let the treats cool at room temperature for 1-2 hours until completely set. You’ll know they’re ready when the top is firm to the touch and the edges pull away slightly from the pan. Resist the urge to cut too soon—patience ensures clean squares.
Once set, slice into squares and serve. Each bite delivers that nostalgic crunch with a burst of fruity color and flavor. Store leftovers in an airtight container at room temperature for up to 3 days.
Pro Tips For Making Fruity Rice Krispie Treats
- Melt Low and Slow: Keep the heat on medium-low when melting the butter and marshmallows—I learned this the hard way after burning two batches at high heat. The mini marshmallows will melt evenly without turning into a caramelized mess.
- Use Fresh Cereal: Skip the stale Fruity Pebbles from the back of the pantry. The cereal needs to be crisp to hold its shape and texture in the final treats.
- Press Lightly: Resist the urge to pack the mixture too tightly into the pan. A gentle press keeps the treats soft and chewy instead of dense and hard.
- Add Vanilla Last: Stir in the vanilla extract after removing the marshmallow mixture from the heat—this preserves its flavor and prevents it from evaporating off.
Pro Cooking Tips for Perfect Results
Butter Melting Perfection
Melt the 0.25 cup Butter over low heat—this is non-negotiable. High heat can brown the butter, which adds a nutty flavor that competes with the fruity cereal. I use a heavy-bottomed pot to prevent hot spots that could scorch the marshmallows later. 🔥
Marshmallow Melting Mastery
Add the 10 oz Mini Marshmallows only after the butter is fully melted. Stir constantly with a wooden spoon—the mixture goes from lumpy to silky in about 5-7 minutes. Mini marshmallows melt faster than regular, so keep the heat low and steady.
Flavor Layering
Stir in the 1 tsp Vanilla Extract and 0.25 tsp Salt when the marshmallows are almost fully melted. This timing ensures the vanilla doesn’t evaporate. The salt might seem odd, but it enhances the fruity flavors beautifully. Trust me on this.
Cereal Coating Technique
Remove from heat before adding the 6 cups Fruity Pebbles Cereal. Fold gently—don’t crush the cereal. The marshmallow mixture should coat every piece evenly. Overmixing turns the cereal soggy, so work quickly but carefully.
Pressing and Setting
Press the mixture firmly into the greased pan using a spatula or measuring cup. Aim for ½-inch thickness for even texture. Let it set for 1-2 hours at room temp—cutting too soon makes a sticky mess. 💡
Clean Cutting Trick
Use a plastic knife for slicing—it glides through without sticking. Dip it in warm water between cuts for even cleaner edges. This small step makes a huge difference in presentation.
Nutrition Facts
Frequently Asked Questions
Can I use regular marshmallows instead of mini?
Yes, swap 40 regular marshmallows for the minis. They take slightly longer to melt but work just as well. Just cut them into smaller pieces first for faster melting.
Why do my treats turn out hard?
This usually happens from overmixing or pressing too hard. Fold the cereal in gently and press just enough to compact. Let them set for 1-2 hours before cutting.
Can I add extra mix-ins?
Try ½ cup of dried fruit, chocolate chips, or sprinkles. Add them with the cereal for even distribution without crushing the cereal pieces.
How do I store leftovers?
Keep them in an airtight container at room temperature for up to 3 days. Avoid the fridge—it makes them sticky and loses the crisp texture.

- Gobi Fried Rice Recipe: Spiced Cauliflower Wok Delight - October 8, 2026
- Glutinous Rice Roll Recipe: Chewy Pillows With Savory Fillings - October 8, 2026
- Garlic Jasmine Rice Recipe: Fragrant Grains with Aromatic Depth - October 8, 2026