
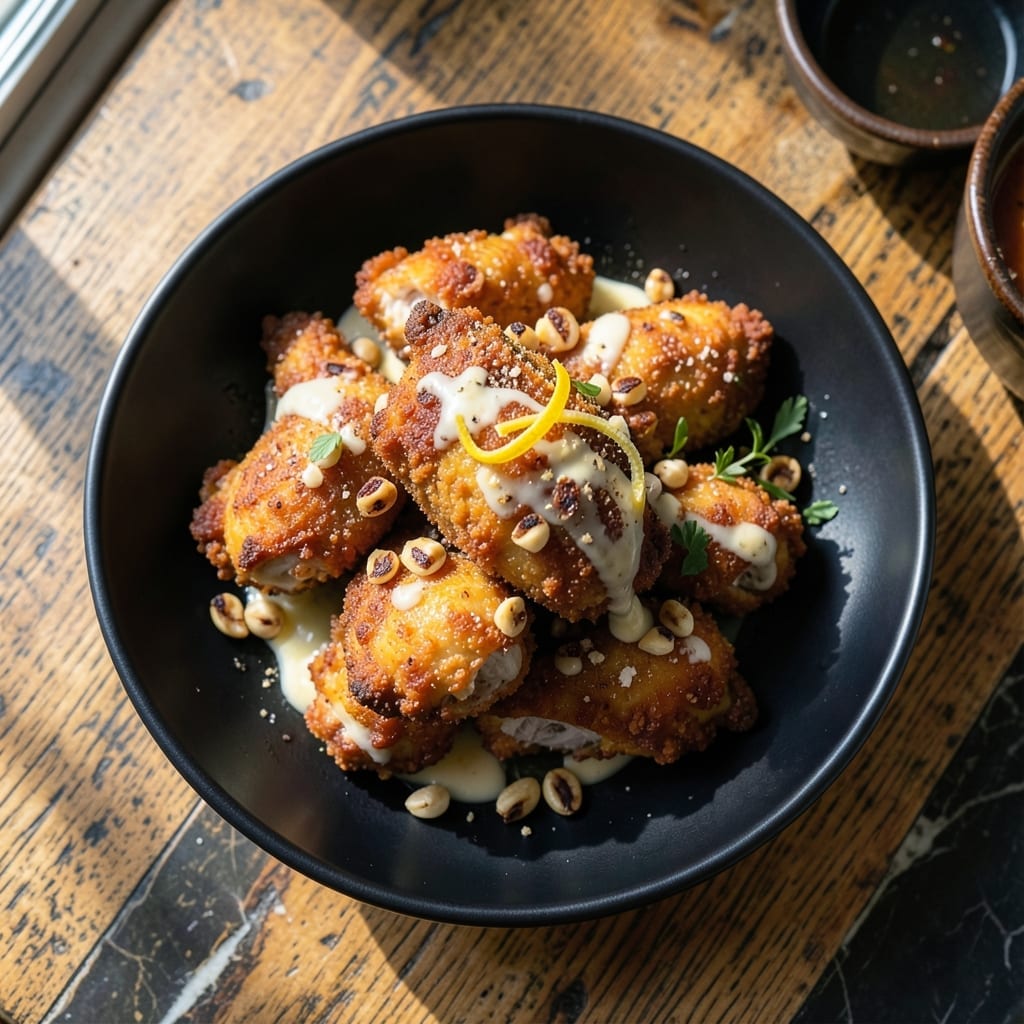
This garlic fried chicken delivers a double-crisp coating with an aromatic garlic punch that sets it apart from ordinary versions. The secret lies in the marinade and frying technique, which ensures every bite is packed with flavor.
I developed this method to achieve a shatteringly crisp exterior while keeping the meat juicy and tender. The garlic infuses the chicken at every stage, from marinating to the final crispy crust.
What you get is golden, crispy chicken with a robust garlic presence that doesn’t overpower. The coating stays crunchy long after frying, making it perfect for serving immediately or later.
Serve hot for the best texture, with your favorite dipping sauce on the side. Here’s how to make it.
Ingredients for Garlic Fried Chicken
Pantry staples and fresh garlic create that shatteringly crisp, aromatic chicken everyone loves.
| Ingredient | Amount | Notes |
|---|---|---|
| Chicken Thighs 🍗 | 2 lb | Boneless, skinless, cut into strips |
| Garlic Cloves 🧄 | 12 cloves | Minced, divided for marinade and coating |
| Buttermilk 🥛 | 1 cup | Full-fat for tenderness |
| All-Purpose Flour 🌾 | 2 cups | For first coating layer |
| Cornstarch 🌾 | ½ cup | For extra crispiness |
| Large Eggs 🥚 | 2 whole | Beaten for binding |
| Garlic Powder 🧄 | 2 tbsp | For dry coating mix |
| Onion Powder 🧅 | 1 tbsp | Complements garlic flavor |
| Paprika 🌶️ | 1 tbsp | Smoked or sweet variety |
| Salt 🧂 | 1 ½ tsp | Diamond Crystal preferred |
| Black Pepper 🌶️ | 1 tsp | Freshly ground for best flavor |
| Cayenne Pepper 🔥 | ½ tsp | Adjust for spice preference |
| Vegetable Oil 🫒 | 4 cups | For deep frying (peanut oil works too) |
The chicken thighs are non-negotiable here—they stay juicy even with the double frying. Boneless, skinless from Costco or Sam’s Club saves time and money for big batches. For the garlic, fresh is a must (the pre-minced stuff in jars just doesn’t have the same punch). Grab a head with plump cloves—if they’re shriveled, they’re past their prime. Organic garlic at Whole Foods has that robust aroma you want.
Buttermilk not on hand? Whole milk plus 1 tbsp lemon juice works in a pinch. Swap cornstarch for arrowroot powder at 1:1 ratio. If you’re avoiding gluten, use gluten-free flour blend—just add 1/4 cup extra cornstarch for crispiness. For the oil, peanut oil gives the best flavor and highest smoke point, but any neutral oil (canola, vegetable) does the job.
Fry in batches and keep finished pieces warm on a wire rack (not paper towels—steam makes them soggy). Leftovers? They reheat surprisingly well in a 400°F oven for 10 minutes. The coating stays crisp for 2-3 days in the fridge, but honestly, they never last that long.
Why You’ll Love This Recipe
- One Bowl Wonder: I toss everything right in the buttermilk marinade—no fancy prep, just chicken, garlic, and a quick dip in flour.
- Pure Garlic Bliss: The buttermilk tenderizes the thighs while the garlic cloves infuse every bite with that bold, punchy flavor I crave.
- Weeknight Hero: Between us, this is my Tuesday lifesaver—ready before the kids start asking what’s for dinner.
- Leftovers? Yes Please: The chicken stays crispy even the next day, so I pack it for lunch without the sad, soggy letdown.
Step-by-Step Instructions for Garlic Fried Chicken
This double-crisp method delivers maximum crunch with a bold garlic flavor that shines through every bite.
Step 1: Marinate Chicken in Buttermilk and Garlic
In a large bowl, whisk together the 1 cup Buttermilk with half of the 12 cloves Garlic Cloves (minced). Add the 2 lb Chicken Thighs (cut into strips) and toss to coat evenly.
Cover and refrigerate for at least 2 hours (overnight works even better). The buttermilk tenderizes the meat while the garlic infuses it with deep, aromatic flavor. You’ll notice the chicken plumps slightly as it absorbs the liquid.
Step 2: Prepare the Double-Crisp Coating
In a shallow dish, whisk together the 2 cups All-Purpose Flour, 0.5 cup Cornstarch, 2 tbsp Garlic Powder, 1 tbsp Onion Powder, 1 tbsp Paprika, 1.5 tsp Salt, 1 tsp Black Pepper, and 0.5 tsp Cayenne Pepper.
In another bowl, beat the 2 whole Large Eggs with the remaining minced garlic cloves. This two-stage coating (flour mix → egg wash → flour mix again) creates an extra-thick, shatteringly crisp crust that clings to every piece.
Step 3: Apply the Coating for Maximum Crunch
Remove the chicken from the buttermilk (let excess drip off) and dredge each piece thoroughly in the flour mixture, pressing gently so it adheres. Then dip in the egg wash, letting excess drip off, and return to the flour mixture for a second coating.
Place the coated pieces on a wire rack set over a baking sheet. Let them rest for 10 minutes—this helps the coating dry slightly and stick better during frying. You should see a thick, uneven layer of coating on each piece.
Step 4: Fry to Golden Perfection
Heat the 4 cups Vegetable Oil in a deep, heavy pot to 350°F. Use a thermometer for accuracy—oil that’s too cool makes greasy chicken, while too-hot oil burns the coating before the meat cooks through.
Fry the chicken in batches (don’t overcrowd the pot) for 6-8 minutes per batch until the coating is deep golden brown and the internal temperature reaches 165°F. The crust should be crisp enough to crackle when you bite into it.
Step 5: Drain and Serve Immediately
Transfer the fried chicken to a wire rack or paper towel-lined plate to drain excess oil. The coating will stay crisp for 10-15 minutes if kept warm in a 200°F oven while you finish frying the remaining batches.
Serve hot while the crust is at its peak crispiness. Each piece should have a thick, craggy coating that gives way to tender, garlicky chicken underneath. The aroma of garlic and spices will be impossible to resist.
Pro Tips For Making Garlic Fried Chicken
- Double-Fry for Crisp: Fry the chicken once at 325°F until cooked through, then rest 5 minutes and fry again at 375°F. I learned this the hard way—single-frying left me with soggy skin more times than I’d like to admit.
- Smash the Garlic: Crush the garlic cloves with the flat of your knife before mincing—it releases way more flavor into the buttermilk marinade. Sounds weird, but it works.
- Pat Thighs Dry: After the buttermilk soak, pat those thighs bone-dry with paper towels before dredging. Skip this and your coating slides right off into the oil.
- Swap Half the Flour: Replace ¼ cup of the all-purpose flour with extra cornstarch in your dredge. My grandmother swore by this, and she was right: it makes the crust shatter like glass.
Wine and Beer Pairings for This garlic fried chicken
Crisp White Wines
A dry Riesling from Germany or Washington state cuts through the richness beautifully with its bright acidity and citrus notes. Sauvignon Blanc from New Zealand works too—its grassy, tropical flavors complement the garlic without competing. 🍷
Bold Red Wines
For red lovers, a light-bodied Pinot Noir from Oregon or Burgundy offers enough acidity to handle the fat while letting the garlic shine. Avoid heavy tannic reds—they’ll clash with the crispy coating.
Light Beers
A crisp pilsner like Pilsner Urquell or Stella Artois refreshes your palate between bites. The carbonation cleanses away the oil while the mild malt flavor doesn’t overpower the garlic. 🍺
Craft Beer Options
A Belgian blonde ale such as Leffe Blonde adds a touch of sweetness that balances the savory garlic. For hop lovers, a session IPA with moderate bitterness works without overwhelming the dish.
Non-Alcoholic Pairings
Sparkling water with lemon or lime provides the same palate-cleansing effect as beer. Iced tea with a squeeze of citrus also complements the garlic notes nicely.
Nutrition Facts
Frequently Asked Questions
What if I don’t have buttermilk?
Mix 1 cup milk with 1 tablespoon lemon juice or vinegar. Let it sit for 5 minutes to thicken. This makes a perfect buttermilk substitute for tenderizing the chicken.
Can I bake this instead of frying?
Baking won’t give the same crispiness, but you can try 400°F for 20-25 minutes, flipping halfway. For better results, spray the pieces with oil before baking to help crisp the coating.
How do I keep the coating from falling off?
Pat the chicken very dry before dredging, and let the coated pieces rest for 10 minutes before frying. This helps the coating adhere better during cooking.
Can I use chicken breasts instead of thighs?
Yes, but thighs stay juicier. If using breasts, reduce frying time to 5-6 minutes to prevent dryness. Cut them into even strips for consistent cooking.

- Jollof Rice Sauce Recipe: West African Tomato and Spice Infusion - September 25, 2026
- Japanese Rice Soup Recipe: Umami-Rich Comfort in a Bowl - September 25, 2026
- Homemade Cream Of Rice Recipe: Silk-Smooth Breakfast in Minutes - September 25, 2026