
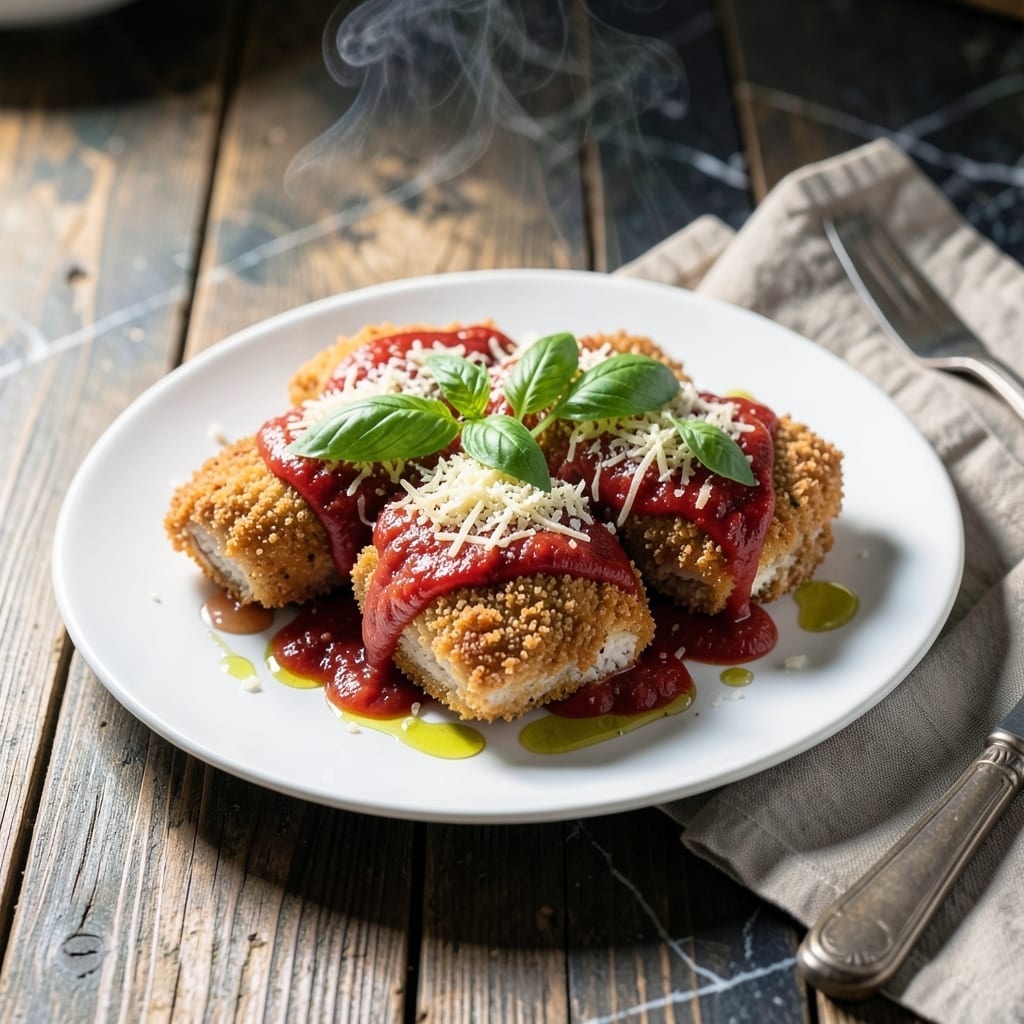
Achieving that perfect gluten-free crisp on chicken parm requires the right breading technique. This method delivers the same satisfying crunch as traditional versions without sacrificing texture or flavor.
The key is using a combination of gluten-free panko and almond flour, which creates a golden, shatteringly crisp coating that holds up to baking. Layered with tangy marinara and melty mozzarella, every bite stays flavorful and juicy.
I developed this recipe after years of testing breading combinations at The Smoky Pig. The result is a dish that even gluten lovers won’t believe is gluten-free. It bakes to perfection in under 30 minutes.
Serve with a side of pasta or a fresh salad for a complete meal. Here’s how to make it.
Ingredients for Gf Chicken Parm
Gluten-free panko and almond flour create that signature crisp coating for this dish.
| Ingredient | Amount | Notes |
|---|---|---|
| Chicken Breast 🍗 | 1 ½ lb | Boneless, skinless, pounded to 1/2-inch thickness |
| Gluten-Free Panko Breadcrumbs 🍞 | 1 ½ cups | Ensure certified gluten-free brand |
| Almond Flour 🌰 | ½ cup | Fine, blanched variety preferred |
| Large Eggs 🥚 | 2 whole | Beaten for breading adhesion |
| Parmesan Cheese 🧀 | ½ cup | Freshly grated from block |
| Marinara Sauce 🍅 | 2 cups | Quality jarred or homemade |
| Mozzarella Cheese 🧀 | 8 oz | Fresh, low-moisture, shredded |
| Olive Oil 🫒 | ½ cup | Divided for cooking and drizzling |
| Garlic Cloves 🧄 | 3 cloves | Minced for sauce enhancement |
| Dried Oregano 🌿 | 1 tsp | For seasoning breading mixture |
| Dried Basil 🍃 | 1 tsp | Complements Italian flavor profile |
| Salt 🧂 | 1 tsp | Diamond Crystal kosher preferred |
| Black Pepper 🌶️ | ½ tsp | Freshly ground for best results |
| All-Purpose Gluten-Free Flour 🌾 | ½ cup | For initial dredging step |
The breading is non-negotiable here. Kikkomans gluten-free panko (available at Whole Foods or Amazon) has the best texture—avoid brands with gritty consistency. Almond flour from Bob’s Red Mill works perfectly (the super-fine kind). For the chicken, use similar-sized breasts for even cooking—pound them to an even 1/2-inch thickness. This prevents dry spots.
No almond flour? Crushed gluten-free cornflakes work in a pinch (pulse in food processor first). For dairy-free, swap Parmesan for nutritional yeast at 1:1 ratio. The mozzarella can be pre-shredded (though fresh melts better). If using frozen chicken, thaw completely and pat very dry—excess moisture ruins the crisp.
Breaded chicken keeps 2 days in the fridge (store unbaked) or 1 month frozen. Bake from frozen adding 10 minutes. Leftovers reheat best in air fryer at 375°F for 5 minutes to revive the crust.
Why You’ll Love This Recipe
- One Pan Wonder: I bread and bake everything on a single sheet pan—less mess, more time to relax.
- Crispy, Cheesy Bite: The gluten-free panko and almond flour give it that perfect crunch, while the parmesan melts into every bite.
- Weeknight Hero: It’s my go-to for busy evenings—ready faster than takeout and way more satisfying.
- Leftovers for Days: Honestly, it reheats beautifully, so I always make extra for easy lunches.
Step-by-Step Instructions for Gluten-Free Chicken Parmesan
Master the technique for crispy, golden crust and perfectly melted cheese in every bite.
Step 1: Prepare and Bread the Chicken
Begin by setting up a breading station with three shallow dishes. In the first, combine the 0.5 cup all-purpose gluten-free flour with 1 tsp salt, 1 tsp dried oregano, and 1 tsp dried basil. In the second, beat the 2 whole large eggs until uniform.
In the third dish, mix the 1.5 cups gluten-free panko breadcrumbs, 0.5 cup almond flour, and 0.5 cup parmesan cheese thoroughly. Pat the 1.5 lb chicken breast dry, then dredge each piece in the seasoned flour, shaking off excess. Next, coat in beaten egg, allowing any excess to drip off before pressing into the breadcrumb mixture. Ensure complete coverage for maximum crispiness.
Step 2: Pan-Fry to Golden Perfection
Heat 0.25 cup olive oil in a large skillet over medium-high heat until shimmering. Carefully add the breaded chicken, working in batches if necessary to avoid crowding. Cook for 4-5 minutes per side until the crust is deep golden brown and the internal temperature reaches 165°F.
Resist the urge to move the chicken prematurely—it should release easily when properly crisped. Transfer the cooked chicken to a paper towel-lined plate to drain excess oil. The crust should be uniform and crisp to the touch, not greasy or soggy.
Step 3: Build and Bake with Sauce and Cheese
Preheat the oven to 375°F. In a baking dish, spread 1 cup marinara sauce evenly across the bottom. Place the fried chicken on top, then spoon the remaining 1 cup marinara sauce over each piece. Sprinkle with the 8 oz mozzarella cheese, ensuring full coverage.
Drizzle the remaining 0.25 cup olive oil over the top for added richness. Bake for 15-20 minutes until the cheese is fully melted and bubbly, with light golden spots forming on the edges. The sauce should be hot and the flavors melded together.
Step 4: Rest and Serve Immediately
Remove the dish from the oven and let it rest for 5 minutes. This allows the cheese to set slightly, preventing it from sliding off when served. Garnish with fresh herbs if desired, though the dish is complete as is.
Serve each portion with a generous spoonful of the sauce and any accumulated cheese from the baking dish. The chicken should have a crisp exterior, tender interior, and a perfect ratio of sauce to melted cheese in every bite.
Pro Tips For Making Gf Chicken Parm
- Pound the Chicken: Use a meat mallet to pound the chicken breasts to an even ½-inch thickness—I learned this the hard way after ending up with dry, overcooked edges and underdone centers more times than I care to admit.
- Double Dredge: Dip each piece in egg, then almond flour, then back in egg, and finally into the gluten-free panko mixed with parmesan. This extra step makes a real difference in getting that crust to actually stick and crisp up.
- Skip the Overcrowding: Fry the chicken in batches with at least an inch of space between pieces—steam from crowded pans turns that beautiful crust soggy, and nobody wants soggy parm.
- Rest Before Saucing: Let the fried chicken rest on a wire rack for 3-4 minutes before adding sauce and cheese. This keeps the coating from falling off when you move it, which is a mess I still occasionally make when I’m in a hurry.
Essential Equipment for This Dish
Breading Station Essentials
Use three shallow dishes for your breading setup—I prefer stainless steel mixing bowls from my vintage collection. The first holds your gluten-free flour and seasonings, the second your beaten eggs, and the third your panko-almond flour mixture. This keeps everything organized and prevents cross-contamination. 💡
Skillet for Perfect Frying
A heavy-bottomed 12-inch cast iron skillet is my go-to for frying. Mine is a well-seasoned Lodge I’ve had for years. Cast iron maintains even heat and develops that perfect golden crust. If using nonstick, ensure it’s PFOA-free and oven-safe for the baking step.
Baking Dish Matters
Choose a 9×13-inch baking dish for even heat distribution. I love my Le Creuset stoneware—it goes from oven to table beautifully. Glass dishes work too, but may require 5 extra minutes of baking time. Avoid metal pans which can cause uneven cooking.
Thermometer for Precision
An instant-read thermometer is non-negotiable. I use my ThermoWorks Thermapen to check chicken reaches 165°F internally. This prevents overcooking while ensuring safety. The probe should insert easily into the thickest part of the breast. 🌡️
Paper Towels for Draining
Keep a roll of heavy-duty paper towels handy for draining fried chicken. I prefer Brawny—they don’t tear under hot oil. Place cooked pieces on a paper towel-lined plate to absorb excess oil before baking. This maintains that perfect crisp texture.
Cheese Grater for Freshness
Use a Microplane grater for your Parmesan—it creates the finest, fluffiest texture that melts beautifully. I’ve had mine since culinary school. For mozzarella, buy pre-shredded if short on time, but fresh blocks shredded with a box grater melt better.
Nutrition Facts
Frequently Asked Questions
Can I use regular breadcrumbs instead?
No, regular breadcrumbs contain gluten. For best results, stick with certified gluten-free panko to maintain the crisp texture.
Why do I need almond flour?
Almond flour adds richness and helps create a crispier crust. It also binds better with the panko for even breading coverage.
How do I prevent soggy breading?
Drain fried chicken on paper towels before baking. Use medium-high heat and avoid overcrowding the pan.
Can I make this ahead?
Bread and freeze unbaked chicken for up to 1 month. Bake from frozen, adding 10 minutes to the time.

- Jollof Rice Sauce Recipe: West African Tomato and Spice Infusion - September 25, 2026
- Japanese Rice Soup Recipe: Umami-Rich Comfort in a Bowl - September 25, 2026
- Homemade Cream Of Rice Recipe: Silk-Smooth Breakfast in Minutes - September 25, 2026