
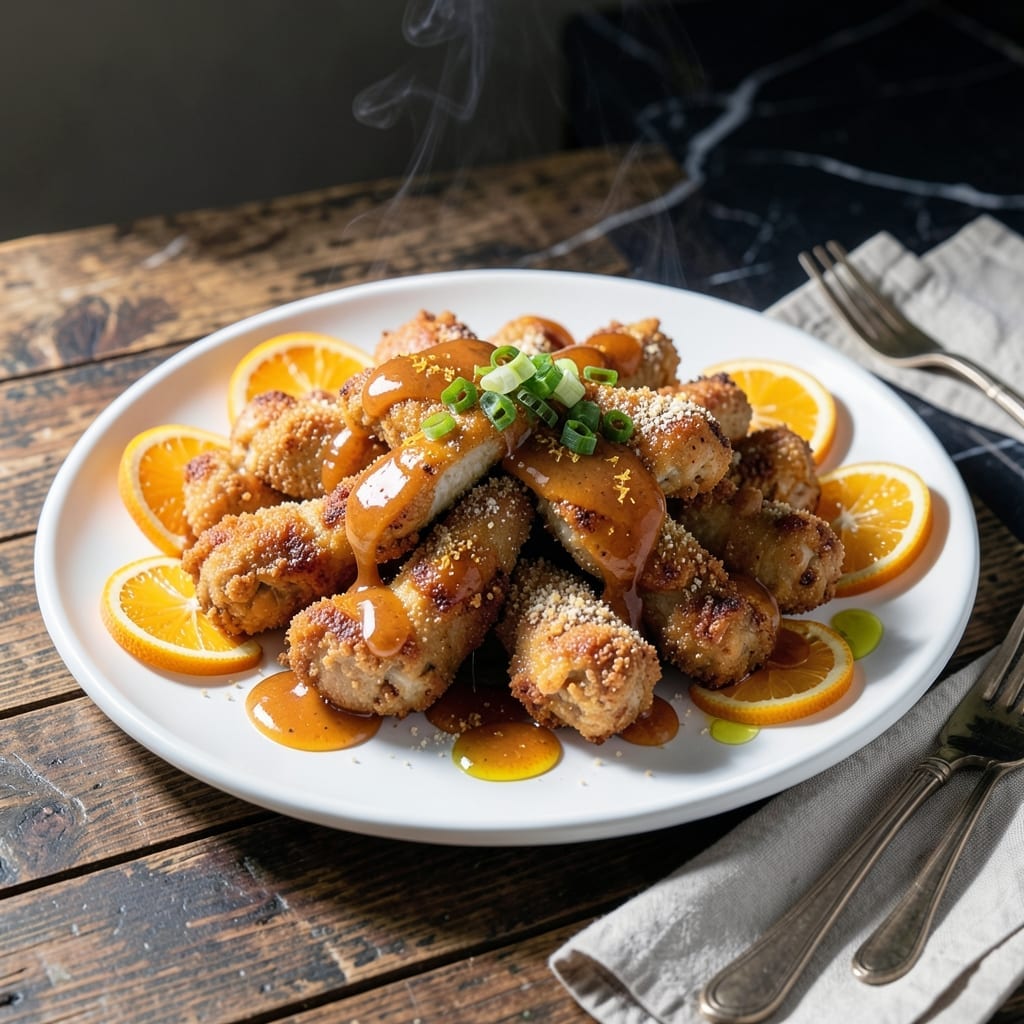
Achieving crispy orange chicken without gluten requires precise technique and the right starch blend. This recipe delivers the signature texture and sweet heat of the classic takeout dish while remaining completely gluten-free. The secret lies in a double-coating method that creates a shatteringly crisp exterior.
I developed this version after years of testing various gluten-free flours and starches. The combination of rice flour and cornstarch provides the perfect crunch, while a hot oil bath ensures even cooking. The sauce balances citrus brightness with just enough heat to keep things interesting.
The result is tender chicken pieces coated in a sticky, tangy glaze with that coveted crispy texture. Each bite delivers the perfect ratio of sauce to coating, with none of the gummy aftertaste that plagues many gluten-free versions. The aroma alone will transport you to your favorite restaurant.
Serve immediately for maximum crispness, with steamed rice and vegetables to complete the meal. The technique works just as well with tofu for a vegetarian option.
Ingredients for Gf Orange Chicken
Crispy gluten-free perfection starts with these carefully selected ingredients for authentic flavor and texture.
| Ingredient | Amount | Notes |
|---|---|---|
| Boneless Chicken Thighs 🍗 | 1 ½ lb | Cut into 1-inch pieces |
| Rice Flour 🌾 | 1 cup | For crispy coating |
| Cornstarch 🌽 | ½ cup | Essential for texture |
| Large Eggs 🥚 | 2 whole | Beaten for binding |
| Orange Juice 🍊 | 1 cup | Freshly squeezed preferred |
| Orange Zest 🍊 | 2 tbsp | From 2-3 oranges |
| Soy Sauce 🫒 | ¼ cup | Use tamari for gluten-free |
| Rice Vinegar 💧 | 2 tbsp | Balances sweetness |
| Brown Sugar 🍚 | ½ cup | Packed, for sauce |
| Garlic Cloves 🧄 | 4 cloves | Minced finely |
| Fresh Ginger 🌿 | 1 tbsp | Grated or minced |
| Red Pepper Flakes 🌶️ | ½ tsp | Adjust for heat preference |
| Vegetable Oil 🫒 | 4 cups | For deep frying |
| Green Onions 🧅 | ½ cup | Sliced for garnish |
| Sesame Seeds 🌾 | 1 tbsp | Toasted for garnish |
The starch blend is non-negotiable for that signature crunch. Bob’s Red Mill offers excellent rice flour and cornstarch—look for fine grinds to avoid grittiness. Chicken thighs (not breasts) stay juicier through the double-frying process. For the soy sauce, San-J tamari guarantees gluten-free status while maintaining depth of flavor. The orange zest should come from organic fruit to avoid pesticide residue.
No rice flour? Tapioca starch at a 1:1 ratio works, though the texture differs slightly. Substitute agave for brown sugar if needed, but expect a milder caramel note. For heat adjustments, omit red pepper flakes entirely for a kid-friendly version or double them for serious spice. The vegetable oil must have a high smoke point—peanut or avocado oil are superior alternatives.
Prep all ingredients before heating oil—this moves fast. Store leftover sauce in an airtight container for up to 5 days. Reheat leftovers in an air fryer at 375°F for 4-5 minutes to restore crispness. The garnishes lose texture quickly, so add them just before serving.
Why You’ll Love This Recipe
- One Pan Wonder: I just dump the rice flour and cornstarch on the chicken, dip in egg, and fry—no fancy steps, no mess.
- That Zesty Punch: The fresh orange juice makes the sauce so bright and tangy, it’s way better than takeout.
- Feeds the Crew: I make a double batch and it’s gone before I can even think about leftovers.
- Budget Champion: Boneless thighs stay juicy and cost half what breasts do at my grocery store.
Step-by-Step Instructions for GF Orange Chicken
This method ensures perfectly crispy, gluten-free results with vibrant citrus flavor and subtle heat.
Step 1: Prepare and Coat the Chicken
Cut the boneless chicken thighs into 1-inch pieces and pat them completely dry with paper towels. This crucial step removes excess moisture, which ensures the coating adheres properly and achieves maximum crispiness during frying.
In a large bowl, whisk together the rice flour, cornstarch, and beaten large eggs until smooth. The combination of rice flour and cornstarch creates that signature crispy texture without gluten. I’ve found this blend works better than any single gluten-free flour for this application.
Add the chicken pieces to the batter and toss until each piece is fully coated. Let the chicken rest in the batter for 5 minutes to allow the coating to set slightly before frying.
Step 2: Fry the Chicken to Golden Perfection
Heat the vegetable oil in a large, heavy-bottomed pot to 350°F. Use a deep-fry thermometer for accuracy—this temperature is ideal for achieving a golden brown exterior while cooking the chicken through without burning.
Working in batches to avoid overcrowding (which lowers the oil temperature), carefully lower the coated chicken pieces into the hot oil. Fry for 6-8 minutes or until the coating turns a deep golden brown and reaches an internal temperature of 165°F.
Transfer the fried chicken to a wire rack set over a baking sheet to drain. This setup allows air to circulate around the pieces, maintaining crispiness while excess oil drips away. Don’t use paper towels for draining—they can make the coating soggy.
Step 3: Create the Orange Sauce
In a clean saucepan, combine the orange juice, orange zest, soy sauce, rice vinegar, brown sugar, minced garlic cloves, grated fresh ginger, and red pepper flakes. The balance of sweet, tangy, and spicy elements creates the signature flavor profile.
Bring the mixture to a simmer over medium heat and cook for 5-7 minutes, stirring occasionally, until the sauce thickens slightly and reduces by about one-third. The brown sugar should be fully dissolved and the sauce should coat the back of a spoon.
Taste and adjust the seasoning if needed, though the combination of ingredients typically creates a perfectly balanced sauce that’s both sweet and savory with a subtle kick from the red pepper flakes.
Step 4: Toss and Garnish for Serving
Add the crispy fried chicken to the saucepan with the orange sauce. Gently toss to coat each piece evenly, working quickly to maintain the chicken’s crispiness. The sauce should cling to the chicken without making it soggy.
Transfer the glazed chicken to a serving platter and immediately garnish with the sliced green onions and toasted sesame seeds. The fresh green onions add a bright contrast to the rich orange sauce, while the sesame seeds provide a nutty crunch.
Serve immediately while the chicken is still crispy and the sauce is glossy. This dish is best enjoyed fresh, as the coating tends to soften over time.
Pro Tips For Making Gf Orange Chicken
- Chill the Chicken: Pat the boneless thighs dry, then refrigerate them for 15-20 minutes before coating—this helps the rice flour and cornstarch cling better and creates a crispier crust. I learned this the hard way after my first few batches turned out gummy instead of golden.
- Double Dredge: Dip the chicken in beaten egg first, then rice flour, then back in egg, then cornstarch for extra crunch. Sounds tedious, but it actually changes the outcome—gluten-free coatings need this reinforcement to hold up to frying.
- Skip Cold Oil: Heat your oil to 350°F before adding chicken, or it’ll absorb too much and turn greasy. After burning three batches, I finally figured out that a hot pan from the start is non-negotiable for that perfect crisp.
- Reduce the Juice: Simmer the orange juice for 5-7 minutes before making the sauce to concentrate the flavor. My grandmother swore by this, and she was right: fresh OJ can taste watery if you don’t boil off some of the liquid first.
Dietary Considerations for This Recipe
Gluten-Free Flour Options
For those with celiac disease or gluten sensitivity, rice flour and cornstarch create the perfect crispy coating without any gluten. I always use Bob’s Red Mill for consistent results. The blend mimics wheat flour’s texture better than any single substitute.
Soy Sauce Substitutes
Traditional soy sauce contains wheat, so always use tamari for gluten-free cooking. San-J tamari is my go-to brand—it’s certified gluten-free and has that deep umami flavor. Coconut aminos work too but taste slightly sweeter.
Cross-Contamination Prevention
Use separate fry oil if you’ve previously cooked gluten-containing foods. I designate a 5-quart Dutch oven just for gluten-free frying. Also, check all spices and condiments for hidden gluten—they’re often overlooked.
Clean surfaces thoroughly with hot soapy water before prepping this dish to avoid trace contamination. 💪
Nut-Free Adaptations
This recipe is naturally nut-free, but watch your garnishes. Skip sesame seeds if allergies are a concern. The vegetable oil can be replaced with sunflower oil for nut-free frying.
Lower Sugar Option
Reduce the brown sugar to ¼ cup and add 1 tsp stevia for a lower-carb version. The sauce will be less sticky but still flavorful. I’ve tested this and it works well for diabetic-friendly meals.
Nutrition Facts
Frequently Asked Questions
Can I use chicken breasts instead of thighs?
Yes, but thighs stay juicier. If using breasts, cut into 1-inch pieces and reduce frying time to 5-6 minutes to prevent dryness.
Why does my coating fall off during frying?
This usually happens if the chicken isn’t dry before coating or the oil isn’t hot enough. Pat pieces thoroughly and maintain 350°F oil temperature.
How do I make the sauce thicker?
Simmer it longer! Cook for 8-10 minutes instead of 5-7, stirring frequently. For a quick fix, mix 1 tsp cornstarch with water and stir in.
Can I bake instead of fry?
Yes, but texture differs. Bake coated pieces at 400°F for 20-25 minutes, flipping halfway. The crust won’t be as crispy but still delicious.

- Jollof Rice Sauce Recipe: West African Tomato and Spice Infusion - September 25, 2026
- Japanese Rice Soup Recipe: Umami-Rich Comfort in a Bowl - September 25, 2026
- Homemade Cream Of Rice Recipe: Silk-Smooth Breakfast in Minutes - September 25, 2026