
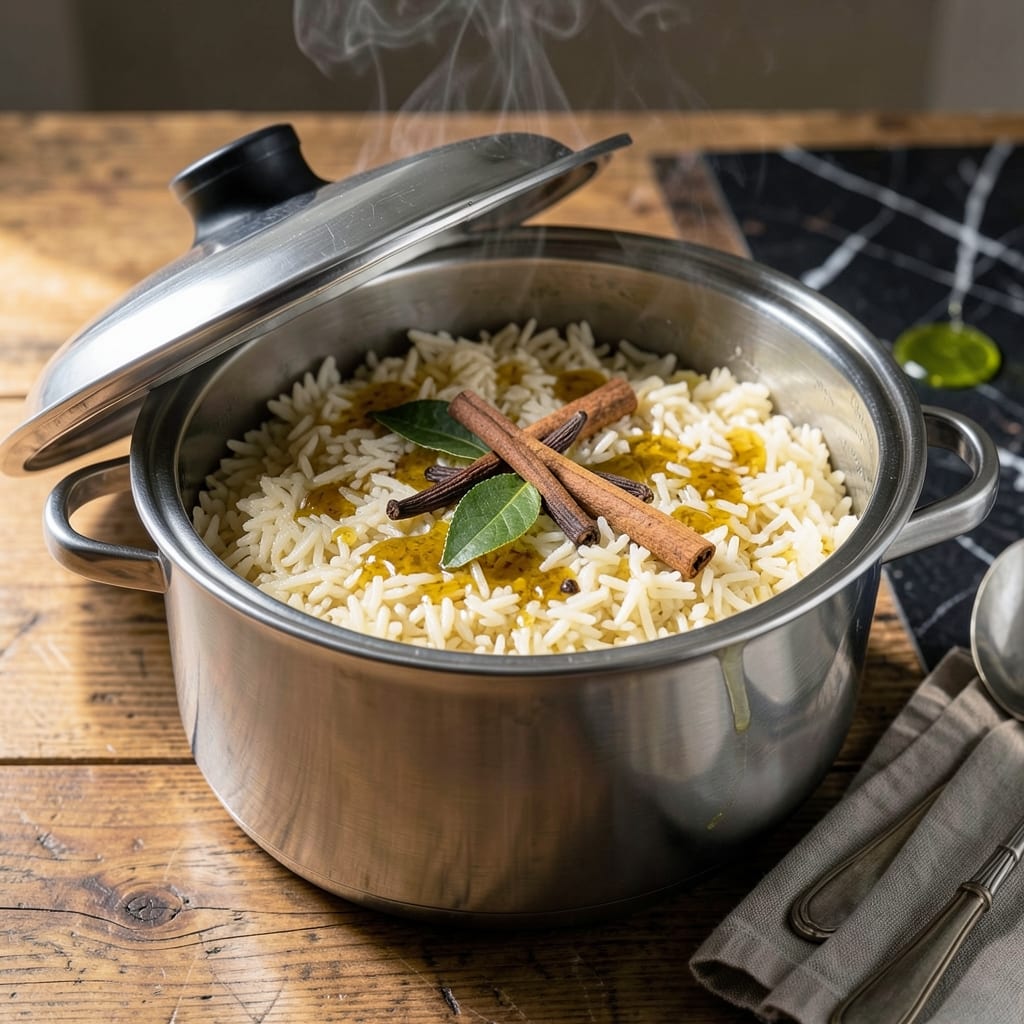
I developed this pressure cooker method after too many pots of unevenly cooked rice in my tiny Boston kitchen. The result is fragrant basmati with perfectly separate grains and a rich golden hue from the ghee.
Using a pressure cooker locks in steam for consistent results every time, while ghee adds depth that butter can’t match. The technique is foolproof—no stirring, no burning, just perfect rice in 15 minutes.
Each bite delivers the nutty aroma of toasted basmati and the rich, caramelized flavor of clarified butter. The rice stays fluffy for hours, making it ideal for meal prep or dinner parties.
Serve as a base for curries or alongside grilled meats. This method never fails me, even in the most temperament kitchen.
Ingredients for Ghee Rice Recipe in Pressure Cooker
Fragrant basmati and rich ghee create this foolproof pressure cooker rice with golden color.
| Ingredient | Amount | Notes |
|---|---|---|
| Basmati Rice 🌾 | 2 cups | Rinsed until water runs clear |
| Ghee 🧈 | 3 tbsp | Clarified butter, unsalted |
| Water 💧 | 3 cups | Or vegetable broth for extra flavor |
| Whole Cloves 🌿 | 2 whole | Optional for aroma |
| Bay Leaf 🍃 | 1 whole | Dried or fresh |
| Cinnamon Stick 🌰 | 1 piece | Optional for depth |
| Green Cardamom Pods 🌿 | 2 whole | Lightly crushed |
| Salt 🧂 | 1 tsp | Adjust to taste |
| Cumin Seeds 🌿 | ½ tsp | Toasted lightly |
| Fresh Cilantro 🌿 | ¼ cup | Chopped, for garnish |
The ghee is non-negotiable for that caramelized depth—Patel Brothers or Whole Foods carry high-quality options (look for grass-fed if possible). Basmati matters too: Tilda or Daawat brands give consistent results. For whole spices, Indian grocery stores have the best selection and prices. Cloves, cardamom, and cinnamon should be fresh (smell them—if there’s no aroma, they’re too old).
No ghee? Clarified butter works but lacks that nutty richness. Skip the whole spices? Ground cumin and a pinch of allspice get you close. For liquid, vegetable broth adds depth, but water works too. The cilantro is optional but brightens the dish—substitute with fresh parsley if that’s what you have.
Rice stays fluffy for hours at room temperature. Store leftovers in an airtight container for up to 5 days in the fridge. Reheat with a splash of water in the microwave to restore moisture. Freezes well for up to 3 months.
Why You’ll Love This Recipe
- One Pot Magic: I just dump everything in the pressure cooker and walk away—no stirring, no watching, no fuss.
- Rich and Fragrant: The ghee toasts the cloves and bay leaf into this warm, nutty aroma that fills the whole kitchen.
- Feeds Everyone: It’s my go-to for potlucks, lazy Sundays, or even just a quick lunch when I’m craving something hearty.
- Leftovers Win: Honestly, it tastes even better the next day—if there’s any left, that is.
Step-by-Step Instructions for Ghee Rice in Pressure Cooker
This method ensures perfectly fragrant basmati with golden hues every single time.
Step 1: Rinse and Soak the Basmati Rice
Place the 2 cups Basmati Rice in a fine-mesh strainer and rinse under cold running water until the water runs completely clear. This removes excess starch that would otherwise make the rice gummy.
Transfer the rinsed rice to a bowl and cover with water. Let it soak for 20-30 minutes. Soaking plumps the grains and ensures even cooking. Drain thoroughly before using—wet rice will make your final dish mushy.
Step 2: Temper the Whole Spices in Ghee
Set your pressure cooker to the sauté function and add the 3 tbsp Ghee. Once it melts and becomes frothy, add the 2 whole Whole Cloves, 1 whole Bay Leaf, 1 piece Cinnamon Stick, 2 whole Green Cardamom Pods, and 0.5 tsp Cumin Seeds.
Sauté for 1-2 minutes until the spices become fragrant and the cumin seeds start to sizzle. Be careful not to burn them—burnt spices taste bitter. The ghee should turn a light golden color and smell nutty.
Step 3: Toast the Rice with Spices
Add the drained 2 cups Basmati Rice to the pressure cooker and stir to coat every grain with the spiced ghee. Toast the rice for 2-3 minutes until it turns slightly translucent at the edges and smells nutty and aromatic.
This step builds flavor and prevents the rice from turning mushy. Stir frequently to ensure even toasting and prevent sticking. You’ll notice the rice grains start to look slightly glassy—that’s your visual cue.
Step 4: Pressure Cook to Perfection
Pour in the 3 cups Water and add the 1 tsp Salt. Stir gently to distribute the rice and spices evenly. Secure the pressure cooker lid and set it to cook on high pressure for 5 minutes.
Once the cooking time is complete, let the pressure release naturally for 10 minutes, then quick-release any remaining pressure. Do not skip the natural release—it prevents the rice from becoming overcooked and sticky.
Step 5: Fluff and Garnish
Carefully open the lid and fluff the rice gently with a fork to separate the grains. The rice should be tender, with each grain distinct and glossy from the ghee.
Transfer to a serving dish and garnish with the 0.25 cup Fresh Cilantro. Let it sit covered for 5 minutes before serving to allow the flavors to meld. The cilantro adds a fresh, bright contrast to the rich, spiced rice.
Pro Tips For Making Ghee Rice Recipe In Pressure Cooker
- Soak the Rice: Give basmati rice a 20-minute soak in cold water before cooking—it swells just enough to prevent the grains from turning mushy in the pressure cooker.
- Toast the Spices: Heat ghee in the pressure cooker first, then add cloves and bay leaf for 30 seconds until fragrant before adding rice; this wakes up their oils and flavors.
- Skip the Stir: After adding water, resist stirring—just swirl the pot gently to avoid breaking the rice grains before pressure cooking.
- Use Less Water: I learned this the hard way—cut the water by 1/4 cup compared to regular rice cooking; the sealed pressure cooker traps steam, so too much water turns rice to paste.
Storing and Reheating This ghee rice recipe in pressure cooker
Refrigerator Storage
Let your rice cool completely—this prevents condensation that can make it soggy. Transfer to an airtight container and store in the fridge for up to 5 days. I use Pyrex glass containers since they don’t absorb odors and are easy to clean. ❄️
Freezer Storage
For longer storage, portion the rice into freezer-safe bags or containers. Squeeze out excess air to prevent freezer burn. It keeps beautifully for up to 3 months. Label with the date—I learned this the hard way after finding mystery containers in my tiny freezer.
Microwave Reheating
Add 1-2 tbsp water per cup of rice, cover with a damp paper towel, and microwave on medium power for 1-2 minutes. Stir and repeat until heated through. This method restores moisture without making the rice mushy. 🔥
Stovetop Reheating
Heat in a skillet with a splash of water or ghee over low heat for 5-7 minutes. Stir occasionally to prevent sticking. This revives the ghee’s aroma and keeps the grains separate, just like fresh.
Meal Prep Tip
This rice reheats so well that I often make a double batch. Store in individual portions for quick lunches. A sprinkle of fresh cilantro after reheating brightens up the flavors. Honestly, it tastes almost as good as the first day.
Nutrition Facts
Frequently Asked Questions
Do I need to soak the rice first?
Yes, soaking for 20-30 minutes plumps the grains and ensures even cooking. Skipping this step may result in unevenly cooked rice with some hard centers.
Can I use regular butter instead of ghee?
You can, but ghee has a higher smoke point and richer flavor. Butter may burn during sautéing and lacks the nutty depth. Use clarified butter as a closer substitute.
Why did my rice turn mushy?
Mushy rice often means too much water or over-stirring. Use exactly 3 cups water for 2 cups rice and avoid stirring after pressure cooking. Let it rest 10 minutes before releasing pressure.
Can I skip the whole spices?
Yes, but they add authentic aroma. Substitute with ½ tsp ground cumin and a pinch of allspice if needed. The ghee still provides rich flavor even without spices.

- Cream of Wild Rice Soup Recipe: Earthy Grains in Silky Broth - October 9, 2026
- Filipino Garlic Rice Recipe: Crispy Fried Aroma With Every Bite - October 9, 2026
- Gobi Manchurian Rice Recipe: Indo-Chinese Fusion in One Bowl - October 9, 2026