
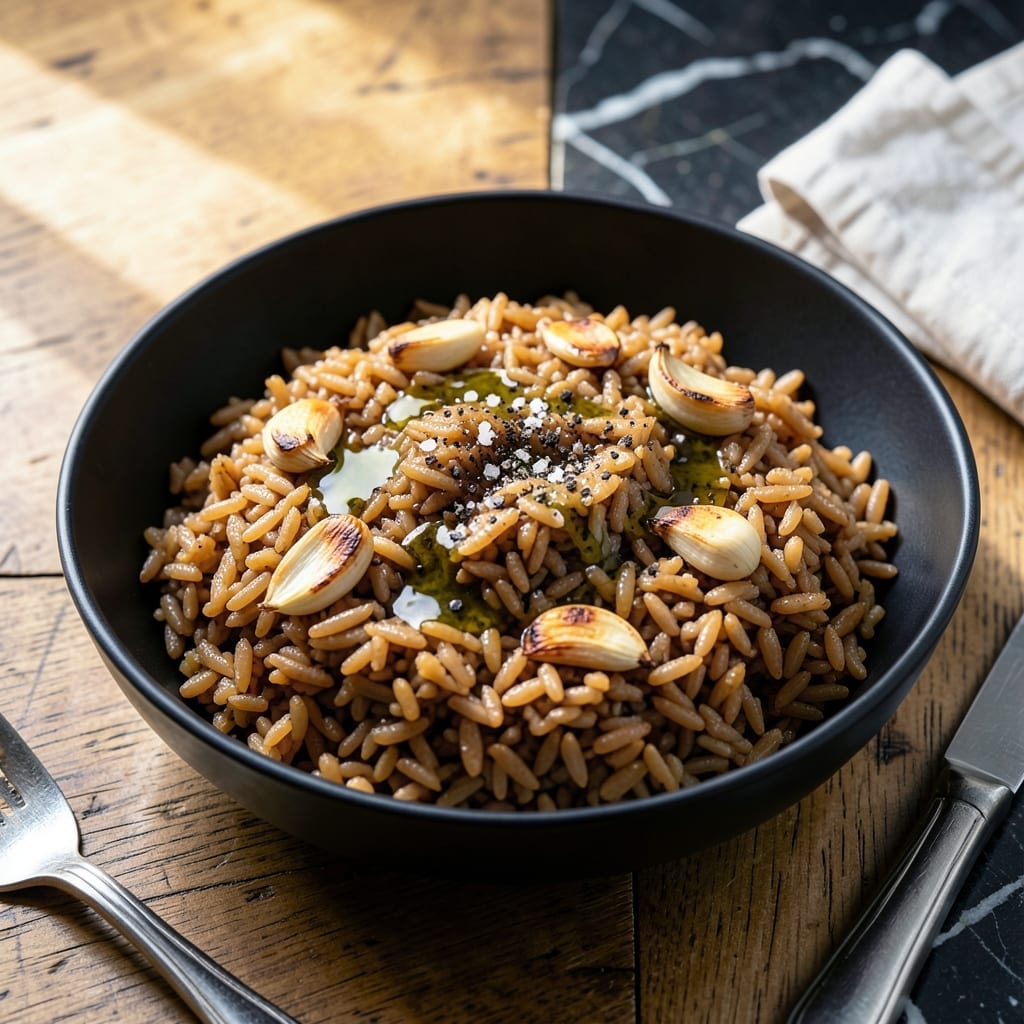
Brown rice delivers a satisfying nutty flavor and chewy texture that pairs perfectly with any meal. This naturally gluten-free dish is a staple worth mastering.
With just a few basic ingredients and proper technique, you’ll achieve perfectly cooked grains every time. The process is straightforward yet delivers impressive results.
Ingredients for Gluten Free Brown Rice
These wholesome ingredients transform into perfectly cooked brown rice with nutty depth and satisfying chew.
| Ingredient | Amount | Notes |
|---|---|---|
| Long-Grain Brown Rice 🌾 | 2 cups | Rinsed thoroughly before cooking |
| Water 💧 | 4 ½ cups | Filtered for best results |
| Extra-Virgin Olive Oil 🫒 | 1 tbsp | Cold-pressed preferred |
| Sea Salt 🧂 | ¾ tsp | Fine grain for even distribution |
| Freshly Ground Black Pepper 🌶️ | ½ tsp | Adjust to taste preference |
| Garlic Cloves 🧄 | 2 cloves | Minced for aromatic depth |
| Bay Leaf 🍃 | 1 whole | Optional for subtle earthiness |
| Vegetable Broth 🥕 | ½ cup | Low-sodium recommended |
| Lemon Zest 🍋 | 1 tsp | Brightens flavor profile |
| Chopped Fresh Parsley 🌿 | 2 tbsp | For garnish and freshness |
The brown rice quality is paramount. Lundberg or Basmati varieties from Whole Foods or Trader Joe’s offer superior texture and flavor. Look for organic certification and check the packaging date—fresher rice cooks more evenly. The olive oil should be cold-pressed and extra-virgin for optimal aroma. A heavy pot with a tight lid prevents steam loss during cooking.
Substitute vegetable broth with water if unavailable, though the depth of flavor will be reduced. Mushroom broth adds umami as an alternative. No fresh garlic? Garlic powder at one-third the amount works in a pinch. For a citrus variation, lime zest can replace lemon. The parsley garnish can be swapped for fresh cilantro or green onions depending on the accompanying dish.
Cooked rice keeps for 4-5 days in an airtight container in the refrigerator. For longer storage, freeze in portions for up to 3 months. Reheat with a splash of water to restore moisture. Always rinse rice before cooking to remove excess starch and prevent gummy texture.
Why You’ll Love This Recipe
- Hands-Off Cooking: I just combine rice, water, and a drizzle of olive oil, then let it simmer—no stirring, no fuss.
- Nutty Depth: The brown rice toasts slightly in the oil, giving it this rich, almost popcorn-like flavor that sea salt enhances perfectly.
- Meal Prep MVP: Honestly, it’s my base for everything—bowls, stir-fries, even salads—and stays great in the fridge for days.
- Budget Stretch: One bag of long-grain brown rice feeds us for multiple meals, and it’s cheaper than any takeout side I’ve seen.
Step-by-Step Instructions for Gluten Free Brown Rice
This method ensures perfectly cooked grains with distinct texture and rich, layered flavor.
Step 1: Prepare the Rice and Aromatics
Place the 2 cups Long-Grain Brown Rice in a fine-mesh strainer and rinse under cold running water until the water runs clear. This removes excess starch that can make the grains gummy. Shake gently to remove all surface moisture.
In a medium saucepan, heat the 1 tbsp Extra-Virgin Olive Oil over medium heat until it shimmers. Add the 2 cloves Garlic Cloves, minced, and sauté for 30-45 seconds until fragrant but not browned. Stir in the 0.75 tsp Sea Salt, 0.5 tsp Freshly Ground Black Pepper, and 1 whole Bay Leaf, toasting them briefly to release their essential oils.
Step 2: Toast the Rice for Enhanced Flavor
Add the rinsed and drained 2 cups Long-Grain Brown Rice to the saucepan with the aromatics. Stir to coat the grains evenly with the oil and spices. Cook for 2-3 minutes, stirring constantly, until the rice becomes slightly translucent at the edges and emits a nutty aroma.
This toasting step deepens the natural nuttiness of the brown rice and ensures each grain absorbs maximum flavor. Be careful not to let the garlic burn—if it starts to darken, reduce the heat immediately. The rice should sizzle gently without browning.
Step 3: Add Liquids and Bring to a Simmer
Pour in the 4.5 cups Water and 0.5 cup Vegetable Broth, then stir in the 1 tsp Lemon Zest. The liquids should cover the rice by about ½ inch. Increase the heat to high and bring the mixture to a full rolling boil.
Once boiling, reduce the heat to low, cover the saucepan with a tight-fitting lid, and let it simmer gently. The goal is a steady but gentle simmer—you should see small bubbles breaking the surface, not a vigorous boil. This controlled heat prevents the rice from cooking unevenly or becoming mushy.
Step 4: Cook Until Tender and Absorb Liquids
Let the rice cook, undisturbed, for 40-45 minutes. Avoid lifting the lid during this time, as it releases steam and lowers the cooking temperature, which can result in undercooked grains. The rice is done when all the liquid has been absorbed and the grains are tender with a slight chew.
To check for doneness, tilt the saucepan slightly—if no liquid pools at the edge, it’s ready. Alternatively, taste a grain: it should be fully cooked through with no hard center. If the rice is still firm, add 2-3 tablespoons of hot water, cover, and cook for another 5 minutes.
Step 5: Rest and Garnish Before Serving
Remove the saucepan from the heat and let the rice rest, covered, for 10 minutes. This allows the grains to steam gently and absorb any remaining moisture, ensuring even texture throughout. Discard the 1 whole Bay Leaf before serving.
Fluff the rice with a fork to separate the grains, then transfer to a serving dish. Garnish with the 2 tbsp Chopped Fresh Parsley for a bright, fresh contrast to the earthy rice. Serve immediately while hot, as the rice will continue to firm up slightly as it cools.
Pro Tips For Making Gluten Free Brown Rice
- Soak the Rice: I learned this the hard way—giving long-grain brown rice a 30-minute soak in warm water cuts the cooking time and guarantees even tenderness. Sounds tedious, but it actually changes the outcome.
- Use Extra Water: Brown rice needs more liquid than white, so bump the water ratio to 2.5 cups per 1 cup of rice. After burning one too many batches, I finally figured out this was the culprit.
- Salt the Water: Add the sea salt to the boiling water before the rice goes in, not after—my grandmother swore by this, and she was right. It seasons the grains evenly from the start.
- Let It Steam: Once the water’s absorbed, turn off the heat, cover the pot, and let it sit for 10 minutes. I skip this when I’m lazy, but the rice is noticeably fluffier when I don’t.
Flavor Customization for This Recipe
Herb Infusions
Swap the Bay Leaf for 2 sprigs fresh rosemary or 3 sprigs thyme for a more pronounced herbal note. I love adding 1 tsp dried sage for a warm, earthy depth that pairs beautifully with roasted vegetables. 🌿
Spice Variations
For a bolder flavor, add ½ tsp ground cumin or ¼ tsp turmeric with the rice during toasting. A pinch of cayenne pepper brings subtle heat. These spices complement the nutty brown rice without overpowering it.
Citrus Twists
Replace the Lemon Zest with lime or orange zest for a different citrus brightness. I often add 1 tbsp fresh lime juice at the end for an extra zing. This works especially well with Mexican-inspired dishes.
Umami Boosters
Stir in 1 tbsp nutritional yeast after cooking for a cheesy, umami-rich flavor. Alternatively, add 1 tsp soy sauce (ensure gluten-free) to the cooking liquid. These small additions make a noticeable difference in depth.
Nutty Additions
Toast ¼ cup chopped almonds or walnuts and fold them into the finished rice. The crunch contrasts beautifully with the chewy grains. I also love adding 2 tbsp toasted sesame seeds for an Asian-inspired touch. 🔥
Fresh Finishes
Beyond parsley, try garnishing with chopped cilantro, green onions, or fresh dill. A sprinkle of pomegranate seeds adds color and a sweet-tart pop. These fresh elements elevate the dish visually and flavor-wise.
Nutrition Facts
Frequently Asked Questions
Why rinse brown rice before cooking?
Rinsing removes excess starch that can make grains gummy. It also eliminates dust or debris from processing. Use cold water until it runs clear for best results.
Can I use a rice cooker instead of a pot?
Yes! Use the same 1:2.25 rice-to-liquid ratio and follow your cooker’s brown rice setting. Most take 45-50 minutes with automatic warm holding.
How do I fix undercooked rice?
Add 2-3 tablespoons hot water, cover, and cook for another 5 minutes. Check for doneness—grains should be tender with no hard center.
What’s the best way to store leftovers?
Keep in an airtight container in the fridge for 4-5 days or freeze for up to 3 months. Reheat with a splash of water to restore moisture.

- El Pollo Loco Spanish Rice Recipe: Smoky Tomato-Infused Side Dish - October 11, 2026
- Fresh Black Beans and Rice Recipe: Latin-Inspired One-Bowl Heartiness - October 11, 2026
- Empire Ghee Rice Recipe: Fragrant Basmati With Golden Clarity - October 11, 2026