
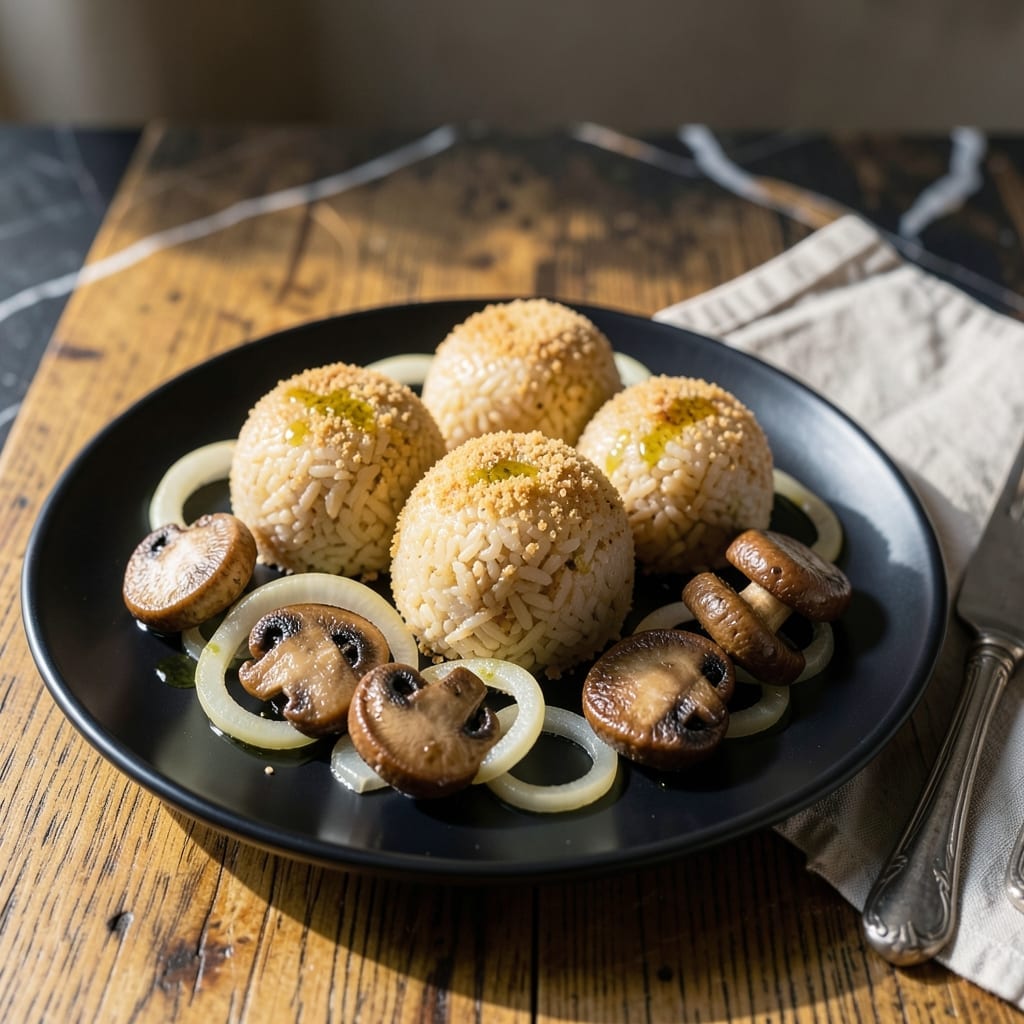
These rice balls deliver crispy golden exteriors with perfectly soft, sticky centers every time. The gluten-free coating stays light and airy while protecting the tender filling inside.
I developed this method after testing multiple binding techniques to ensure they hold together without gluten. The result is a foolproof approach that works with any filling you choose.
Ingredients for Gluten Free Rice Balls
A handful of pantry staples transforms into crispy, golden rice balls with tender centers.
| Ingredient | Amount | Notes |
|---|---|---|
| Sushi Rice 🍚 | 2 cups | Short-grain, rinsed until clear |
| Water 💧 | 2 ½ cups | For cooking rice |
| Gluten-Free Breadcrumbs 🍞 | 1 ½ cups | Panko-style for crispiness |
| Cornstarch 🌾 | ½ cup | For binding and coating |
| Mushrooms 🍄 | 1 cup | Finely chopped for filling |
| Onion 🧅 | ½ whole | Minced for filling |
| Garlic Cloves 🧄 | 3 cloves | Minced for filling flavor |
| Extra-Virgin Olive Oil 🫒 | ¼ cup | For sautéing filling |
| Sea Salt 🧂 | 1 tsp | Divided for seasoning |
| Black Pepper 🌶️ | ½ tsp | Freshly ground preferred |
| Nutritional Yeast 🧀 | 2 tbsp | For cheesy flavor in filling |
| Vegetable Broth 🥫 | ½ cup | Low-sodium for filling moisture |
| Avocado Oil 🫒 | 2 cups | For deep frying crisp coating |
The rice is non-negotiable here. Short-grain sushi rice provides the sticky texture essential for binding—long-grain varieties won’t hold. Koshihikari or Nishiki are premium choices, but any short-grain works. Whole Foods and Asian markets typically stock these. For the gluten-free breadcrumbs, Aleia’s or Ian’s brands are reliable, but check labels carefully for hidden gluten.
Need a nut-free version? Swap nutritional yeast for miso paste (1 tbsp) in the filling. No mushrooms? Chopped zucchini or spinach (sautéed and drained) works equally well. The cornstarch can be replaced with arrowroot powder at a 1:1 ratio. For frying, sunflower oil or peanut oil are excellent alternatives to avocado oil—all have high smoke points.
Cooked rice balls keep in the fridge for 2-3 days in an airtight container. Reheat in an oven at 350°F to restore crispiness. The filling mixture can be prepped 1 day ahead and stored separately. For freezing, arrange cooled rice balls on a tray, freeze solid, then transfer to a bag—they’ll keep for 1 month.
Why You’ll Love This Recipe
- No-Fuss Rolling: I can shape these in minutes—just sticky sushi rice, a quick roll in gluten-free breadcrumbs, and they’re ready for the pan.
- Umami Bomb: The mushrooms soak into the rice, giving every bite that deep, savory richness I crave.
- Party or Lunchbox: I pack them for picnics, serve as appetizers, or toss in my kid’s lunch—they’re always a hit.
- Budget Stretcher: Honestly, a little rice and a handful of mushrooms go a long way, and leftovers reheat beautifully.
Step-by-Step Instructions for Gluten Free Rice Balls
Master the technique for achieving that perfect contrast of textures with these precise steps.
Step 1: Prepare and Cook the Sushi Rice
Rinse the 2 cups sushi rice under cold water until the water runs clear, about 4-5 rinses. This removes excess starch and prevents the rice from becoming gummy when cooked. Drain well in a fine-mesh strainer.
Combine the drained rice with 2.5 cups water in a rice cooker or saucepan. Cook until the water is absorbed and the rice is tender, about 20 minutes. Let it sit covered for 10 minutes to steam, then spread on a baking sheet to cool completely. The rice should be sticky but not wet.
Step 2: Sauté the Filling Vegetables
Heat the 0.25 cup extra-virgin olive oil in a skillet over medium heat. Add the minced 0.5 whole onion and cook for 3-4 minutes until translucent. Stir in the minced 3 cloves garlic cloves and cook for 30 seconds until fragrant.
Add the finely chopped 1 cup mushrooms, 1 tsp sea salt, 0.5 tsp black pepper, 2 tbsp nutritional yeast, and 0.5 cup vegetable broth. Cook for 8-10 minutes until the mushrooms are tender and the liquid has mostly evaporated. Transfer to a bowl and let cool completely.
Step 3: Shape the Rice Balls with Filling
With wet hands (to prevent sticking), take about ¼ cup of the cooled rice and flatten it in your palm. Place 1 tablespoon of the mushroom filling in the center, then fold the rice around it to form a ball. Press gently to seal—don’t compact too tightly or the rice will become dense.
Roll each ball between your palms to smooth the surface. You should have about 12-14 rice balls. Place them on a parchment-lined tray and refrigerate for 30 minutes to firm up. This chilling step is crucial to prevent the balls from falling apart during coating.
Step 4: Coat and Fry to Crispy Perfection
Set up a breading station with three shallow dishes. Place the 0.5 cup cornstarch in the first dish, beat 1 egg with 1 tablespoon water in the second, and put the 1.5 cups gluten-free breadcrumbs in the third. Roll each rice ball in the cornstarch, shaking off excess, then dip in the egg mixture, and finally coat thoroughly in the breadcrumbs.
Heat the 2 cups avocado oil in a deep, heavy-bottomed pot to 350°F. Fry the rice balls in batches for 3-4 minutes until golden brown and crispy on all sides. Use a slotted spoon to transfer them to a wire rack or paper towels to drain. Serve immediately while hot and crispy.
Pro Tips For Making Gluten Free Rice Balls
- Chill the Rice: Let the cooked sushi rice cool to room temperature before shaping—I learned this the hard way after my first batch turned into sticky, unmanageable blobs.
- Dust with Cornstarch: Lightly coat your hands with cornstarch while rolling to prevent sticking; it actually changes the outcome, especially with gluten-free breadcrumbs that can clump.
- Skip Soggy Mushrooms: Sauté mushrooms separately until all moisture evaporates before mixing into the rice, or they’ll turn your rice balls into a mushy mess.
- Double-Crumb Coat: Dip the rice balls in cornstarch, then egg wash, then gluten-free breadcrumbs twice for a crispier finish—sounds tedious, but it’s worth every second.
Best Sauces and Condiments for These Flavors
Classic Marinara Dip
Warm 1 cup marinara sauce with 1 tsp garlic powder and ½ tsp dried oregano for 5 minutes over low heat. I use Rao’s Homemade for its rich, chunky texture. The acidity cuts through the richness beautifully. 🍝
Spicy Sriracha Mayo
Mix ½ cup mayo with 1 tbsp sriracha and 1 tsp lime juice. This creamy, spicy dip adds a tangy kick. For extra flavor, add 1 tsp honey to balance the heat.
Creamy Vegan Ranch
Blend ½ cup vegan mayo, 1 tbsp apple cider vinegar, 1 tsp dried dill, and ½ tsp onion powder. This cool, herby dip pairs perfectly with the crispy coating. I love Just Mayo for this. ✨
Sweet Chili Glaze
Simmer ½ cup sweet chili sauce with 1 tbsp rice vinegar until slightly thickened. The sweet and tangy glaze complements the savory filling beautifully.
Tahini Lemon Sauce
Whisk ¼ cup tahini, 2 tbsp lemon juice, 1 tbsp maple syrup, and 2 tbsp water until smooth. This Middle Eastern-inspired sauce adds a nutty depth to each bite.
Nutrition Facts
Frequently Asked Questions
Can I bake these instead of frying?
Yes, bake at 375°F for 20-25 minutes, flipping halfway. The texture will be slightly different but still delicious. Spray with oil first for extra crispiness.
What can I use instead of cornstarch?
Arrowroot powder works as a 1:1 substitute. Tapioca starch is another good option but may create a slightly chewier coating. Always check for gluten-free certification.
Why did my rice balls fall apart?
This usually happens if the rice is too warm or not sticky enough. Ensure it’s completely cooled and use short-grain sushi rice. Chilling before frying also helps them hold shape.
Can I make these ahead?
Shape and refrigerate uncoated balls for up to 24 hours. Or freeze after coating for up to 1 month. Fry from frozen, adding 1-2 minutes extra.

- El Pollo Loco Spanish Rice Recipe: Smoky Tomato-Infused Side Dish - October 11, 2026
- Fresh Black Beans and Rice Recipe: Latin-Inspired One-Bowl Heartiness - October 11, 2026
- Empire Ghee Rice Recipe: Fragrant Basmati With Golden Clarity - October 11, 2026