
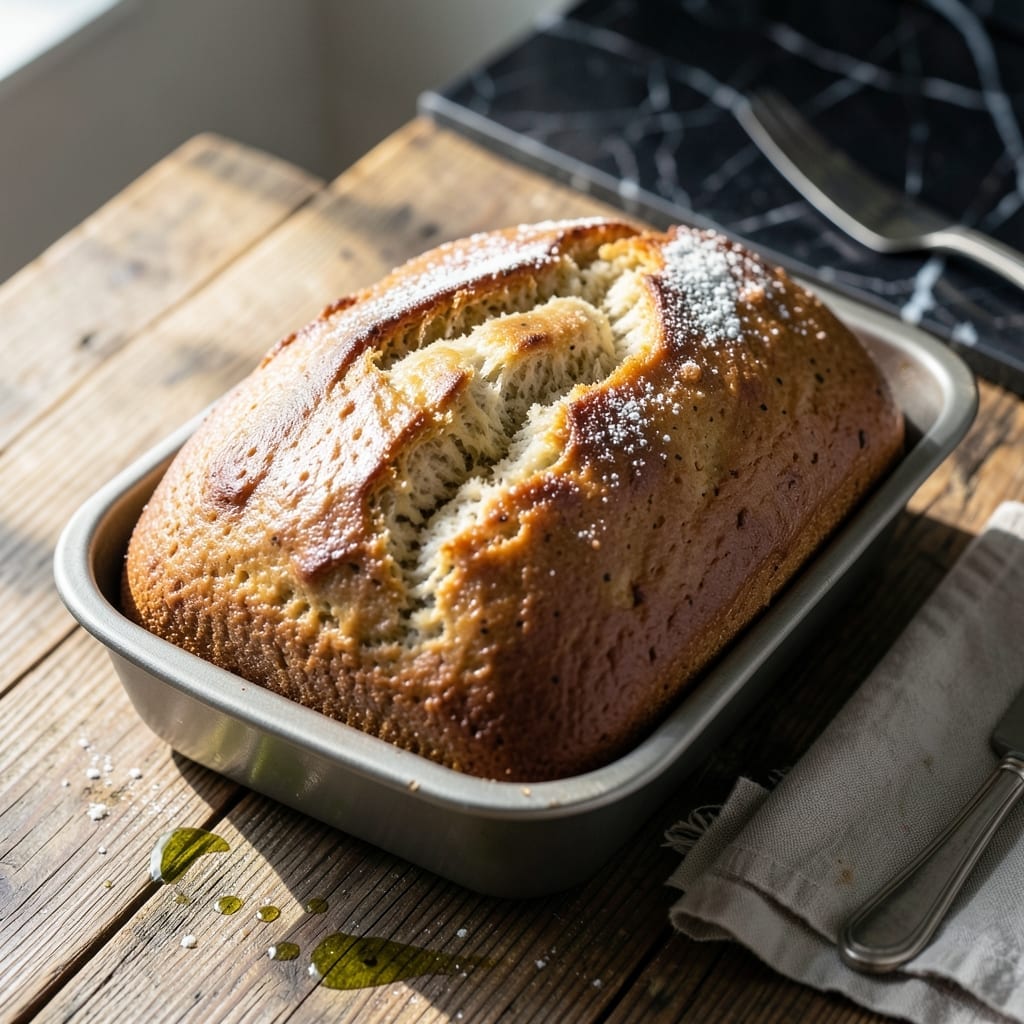
I developed this recipe after countless trials in my tiny Boston kitchen, where gluten-free baking often felt impossible. This method transforms simple rice flour into a light, fluffy loaf with the bread machine doing most of the work.
The key lies in the precise balance of rice flour, starches, and xanthan gum, which mimic gluten’s structure. I’ve tested this with various machines, and the timing remains consistent—no guesswork involved.
What emerges is a golden loaf with a soft crumb and just enough chew. The aroma alone makes the effort worthwhile, and it toasts beautifully the next morning.
Perfect for sandwiches, toast, or simply enjoying fresh from the machine. This is homemade bread without the hassle.
Ingredients for Gluten Free Rice Bread Machine
Simple pantry staples create a light, fluffy gluten-free loaf in your bread machine.
| Ingredient | Amount | Notes |
|---|---|---|
| White Rice Flour 🌾 | 2 cups | Fine grind, certified gluten-free |
| Brown Rice Flour 🌾 | 1 cup | Fine grind, certified gluten-free |
| Tapioca Starch 🌾 | ½ cup | Also called tapioca flour |
| Potato Starch 🥔 | ¼ cup | Not potato flour |
| Xanthan Gum 🧪 | 1 ½ tsp | Essential for gluten-free structure |
| Sugar 🍚 | 2 tbsp | Granulated, for yeast activation |
| Salt 🧂 | 1 tsp | Fine sea salt preferred |
| Active Dry Yeast 🍞 | 2 ¼ tsp | One packet, instant or bread machine |
| Water 💧 | 1 ½ cups | Warm, about 110°F |
| Olive Oil 🫒 | 2 tbsp | Light or extra-virgin |
| Apple Cider Vinegar 🍏 | 1 tbsp | For acidity and rise |
| Psyllium Husk Powder 🌿 | 1 tbsp | Optional, improves texture |
The rice flours are non-negotiable here. Bob’s Red Mill is my go-to for both white and brown—consistent grind, always gluten-free certified. Don’t swap potato starch for potato flour (they’re totally different). King Arthur also makes a solid gluten-free blend if you’re short on time, but I prefer controlling the ratios myself. Xanthan gum is key for structure (no substitutes).
No tapioca starch? Arrowroot powder at the same amount works in a pinch. Psyllium husk powder is optional but adds chew—find it at Whole Foods or Natural Grocers. The vinegar might seem odd, but it reacts with the yeast for better rise. If your yeast is old, test it in warm water with a pinch of sugar first (should foam in 5 minutes).
Store flours in the freezer to prevent rancidity—lasts 6-12 months. The loaf stays fresh for 3-4 days wrapped tightly, or slice and freeze for 3 months. Toast slices straight from frozen if needed.
Why You’ll Love This Recipe
- Hands-Off Baking: Just dump the rice flours, tapioca starch, and xanthan gum in the machine and walk away—no kneading, no fuss.
- Lightly Sweet Nuttiness: The brown rice flour gives it this subtle, toasty flavor that’s way better than store-bought gluten-free loaves.
- Sandwich Savior: Finally, a bread that holds up to turkey, jam, or avocado without crumbling into a sad pile of crumbs.
- Budget Stretcher: Here’s what sold me—those rice flours and starches cost pennies per slice compared to specialty bakery loaves.
Step-by-Step Instructions for Gluten Free Rice Bread
This hands-off method delivers a perfect loaf with minimal effort from you.
Step 1: Combine Dry Ingredients for Structure
In your bread machine pan, whisk together the 2 cups White Rice Flour, 1 cup Brown Rice Flour, 0.5 cup Tapioca Starch, and 0.25 cup Potato Starch. These four flours create the base that mimics wheat’s texture and rise.
Add the 1.5 tsp Xanthan Gum, 2 tbsp Sugar, and 1 tsp Salt to the pan. The xanthan gum replaces gluten’s elasticity, while sugar feeds the yeast and salt regulates its growth. Whisk until no lumps remain and the mixture looks uniform.
Step 2: Activate Yeast with Wet Ingredients
Create a well in the center of your dry ingredients. Pour in the 1.5 cups Water (warm to about 110°F), 2 tbsp Olive Oil, 1 tbsp Apple Cider Vinegar, and 1 tbsp Psyllium Husk Powder. The vinegar adds acidity that improves rise, while psyllium husk enhances moisture retention.
Use a spatula to gently stir the wet ingredients into the dry, just until combined—don’t overmix. The dough will look sticky and slightly shaggy, which is perfect for gluten-free bread. You should see small bubbles forming as the yeast begins to activate.
Step 3: Select Bread Machine Settings
Secure the pan in your bread machine and select the gluten-free setting. If your machine has a crust color option, choose medium. The gluten-free cycle typically runs 1 hour 40 minutes to 2 hours with a longer rise time to accommodate the denser dough.
Press start and let the machine do its work. During the first 5-10 minutes, watch through the window to ensure the paddle is properly mixing the dough. If it looks too dry, add 1-2 teaspoons water; if too wet, add 1-2 teaspoons White Rice Flour.
Step 4: Test and Cool for Optimal Texture
When the cycle completes, immediately check the internal temperature with a digital thermometer—it should read 200-210°F. If it’s below 200°F, return the pan to the machine for an additional 5-10 minutes on the bake setting.
Once done, carefully remove the pan using oven mitts and turn the loaf out onto a wire rack. Let it cool completely for at least 1 hour before slicing. This cooling period allows the structure to set, preventing a gummy texture. The bread should have a golden crust and spring back slightly when pressed.
Pro Tips For Making Gluten Free Rice Bread Machine
- Warm Your Liquids: I learned this the hard way—cold water or milk can make your rice bread dense. Use room temperature or slightly warm liquids (about 80°F) to help the xanthan gum activate properly.
- Measure Xanthan Gum Precisely: Sounds weird, but it works: too much xanthan gum makes bread gummy, too little and it crumbles. Stick to 1 teaspoon per cup of flour blend—no eyeballing.
- Skip the Overmixing: After burning three batches, I finally figured out that overmixing gluten-free bread dough develops too much air, leading to a collapsed loaf. Mix just until combined.
- Use a Light Grease: My grandmother swore by this, and she was right: lightly grease the bread pan with oil or non-stick spray before adding the dough to prevent sticking—gluten-free bread is stickier than you think.
Serving Suggestions for Leftovers
Toasted Perfection
Fresh from the machine, this loaf toasts beautifully for breakfast. I use my Cuisinart toaster on medium setting for 2-3 minutes until golden. Spread with almond butter or dairy-free cream cheese for a quick, satisfying morning bite. The crust gets crisp while the inside stays soft. 💛
Sandwich Star
Once cooled, slice thin for sandwiches that hold up without crumbling. I love it with turkey, avocado, and mustard—the mild rice flavor lets the fillings shine. Press lightly when assembling to prevent squishing the soft texture.
Soup Companion
Warm slices make an excellent companion to soups and stews. The bread soaks up broth without falling apart. I serve it with my New England clam chowder for dipping. A sprinkle of dried herbs on top adds extra flavor.
Sweet Treats
Transform leftovers into French toast by soaking slices in a mix of almond milk, 1 egg, and cinnamon. Cook on medium heat until golden. The bread’s density holds up perfectly to the custard coating.
Garlic Bread Twist
Mix 3 tbsp olive oil with minced garlic and parsley, then brush on slices. Toast under the broiler for 2-3 minutes until fragrant. This works wonderfully as an appetizer or alongside pasta dishes.
Freezing for Later
Slice and freeze extras in a ziplock bag with parchment between slices. Toast straight from frozen when needed. This method keeps the bread fresh for up to 3 months without losing texture. ❄️
Nutrition Facts
Frequently Asked Questions
Can I use only white rice flour?
No, the mix of white and brown rice flours is essential. Brown adds fiber and structure, while white keeps the texture light. Using just one type will result in a denser, crumblier loaf.
Why is xanthan gum necessary?
Xanthan gum replaces gluten’s elasticity, binding the ingredients together. Without it, the bread won’t hold its shape and will be too crumbly. 1.5 tsp is the sweet spot for this recipe.
Can I skip the psyllium husk powder?
Yes, it’s optional but recommended. It improves moisture retention and texture. Without it, the loaf may be slightly drier but will still rise.
How do I know when it’s done?
Use a digital thermometer to check the internal temperature. It should read 200-210°F when fully baked. If it’s below 200°F, return it for 5-10 minutes.

- Furikake Rice Seasoning Recipe: Umami-Packed Japanese Blend for Any Meal - October 7, 2026
- Knorr Vegetable Soup Mix Rice Recipe: Savory One-Pot Side Dish - October 7, 2026
- Lebanese Lentil and Rice Soup Recipe: Mujadara-Inspired Warmth in a Bowl - October 7, 2026