
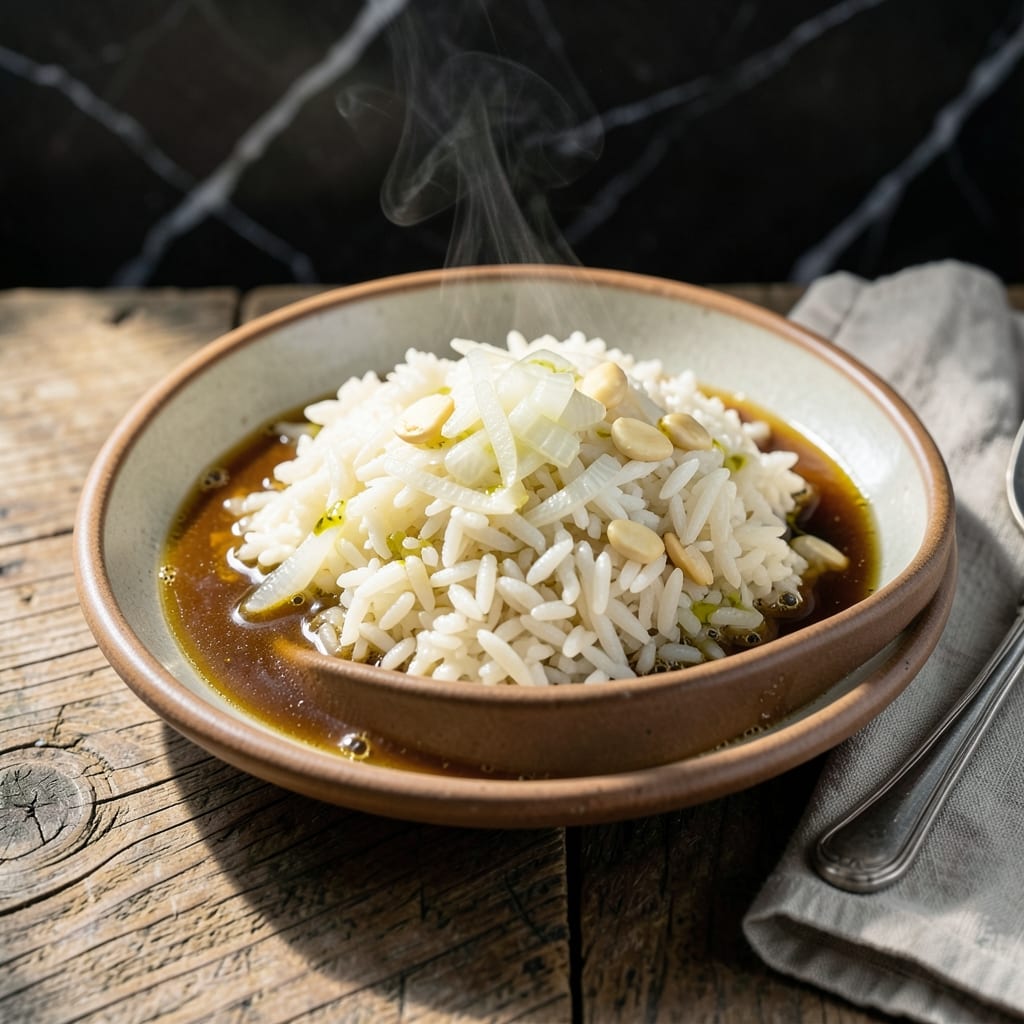
This method delivers perfectly fluffy rice with a subtle nutty flavor that transforms a simple side into something special. The technique is straightforward yet precise, ensuring consistent results every time.
By toasting the rice briefly before adding liquid, you unlock its natural aromas and create a depth of flavor that plain steamed rice lacks. The cooking process is simple but requires attention to detail for the best texture.
Ingredients for Gluten Free Rice
Simple pantry staples transformed into perfectly fluffy rice with nutty depth and vibrant flavor.
| Ingredient | Amount | Notes |
|---|---|---|
| Long-Grain White Rice 🍚 | 2 cups | Rinsed until water runs clear |
| Water 💧 | 4 cups | Filtered for best flavor |
| Olive Oil 🫒 | 1 ½ tbsp | Extra-virgin for toasting |
| Garlic Cloves 🧄 | 3 cloves | Minced or pressed |
| Onion 🧅 | ½ whole | Finely diced, yellow preferred |
| Vegetable Broth 🥕 | 1 cup | Low-sodium for control |
| Sea Salt 🧂 | 1 tsp | Fine grain for even distribution |
| Black Pepper 🌶️ | ¼ tsp | Freshly ground preferred |
| Bay Leaf 🍃 | 1 whole | Dried or fresh |
| Butter 🧈 | 1 tbsp | Vegan butter for dietary compliance |
| Lemon Juice 🍋 | 1 tbsp | Freshly squeezed for brightness |
| Fresh Parsley 🌿 | 2 tbsp | Chopped, for garnish |
The rice quality is non-negotiable. Jasmine or basmati deliver the best texture and aroma when toasted. Look for unbroken grains with minimal dust in the package—this ensures even cooking. I source mine from Whole Foods bulk bins for freshness, but any reputable grocery store brand works. The olive oil should be cold-pressed for the cleanest toasting flavor.
Need to swap the rice? Brown rice works but requires a 50% increase in liquid and cook time (or use a rice cooker). Out of vegetable broth? Water with a bouillon cube gets you close. No fresh parsley? Dried parsley at half the amount or fresh cilantro work fine. For the butter, Miyoko’s or Earth Balance are excellent vegan alternatives that melt beautifully.
Cooked rice keeps 4-5 days in an airtight container in the fridge. Reheat with a splash of water to restore moisture. For longer storage, freeze in portions for up to 3 months. Always rinse your rice first—removes excess starch for fluffier results.
Why You’ll Love This Recipe
- One Pot Wonder: I just toss in rice, water, olive oil, garlic, and onion—no fancy steps, no extra pans.
- Garlic-Infused Comfort: The sizzle of garlic and onion in olive oil makes every bite warm and aromatic.
- Meal Prep Hero: I make a big batch on Sunday and it pairs perfectly with proteins or veggies all week.
- Budget Stretch: A pound of rice feeds my family for days, and the ingredients cost pennies.
Step-by-Step Instructions for Fluffy Gluten Free Rice
This method delivers perfectly cooked grains with rich, layered flavor in every bite.
Step 1: Rinse and Toast the Rice
Place the 2 cups Long-Grain White Rice in a fine-mesh strainer and rinse under cold water until the water runs completely clear. This removes excess starch, which prevents the grains from becoming gummy during cooking.
In a medium saucepan with a tight-fitting lid, heat the 1.5 tbsp Olive Oil over medium heat. Add the rinsed rice and stir for 2-3 minutes until the grains turn slightly translucent and smell nutty. This toasting step enhances the natural aroma of the rice and adds depth to the final dish.
Step 2: Sauté Aromatics Until Fragrant
Add the 0.5 whole Onion (finely diced) to the saucepan with the toasted rice. Cook for 3-4 minutes, stirring occasionally, until the onion softens and becomes translucent.
Stir in the 3 cloves Garlic Cloves (minced or pressed) and cook for an additional 30 seconds until fragrant. Be careful not to let the garlic burn—it should smell sweet and aromatic, not bitter or acrid. The onion and garlic build a flavorful foundation for the rice.
Step 3: Add Liquids and Seasonings
Pour in the 4 cups Water and 1 cup Vegetable Broth, then add the 1 tsp Sea Salt, 0.25 tsp Black Pepper, and 1 whole Bay Leaf. Stir everything together, making sure to scrape up any browned bits from the bottom of the pan. These bits are packed with flavor and will dissolve into the cooking liquid.
Bring the mixture to a rolling boil over high heat. Once boiling, reduce the heat to low, cover the saucepan with the lid, and let it simmer gently. You should see just a few small bubbles breaking the surface—this ensures even cooking without scorching.
Step 4: Cook Until Liquid Is Absorbed
Let the rice simmer undisturbed for 18-20 minutes. Resist the urge to lift the lid and stir—this releases steam and can lead to uneven cooking. The rice is done when all the liquid has been absorbed and the grains are tender.
Turn off the heat and let the rice sit, covered, for an additional 5-10 minutes. This resting period allows the steam to redistribute, fluffing the grains and ensuring they’re light and separate. Remove and discard the bay leaf before serving.
Step 5: Finish and Serve
Gently fluff the rice with a fork to separate the grains. Stir in the 1 tbsp Butter and 1 tbsp Lemon Juice, which add richness and a bright, fresh note to balance the dish.
Transfer the rice to a serving dish and garnish with the 2 tbsp Fresh Parsley (chopped). The parsley adds a pop of color and a subtle herbal flavor that complements the nutty, savory rice. Serve warm and enjoy the fluffy texture and layered taste.
Pro Tips For Making Gluten Free Rice
- Rinse the Rice: Always rinse your long-grain white rice until the water runs clear—it removes excess starch and prevents a gummy texture, which is especially important for gluten-free dishes where texture matters most.
- Sauté the Aromatics: Cook the minced garlic and diced onion in olive oil for 2-3 minutes until soft and fragrant before adding water—this builds a flavor base that plain rice can’t match.
- Use the Right Ratio: Stick to a 1:1.5 rice-to-water ratio (1 cup rice to 1.5 cups water) and resist the urge to stir while cooking—it breaks the grains and turns your rice mushy.
- Rest Before Serving: After cooking, let the rice sit covered for 10 minutes off the heat. I learned this the hard way—it lets the steam redistribute so the texture is light and fluffy, not wet at the bottom.
Storing and Reheating gluten free rice
Refrigerator Storage
Let your rice cool completely before storing—I usually spread it on a baking sheet to speed this up. Transfer to airtight containers (I love glass Pyrex for visibility) and refrigerate at 40°F or below for up to 5 days. The flavors actually deepen overnight. ❄️
Freezer Storage
For longer storage, portion cooled rice into freezer-safe bags or containers. Remove excess air and freeze for up to 3 months. I recommend 1-cup portions for easy meal prep. Label with the date to track freshness.
Stovetop Reheating
My preferred method: Heat rice in a saucepan with 2 tbsp water or broth per cup over medium-low heat. Cover and stir occasionally for 5-7 minutes until heated through. This restores moisture beautifully. 🔥
Microwave Reheating
Place rice in a microwave-safe dish, sprinkle with 1-2 tsp water, and cover loosely. Heat on 70% power for 2-minute intervals, stirring between each, until reaching 165°F.
Reviving Dry Rice
If your rice seems dry after reheating, add 1 tbsp butter or olive oil and a splash of liquid. Stir gently and let it sit covered for 2-3 minutes. The steam will redistribute moisture evenly.
Storage Tip
Never leave rice at room temperature for more than 2 hours to prevent bacterial growth. This is especially important with rice dishes containing vegetables or broth. Safety first!
Nutrition Facts
Frequently Asked Questions
Do I need special rice for this?
Any long-grain white rice works, but jasmine or basmati give the best texture. Avoid instant rice as it turns mushy. Rinse thoroughly before cooking to remove excess starch for fluffier results.
Can I make this without toasting the rice?
Skipping the toasting step means missing out on the nutty depth. If short on time, toast for just 1 minute – some flavor is better than none. The aroma difference is noticeable.
Why did my rice turn out sticky?
This usually happens when lifting the lid or stirring during cooking. Keep it covered for the full 18-20 minutes of simmering. Also, ensure you’re using the correct 2:1 liquid-to-rice ratio.

- Ground Beef Rice and Beans Recipe: Slow-Simmered Savory Harmony - October 17, 2026
- Guyanese Fried Rice Recipe: Caribbean Spice With Wok-Charred Aromatics - October 17, 2026
- Hakka Thunder Tea Rice Recipe: Wok-Charred Herbal Infusion - October 17, 2026