
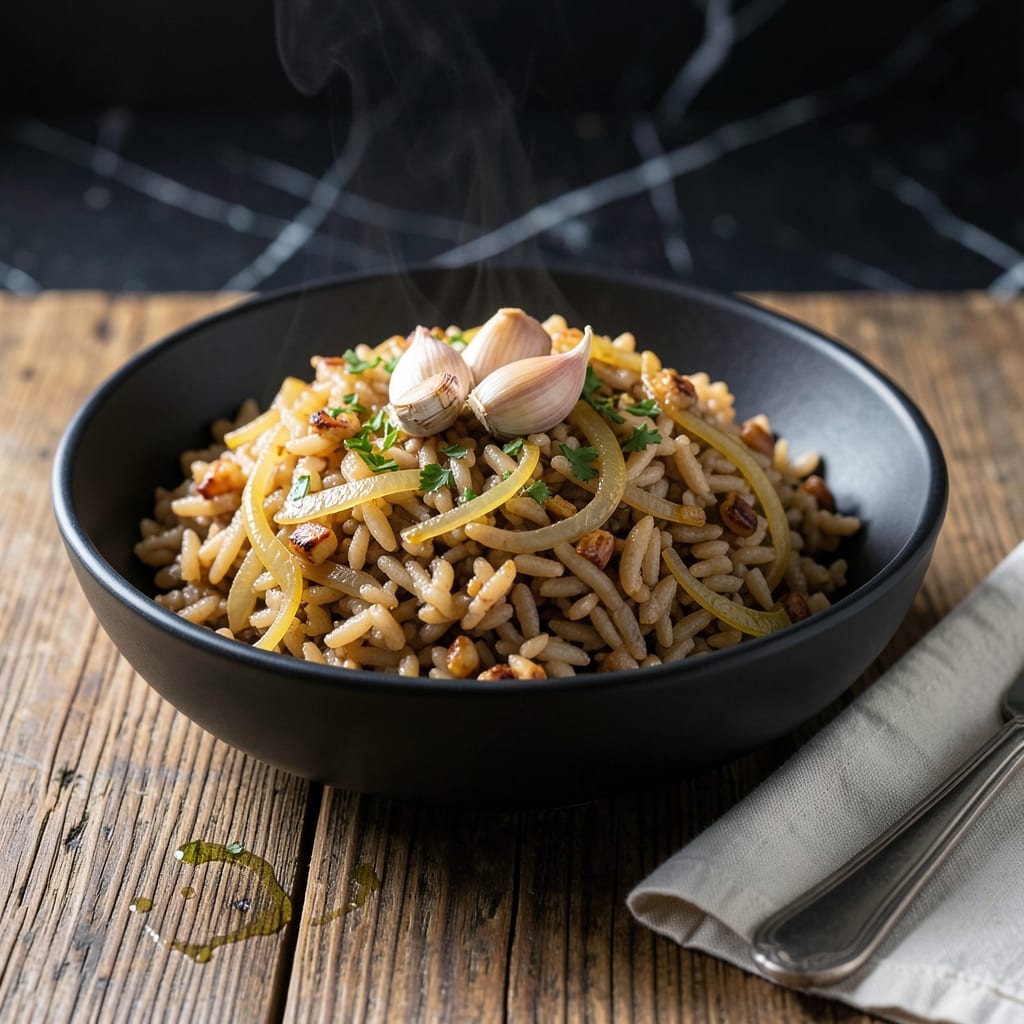
This garlic-infused brown rice transforms a simple side into a flavor-packed main dish. The toasted aroma and buttery notes make it irresistible.
I developed this method to bring out the natural nuttiness of brown rice while keeping it vegan-friendly. The result is perfectly tender grains with a rich, savory depth.
Ingredients for Garlic Brown Rice
A few quality vegan staples create this aromatic, savory brown rice dish with deep flavor.
| Ingredient | Amount | Notes |
|---|---|---|
| Long-Grain Brown Rice 🌾 | 1 ½ cups | Rinsed until water runs clear |
| Garlic Cloves 🧄 | 8 cloves | Minced or pressed for maximum flavor |
| Vegan Butter 🧈 | 3 tbsp | Miyoko's or Earth Balance recommended |
| Extra-Virgin Olive Oil 🫒 | 1 tbsp | For toasting rice and garlic |
| Vegetable Broth 🥕 | 3 ½ cups | Low-sodium preferred for control |
| Yellow Onion 🧅 | ½ whole | Finely diced for even distribution |
| Fresh Parsley 🌿 | ¼ cup | Chopped, for garnish |
| Sea Salt 🧂 | 1 tsp | Diamond Crystal for even seasoning |
| Freshly Ground Black Pepper 🌶️ | ½ tsp | Adjust to taste preference |
| Dried Thyme 🍃 | ½ tsp | Crushed between fingers to release oils |
| Bay Leaf 🌿 | 1 whole | Removed before serving |
The rice quality matters—short-grain or jasmine brown rice won’t give the same texture. I source mine from Trader Joe’s or bulk bins at natural food stores. Miyoko’s vegan butter has the best melt and flavor for this application, but Earth Balance works in a pinch. For the broth, Imagine or Pacific Foods brands have clean, vegan labels without weird additives.
No vegan butter? Extra olive oil with a pinch of nutritional yeast adds richness. Fresh thyme can replace dried at triple the amount. If you’re out of vegetable broth, water plus a bouillon cube works—just check it’s vegan. The onion is optional but adds depth; shallots at half the quantity give a milder, sweeter note.
Store dry rice in an airtight container for up to 6 months. Cooked rice keeps 4-5 days refrigerated or freezes for 3 months. The garlic flavor intensifies overnight—perfect for meal prep.
Why You’ll Love This Recipe
- One Pot Wonder: I just dump the rice, broth, and minced garlic in a pot, simmer, and walk away.
- Garlic Lovers’ Dream: The vegan butter and olive oil make the garlic cloves turn golden and fragrant—it smells like a restaurant in here.
- Meal Prep MVP: It keeps beautifully for days, and honestly, it tastes even better reheated with a splash of broth.
- Budget Stretcher: A pound of brown rice and a few garlic cloves feed my family for pennies per serving.
Step-by-Step Instructions for Garlic Brown Rice
Master the technique for perfectly fragrant rice with deep, savory garlic infusion.
Step 1: Toast the Rice and Aromatics
Heat the 1 tbsp Extra-Virgin Olive Oil and 3 tbsp Vegan Butter in a heavy pot over medium heat until the vegan butter melts. Add the 1.5 cups Long-Grain Brown Rice and stir to coat each grain in the fat mixture.
Cook for 2-3 minutes until the rice becomes light golden brown and emits a nutty aroma. Add the finely diced 0.5 whole Yellow Onion and all 8 cloves Garlic Cloves (minced). Continue stirring for 1 minute until the onion softens and the garlic becomes fragrant but not browned.
Step 2: Deglaze and Season
Pour in the 3.5 cups Vegetable Broth, scraping the bottom of the pot to release any browned bits. Add the 1 tsp Sea Salt, 0.5 tsp Freshly Ground Black Pepper, 0.5 tsp Dried Thyme (crushed), and 1 whole Bay Leaf.
Stir well to combine all ingredients and bring the mixture to a rolling boil. The liquid should appear slightly cloudy from the toasted rice starch, and the garlic and thyme aromas should be pronounced.
Step 3: Simmer Until Tender
Once boiling, reduce the heat to low, cover the pot with a tight-fitting lid, and maintain a gentle simmer. Cook undisturbed for 40-45 minutes until the rice absorbs most of the liquid and becomes tender but still slightly chewy.
Resist the urge to stir during cooking—this can break the rice grains and release excess starch. The rice is done when the surface appears dimpled and the liquid has reduced to the level of the rice.
Step 4: Rest and Finish
Remove the pot from heat and let it sit covered for 10 minutes. This allows the rice to steam in its own residual heat, ensuring even cooking and fluffier texture. The grains should now be uniformly tender with no hard centers.
Discard the Bay Leaf and fluff the rice gently with a fork. Taste and adjust seasoning if needed—the garlic flavor should be bold but balanced, and the thyme should add a subtle earthy note.
Step 5: Garnish and Serve
Transfer the rice to a serving dish and sprinkle with the 0.25 cup Fresh Parsley (chopped). The parsley adds a bright, fresh contrast to the rich garlic and buttery rice.
Serve immediately while hot. The rice should have a glossy sheen from the vegan butter, with visible flecks of garlic and onion throughout. The texture should be tender with individual grains that hold their shape.
Pro Tips For Making Garlic Brown Rice
- Toast the Rice First: Sauté the dry brown rice in olive oil for 2-3 minutes before adding liquid—this deepens the nutty flavor and prevents mushiness.
- Mince Garlic Fine: Chop the garlic cloves as small as possible; larger pieces can burn in the oil and leave bitter spots in your rice.
- Use Double the Broth: Brown rice needs more liquid than white, so use a 2:1 ratio of vegetable broth to rice for perfectly cooked grains.
- Let It Steam: After cooking, turn off the heat, cover, and let it sit for 10 minutes—this lets the rice absorb any remaining liquid and finish evenly.
Common Mistakes When Making This Dish
Over-Toasting the Rice
Toast the rice until it’s just light golden—about 2-3 minutes. Dark brown rice burns easily and develops a bitter flavor. I once left mine too long and had to start over. Keep the heat at medium and stir constantly. 🔥
Burning the Garlic
Add your 8 minced garlic cloves after the onion softens, then cook for only 1 minute. Burnt garlic turns acrid and ruins the dish. The moment you smell that sweet garlic aroma, move to the next step.
Incorrect Liquid Ratio
Use exactly 3.5 cups vegetable broth for 1.5 cups brown rice. Too little liquid leaves rice undercooked; too much makes it mushy. I measure with a liquid measuring cup for precision.
Peeking While Cooking
Resist lifting the lid during the 40-45 minute simmer. Each peek releases steam and lowers the temperature, extending cook time. Trust the process and let the rice work its magic.
Skipping the Rest
That 10-minute rest is crucial. It lets the rice steam evenly and absorb final moisture. I set a timer—skipping this step gives you uneven texture and dry patches.
Over-Stirring After Cooking
Fluff with a fork gently, just once. Over-stirring breaks the grains and releases excess starch. You want those beautiful, separate grains with flecks of garlic and onion throughout. ✨
Nutrition Facts
Frequently Asked Questions
Can I use white rice instead of brown?
Yes, but reduce cooking time to 18-20 minutes and liquid to 2.5 cups. Brown rice needs more time and water due to its fibrous bran layer. The garlic flavor will still shine through beautifully.
Why toast the rice first?
Toasting for 2-3 minutes enhances the nutty flavor and helps the grains stay separate. It also prevents mushiness by strengthening the outer layer before liquid is added.
Can I make this ahead of time?
Cooked rice keeps for 4-5 days refrigerated. Reheat with a splash of broth to restore moisture. The garlic flavor actually deepens overnight.
What if my rice is still crunchy after cooking?
Add 1/4 cup hot broth, cover, and steam for 5-10 minutes. This usually fixes undercooked grains. Next time, check your heat level—it should be a gentle simmer.

- Ground Beef Rice and Beans Recipe: Slow-Simmered Savory Harmony - October 17, 2026
- Guyanese Fried Rice Recipe: Caribbean Spice With Wok-Charred Aromatics - October 17, 2026
- Hakka Thunder Tea Rice Recipe: Wok-Charred Herbal Infusion - October 17, 2026