
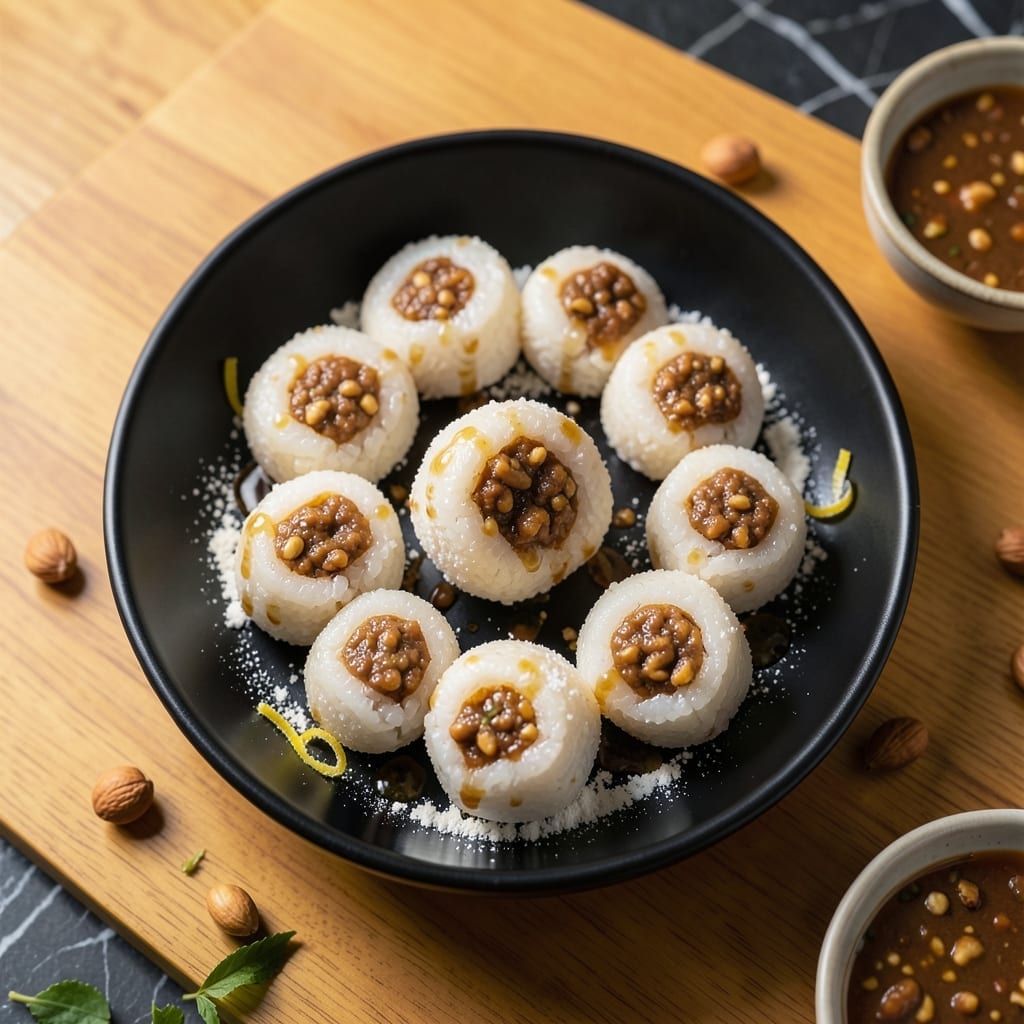
These soft rice balls hide a crunchy peanut center, offering a delightful contrast in every bite. This traditional treat balances chewy and crisp textures beautifully.
Making them at home is simpler than you think. The glutinous rice dough comes together quickly, and the peanut filling adds a satisfying surprise that keeps everyone reaching for more.
Ingredients for Glutinous Rice Balls with Peanut Filling
Pantry staples plus peanuts create these chewy, crunchy treats everyone will love.
| Ingredient | Amount | Notes |
|---|---|---|
| Glutinous Rice Flour 🌾 | 2 cups | Also called sweet rice flour |
| Granulated Sugar 🍚 | ¼ cup | Divided for dough and filling |
| Warm Water 💧 | ¾ cup | For dough consistency |
| Roasted Peanuts 🥜 | 1 cup | Unsalted, finely chopped |
| Peanut Butter 🥜 | ½ cup | Creamy variety preferred |
| Honey 🍯 | 2 tbsp | For binding peanut filling |
| Salt 🧂 | ¼ tsp | For enhancing flavors |
| Cornstarch 🌾 | ¼ cup | For dusting work surface |
| Vanilla Extract 🌿 | 1 tsp | Optional for sweetness |
| Sesame Seeds 🌰 | 2 tbsp | For garnish (toasted) |
The glutinous rice flour is non-negotiable here—look for it in the Asian aisle at Whole Foods or Kroger. Bob’s Red Mill makes a good version if you’re shopping online. The peanuts need to be roasted (raw ones won’t give that crunch). I grab mine from Trader Joe’s—their dry-roasted peanuts are perfect and budget-friendly. Don’t skip the cornstarch for dusting; it keeps the dough from sticking without adding flavor.
No peanut butter? Almond butter works at a 1:1 ratio. Swap honey for maple syrup if you’re going vegan (though this recipe keeps the honey). The vanilla is optional, but it adds a nice depth—use pure extract, not imitation. For extra texture, toss some crushed peanuts into the filling mix. If your dough feels too sticky, add a bit more flour, but don’t overdo it (the rice flour hydrates as it rests).
Store the filling in an airtight container for up to 1 week. The uncooked rice balls can sit covered at room temp for 2 hours before shaping. Once filled, cook immediately or freeze on a tray for up to 1 month—no thawing needed, just boil from frozen.
Why You’ll Love This Recipe
- No-Fuss Mixing: I just stir the glutinous rice flour, sugar, and warm water together—no fancy equipment, no fuss.
- Peanut Heaven: The roasted peanuts and peanut butter filling hit that sweet-savory spot I crave every single time.
- Feeds a Party: I roll a big batch for Luna New Year, and they disappear before the fireworks start.
- Budget Stretch: A bag of rice flour and a jar of peanut butter make dozens, so I spend pennies per serving.
Step-by-Step Instructions for Glutinous Rice Balls With Peanut Filling
These soft rice balls come together with simple steps and a few key techniques.
Step 1: Prepare the Peanut Filling
In a bowl, combine the 1 cup Roasted Peanuts (finely chopped), 0.5 cup Peanut Butter, 2 tbsp Honey, and 0.25 tsp Salt. Mix until it forms a thick, sticky paste that holds together when pressed. If it feels too dry, add a touch more peanut butter.
Divide the mixture into 8 equal portions and roll each into a ball about 1 inch in diameter. Place them on a plate and chill in the refrigerator for 15 minutes to firm up. This makes them easier to handle when wrapping in the dough.
Step 2: Make the Glutinous Rice Flour Dough
In a large bowl, whisk together the 2 cups Glutinous Rice Flour and 0.25 cup Granulated Sugar. Gradually add the 0.75 cup Warm Water while mixing with a wooden spoon or your hands until a shaggy dough forms.
Knead the dough for 5-7 minutes until smooth and elastic. It should feel slightly sticky but not wet. If it’s too sticky, dust your hands with a bit of the 0.25 cup Cornstarch to prevent sticking. Cover with a damp towel to keep it from drying out.
Step 3: Shape the Rice Balls
Dust your work surface with some of the 0.25 cup Cornstarch to prevent sticking. Divide the dough into 8 equal pieces and roll each into a ball. Flatten a dough ball in your palm, then place a chilled peanut filling ball in the center.
Gently stretch the dough edges up and over the filling, pinching to seal completely. Roll the filled ball between your palms to smooth it out. Repeat with the remaining dough and filling, keeping the finished balls under a damp towel to prevent drying.
Step 4: Cook the Rice Balls
Bring a large pot of water to a gentle boil. Add the rice balls in batches, ensuring they have room to float. Cook for 8-10 minutes—they’ll float to the surface when done. Stir occasionally to prevent sticking.
Use a slotted spoon to transfer the cooked balls to a bowl of cold water for 1 minute to stop the cooking process. Drain and pat dry with a clean towel.
Step 5: Garnish and Serve
Optional: heat the 2 tbsp Sesame Seeds in a dry skillet over low heat for 1-2 minutes until fragrant and lightly toasted. Roll the warm rice balls in the toasted sesame seeds to coat evenly.
Serve immediately while warm. The outer layer should be soft and slightly chewy, with a sweet, crunchy peanut center that oozes slightly when bitten into. For extra flavor, drizzle with a bit of the 1 tsp Vanilla Extract mixed into a little honey.
Pro Tips For Making Glutinous Rice Balls With Peanut Filling
- Knead While Warm: Work the glutinous rice flour dough while it’s still warm from the water—it’s more pliable and less likely to crack when shaping.
- Grind Peanuts Fine: Pulse the roasted peanuts into a fine, almost powdery texture so the filling holds together and doesn’t ooze out during cooking.
- Avoid Overfilling: I learned this the hard way—use no more than 1 teaspoon of peanut filling per ball or they’ll burst open in the water.
- Use Cold Hands: Dip your hands in cold water before shaping each ball to prevent sticking and keep the dough smooth.
Make-Ahead Tips for This Dish
Prep Ahead Filling
The peanut filling can be made up to 3 days in advance. Store it in an airtight container at room temperature. I find it firms up slightly, making it even easier to shape into balls when ready to use. 💡
Dough Prep Strategy
Mix the glutinous rice dough 1 day ahead and refrigerate it wrapped tightly in plastic. Let it sit at room temperature for 30 minutes before shaping to soften. This resting time improves the texture significantly.
Freezing Uncooked Balls
After shaping but before cooking, arrange the rice balls on a parchment-lined tray. Freeze for 1 hour, then transfer to a freezer bag. They’ll keep for 1 month and can be cooked directly from frozen.
Batch Cooking
Cook the rice balls in 2 batches to avoid crowding the pot. Undercook them by 1-2 minutes if you plan to reheat later. This prevents them from becoming mushy when warmed up again.
Reheating Tips
Steam frozen cooked rice balls for 5-7 minutes until heated through. For refrigerated ones, 3-4 minutes in boiling water works perfectly. Avoid microwaving, as it can make the filling too soft. ❄️
Make-Ahead Assembly
If prepping for a party, shape all the balls and keep them covered with a damp towel at room temp. Cook them fresh when guests arrive for the best texture and that fresh-made impression.
Nutrition Facts
Frequently Asked Questions
Can I use regular rice flour instead of glutinous?
No, the texture won’t be the same. Glutinous rice flour gives the chewy, stretchy quality. Regular rice flour makes them crumbly and dry.
Why did my filling leak out during cooking?
This happens if the dough is too thin or not sealed tightly. Roll dough balls slightly thicker and pinch the seams completely shut before cooking.
How do I store leftovers?
Keep cooked balls in an airtight container for up to 3 days. Reheat by steaming for 3-4 minutes before serving.
Can I make these without a food processor?
Yes! Finely chop peanuts by hand and mix with other filling ingredients. It may take a bit more effort but works just as well.

- Glutinous Rice Flour Bread Recipe: Soft Pillows with Nutty Depth - October 12, 2026
- Green Rice Casserole Recipe: Cheesy Baked Comfort with Vibrant Herbs - October 12, 2026
- Glutinous Rice Coconut Milk Recipe: Chewy Sweetness With Tropical Depth - October 12, 2026