
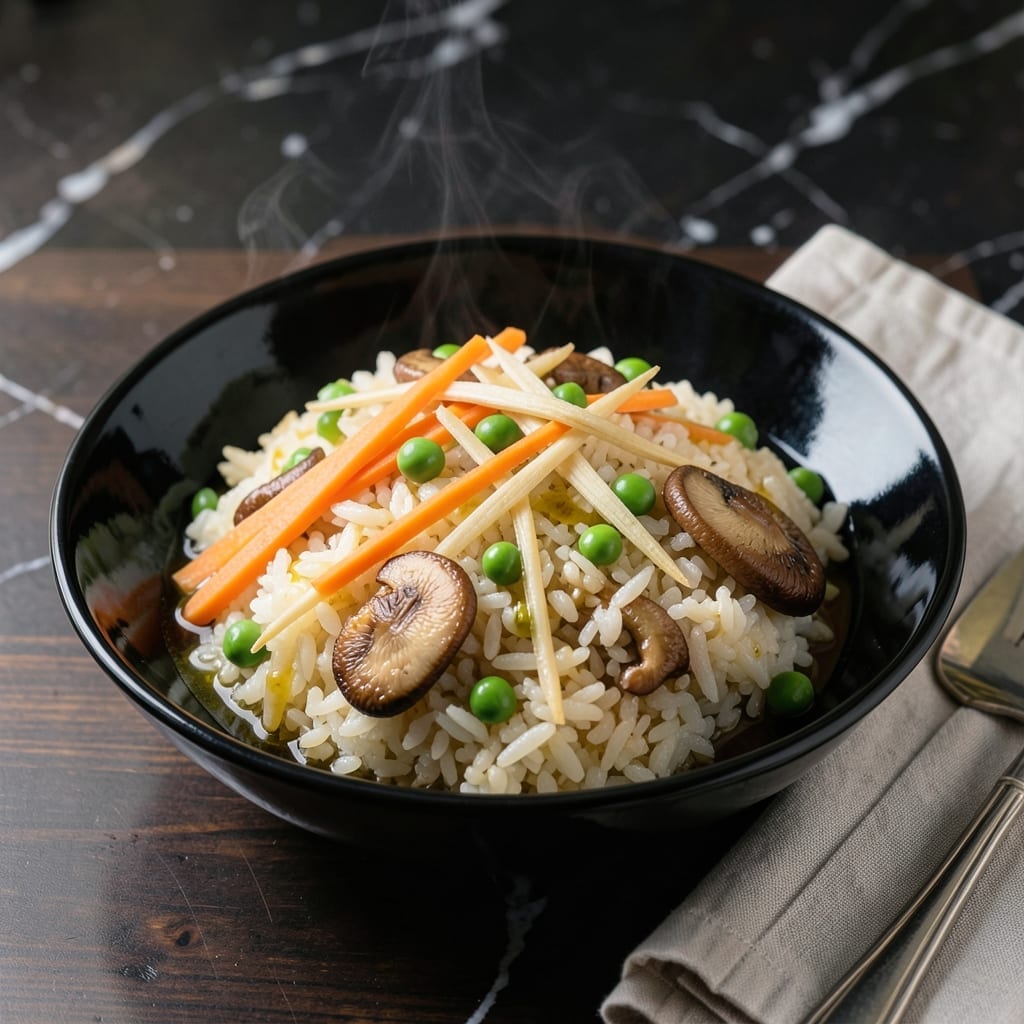
This colorful Japanese dish transforms simple ingredients into a comforting one-pan meal with vibrant flavors and textures.
Gomoku rice celebrates the beauty of mixing seasonal vegetables with dashi-seasoned rice, creating a balanced bite in every spoonful. The key is layering ingredients properly so each maintains its distinct character while absorbing the savory broth.
You’ll enjoy the contrast of tender carrots, earthy shiitake, and sweet peas against the soft, fragrant rice. This traditional approach ensures even cooking and maximum flavor distribution.
Perfect for family meals, this dish offers both nutrition and satisfaction in every serving.
Ingredients for Gomoku Rice
Simple yet vibrant ingredients create this comforting Japanese one-pan meal with layered flavors.
| Ingredient | Amount | Notes |
|---|---|---|
| Japanese Short-Grain Rice 🍚 | 2 cups | Rinsed until water runs clear |
| Dashi Stock 🍜 | 2 ½ cups | Homemade or instant dashi powder |
| Carrots 🥕 | 1 whole | Julienned into matchsticks |
| Shiitake Mushrooms 🍄 | 4 whole | Fresh or rehydrated dried |
| Green Peas 🌱 | ¾ cup | Fresh or frozen, thawed |
| Burdock Root 🌿 | ½ whole | Peeled and julienned |
| Soy Sauce 🫒 | 2 tbsp | Low-sodium preferred |
| Mirin 🍶 | 1 ½ tbsp | Sweet rice wine |
| Sake 🍶 | 1 ½ tbsp | Dry rice wine |
| Sugar 🍬 | 1 tsp | Granulated white sugar |
| Neutral Oil 🛢️ | 1 tbsp | For sautéing vegetables |
| Salt 🧂 | ½ tsp | To taste for seasoning |
The rice is non-negotiable—Japanese short-grain (sushi rice) is essential for the right sticky texture. Nishiki or Koshihikari brands are reliable and widely available at Asian markets or well-stocked supermarkets. For dashi, instant granules work fine, but homemade kombu and bonito flakes deliver superior depth. Fresh shiitake mushrooms offer a meaty texture, but dried (rehydrated) are a solid backup with more concentrated umami.
No burdock root? Lotus root or parsnips provide a similar crunch and earthy flavor. Green peas can be swapped for edamame or chopped green beans. If you lack mirin, mix 1 tbsp sugar with 2 tbsp water per tablespoon needed. For sake, dry dry sherry works in a pinch. The soy sauce should be Japanese-style—Kikkoman or Yamasa are standard choices.
Prepared gomoku rice keeps well in the fridge for 3-4 days and reheats beautifully with a splash of water. The vegetables can be prepped a day ahead—store them in cold water to maintain crispness. For best results, use within 24 hours of cutting to preserve freshness and texture.
Why You’ll Love This Recipe
- One-Pot Wonder: I love that everything cooks together—rice, dashi, and veggies in a single pot. No extra pans, no fuss.
- Umami Bomb: The shiitake and dashi create this deep, savory richness that makes every bite crave-worthy.
- Meal Prep Magic: It keeps beautifully for days, so I can make a big batch and enjoy it for lunch or dinner.
- Budget Friendly: Carrots, peas, and mushrooms stretch this dish far without breaking the bank.
Step-by-Step Instructions for Gomoku Rice
Follow this method for perfectly cooked rice with vibrant vegetables and balanced Japanese flavors.
Step 1: Prepare the Japanese Short-Grain Rice
Rinse the 2 cups Japanese Short-Grain Rice under cold water until the water runs completely clear, about 4-5 rinses. This removes excess starch that could make the rice gummy. Drain thoroughly in a fine-mesh strainer.
Combine the rinsed rice with the 2.5 cups Dashi Stock in a medium saucepan. The dashi infuses the grains with umami depth. Let the rice soak in the liquid for 20 minutes before cooking—this ensures even hydration and prevents dry spots.
Step 2: Sauté the Vegetables for Color and Texture
Heat the 1 tbsp Neutral Oil in a large skillet over medium heat. Add the julienned 1 whole Carrots, 0.5 whole Burdock Root, and sliced 4 whole Shiitake Mushrooms. Sauté for 5-6 minutes until the edges begin to soften but the vegetables retain a slight bite.
Add the 0.75 cup Green Peas and cook for an additional 2 minutes. The peas should turn bright green and warm through. Season lightly with 0.5 tsp Salt to enhance the natural sweetness of the vegetables.
Step 3: Cook the Rice and Combine with Vegetables
Bring the rice and dashi mixture to a boil over high heat. Once boiling, reduce to low heat, cover, and simmer for 15 minutes. The surface should look bubbly with steam vents when ready. Turn off the heat and let it rest, covered, for 10 minutes.
Fluff the rice gently with a rice paddle or fork. In a small bowl, mix the 2 tbsp Soy Sauce, 1.5 tbsp Mirin, 1.5 tbsp Sake, and 1 tsp Sugar until the sugar dissolves. Fold this mixture and the sautéed vegetables into the rice until evenly distributed.
Step 4: Steam and Serve for Maximum Flavor
Return the combined rice and vegetables to the saucepan over low heat. Cover and let steam for an additional 5 minutes. This final step allows the flavors to meld and the rice to absorb any remaining liquid.
Remove from heat and let sit, covered, for 5 minutes. The rice should be glossy, with each grain distinct yet tender. Serve warm, garnished with a sprinkle of toasted sesame seeds if desired, for a comforting bowl of vibrant, savory goodness.
Pro Tips For Making Gomoku Rice
- Soak the Rice: Give your Japanese short-grain rice a good 30-minute soak before cooking—it guarantees even cooking and that sticky, glossy texture gomoku rice needs.
- Pre-cook the Veggies: Sauté carrots and shiitake mushrooms separately for 2-3 minutes first; raw veggies will leave your rice undercooked and watery.
- Use Fresh Dashi: Skip the powdered stuff and use fresh dashi stock—it makes a real difference in depth of flavor, especially with the mushrooms.
- Add Peas Last: Stir in green peas only in the last 2 minutes of cooking so they stay bright and crisp, not mushy and dull.
Best Sauces and Condiments for These Flavors
Classic Tamagoyaki Drizzle
A light drizzle of sweet and savory tamagoyaki sauce elevates the dish beautifully. Mix 2 tbsp soy sauce, 1 tbsp mirin, and 1 tsp sugar until dissolved. Drizzle lightly over each serving for a glossy finish. 💛
Spicy Mayo Swirl
For a creamy kick, I whisk ¼ cup Japanese mayo with 1 tsp sriracha or 1 tbsp chili crisp. The tangy heat complements the earthy vegetables and savory rice perfectly. Swirl it in or serve on the side.
Pickled Ginger Garnish
Thinly sliced pickled ginger (gari) adds a refreshing, tangy crunch. I use about 2 tbsp per serving for balance. It cuts through the richness and brightens each bite.
Sesame Soy Sprinkle
Toast 2 tbsp sesame seeds until golden, then mix with 1 tsp soy sauce and a pinch of sugar. Sprinkle over the rice just before serving. This adds a nutty crunch and extra umami depth.
Miso Butter Glaze
Combine 1 tbsp white miso paste with 2 tbsp melted butter for a rich, velvety glaze. Drizzle warm over the rice to add a luxurious, umami-packed layer. It melts beautifully into the grains. ✨
Nutrition Facts
Frequently Asked Questions
Can I use different vegetables in this dish?
Try lotus root or parsley instead of burdock for a similar crunch. Edamame or green beans work well in place of peas.
Can I make this ahead of time?
Yes, it keeps well in the fridge for 3-4 days. Reheat with a splash of water to restore moisture. Prep veggies a day ahead and store in cold water.
What if my rice turns out mushy?
Rinse the rice thoroughly until water runs clear to remove excess starch. Use 20 minutes soaking time and avoid stirring while cooking for perfect texture.
Do I need to use dashi?
Dashi adds authentic umami flavor, but vegetable broth works as a substitute. For best results, use instant dashi granules or homemade kombu and bonito flakes.

- Jollof Rice Sauce Recipe: West African Tomato and Spice Infusion - September 25, 2026
- Japanese Rice Soup Recipe: Umami-Rich Comfort in a Bowl - September 25, 2026
- Homemade Cream Of Rice Recipe: Silk-Smooth Breakfast in Minutes - September 25, 2026