
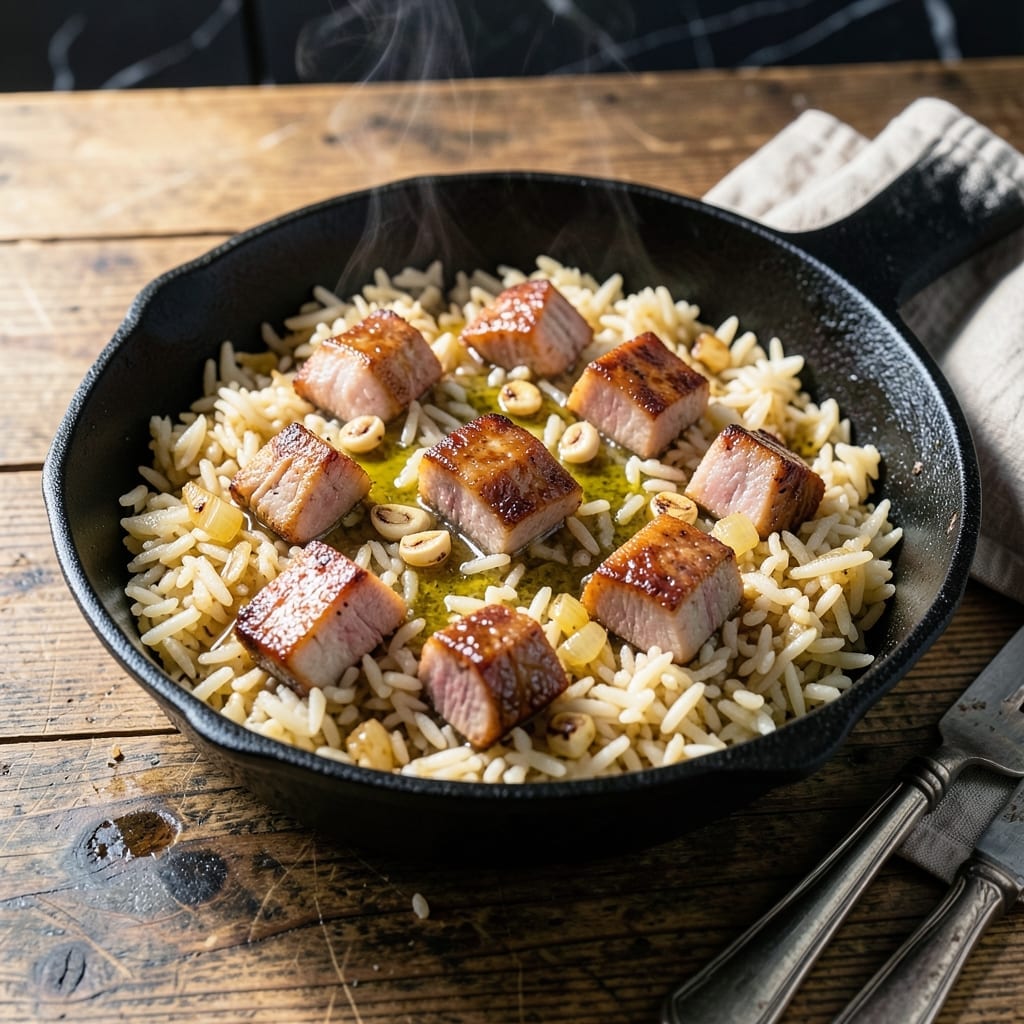
This one-pot dish delivers the ultimate comfort food experience with minimal cleanup. I developed this recipe during those cold New England evenings when only rich, hearty flavors would do.
The secret lies in using leftover ham and its natural fats, which infuse the rice with deep, savory goodness. Cooked in a single pot, the rice absorbs all those greasy, flavorful juices without the need for constant stirring.
What results is a dish with tender rice grains, each coated in a layer of ham fat that makes it irresistibly rich. The texture is easy to achieve—just let it simmer until the rice is soft and the flavors meld together.
Perfect for using up holiday leftovers or when you need a filling meal with little effort. This is the kind of dish that turns simple ingredients into something deeply satisfying.
Ingredients for Greasy Ham Rice
Leftover ham and rice come together with rich, savory flavor in this simple one-pot dish.
| Ingredient | Amount | Notes |
|---|---|---|
| Cooked Ham 🍖 | 2 cups | Diced, with fat included |
| Long-Grain White Rice 🍚 | 1 ½ cups | Uncooked, rinsed well |
| Chicken Broth 🥣 | 2 ½ cups | Low-sodium preferred |
| Yellow Onion 🧅 | 1 whole | Medium, finely diced |
| Garlic Cloves 🧄 | 3 cloves | Minced for depth of flavor |
| Unsalted Butter 🧈 | 2 tbsp | For additional richness |
| Dried Thyme 🌿 | ½ tsp | Ground or rubbed variety |
| Bay Leaf 🍃 | 1 whole | Removed before serving |
| Black Pepper 🌶️ | ½ tsp | Freshly ground preferred |
| Salt 🧂 | ½ tsp | Adjust to taste after cooking |
| Frozen Peas 🌱 | ¾ cup | Optional for color and texture |
| Fresh Parsley 🌿 | 2 tbsp | Chopped, for garnish |
The ham is key here—look for leftover holiday ham with a good amount of fat for maximum flavor. Any long-grain white rice works, but avoid instant varieties. Costco has great prices on bulk rice if you’re stocking up. The broth should be low-sodium so you can control the seasoning. I always keep a box of Swanson in the pantry for recipes like this.
No ham? Bacon or smoked sausage will add a similar richness. Short on broth? Water plus bouillon cube works in a pinch. Fresh garlic is ideal, but jarred minced garlic saves time. The peas are totally optional—diced carrots or bell peppers add color too. If you’re using pre-cooked rice, adjust the broth amount down by half.
This keeps well for 4 days in the fridge and reheats beautifully. The rice soaks up more flavor over time. Freeze portions for up to 3 months—just thaw in the fridge overnight before reheating.
Why You’ll Love This Recipe
- One Pot Wonder: I toss everything in a single skillet—ham, rice, broth—and let it simmer while I set the table.
- Savory Depth: The garlic and onion caramelize in the ham fat, making every bite rich and satisfying.
- Feeds a Crowd: Honestly, it’s my go-to for Sunday suppers or when the cousins drop by unannounced.
- Budget Stretcher: A pound of ham and a bag of rice makes enough for leftovers that taste even better the next day.
Step-by-Step Instructions for Greasy Ham Rice
This one-pot method delivers rich, savory rice with minimal effort and easy cleanup.
Step 1: Sauté Aromatics in Butter
Melt the 2 tbsp unsalted butter in a large pot or Dutch oven over medium heat. Add the finely diced yellow onion and cook for 4-5 minutes until softened and just beginning to turn translucent.
Stir in the minced garlic cloves and cook for an additional 30 seconds until fragrant. I always watch closely here—garlic burns quickly and turns bitter. The butter should be foamy but not browned.
This base layer of onion and garlic creates the flavor foundation that makes the dish taste deeply savory. The butter adds richness that complements the ham perfectly.
Step 2: Toast Rice and Add Seasonings
Add the 1.5 cups long-grain white rice to the pot and stir to coat in the buttery aromatics. Toast for 2 minutes until the rice appears slightly translucent at the edges—this step enhances the nutty flavor of the rice.
Sprinkle in the 0.5 tsp dried thyme, 0.5 tsp black pepper, and 0.5 tsp salt. Stir to distribute evenly, then add the 1 whole bay leaf. The thyme and bay leaf infuse the rice with subtle herbal notes as it cooks.
This is where the magic starts. The rice absorbs all those buttery, garlicky flavors before the liquid even goes in, ensuring every bite is packed with taste.
Step 3: Add Ham, Broth, and Simmer
Stir in the 2 cups cooked ham (with its fat) and the 2.5 cups chicken broth. Bring the mixture to a boil, then immediately reduce the heat to low. Cover the pot and let it simmer undisturbed for 18-20 minutes.
The ham’s fat will render slightly as it heats, adding that signature “greasy” richness to the dish. Don’t stir during this time—it can break the rice grains and make the final texture mushy. The liquid should be gently bubbling, not rolling.
After 18 minutes, check that the rice is tender and most of the liquid has been absorbed. If it’s still firm, cook for another 2-3 minutes and check again.
Step 4: Finish with Peas and Rest
Once the rice is tender, remove the pot from heat. Discard the bay leaf, then gently fold in the 0.75 cup frozen peas. The residual heat will thaw them perfectly without turning them to mush.
Cover the pot and let it sit for 5 minutes. This resting period allows the rice to steam and absorb any remaining liquid, ensuring a fluffy texture. The peas will turn bright green and warm through during this time.
Taste and adjust seasoning with additional salt if needed. The ham is already salty, so I usually find the seasoning perfect as is, but preferences vary.
Step 5: Garnish and Serve
Fluff the rice with a fork to separate the grains and distribute the ham and peas evenly. Sprinkle with the 2 tbsp fresh parsley just before serving—it adds a pop of color and freshness that balances the richness.
Serve hot, straight from the pot. The rice should be tender with a slight bite, the ham warm and flavorful, and the peas vibrant. Every spoonful should deliver a mix of textures and that comforting, savory depth you expect from this dish.
Pro Tips For Making Greasy Ham Rice
- Render the Ham First: Dice the ham into small pieces and crisp it in the pot before adding anything else—this releases the fat that gives the rice its rich, greasy texture. I learned this the hard way after making bland batches by skipping this step.
- Toast the Rice: After sautéing the onion and garlic, add the dry rice and stir for 1-2 minutes until it looks slightly translucent. This prevents a mushy finish and deepens the flavor.
- Use Warm Broth: Pour in chicken broth that’s already hot from the stove—cold broth slows down the cooking and can make the rice gummy. Sounds fussy, but it actually changes the outcome.
- Skip the Stirring: Once the rice is simmering, resist the urge to stir. Just cover and let it cook undisturbed for 18-20 minutes, or you’ll end up with sticky, uneven grains.
Essential Equipment for greasy ham rice
Essential Cookware
I always reach for my 5-quart Dutch oven for this recipe—it’s the perfect size for 4 servings and distributes heat evenly. My Lodge enameled cast iron has seen better days but still delivers that consistent simmer needed for perfect rice every time.
Wooden Spoon Necessity
A good wooden spoon is non-negotiable here. I use mine to scrape up all those browned bits from the bottom when toasting the rice. The flat edge helps press the rice into the pot so it toasts evenly without burning.
Lid Requirements
Your pot must have a tight-fitting lid to trap steam during the 18-20 minute simmer. I learned this the hard way in my tiny Boston kitchen—without a proper seal, the rice turns out dry and undercooked.
Measuring Tools
Accurate measurements matter, especially for the rice-to-liquid ratio. I use my OXO measuring cups for the 1.5 cups rice and 2.5 cups broth. A 1-tbsp measure helps portion the butter and spices precisely. 💡
Cutting Board and Knife
A sharp 8-inch chef’s knife makes quick work of dicing the yellow onion and 2 cups ham. I prefer a plastic cutting board for the ham to avoid cross-contamination with other ingredients.
Optional Pea Prep
If using frozen peas, no prep is needed—just keep them in the freezer until the final step. For fresh peas, a quick blanch in boiling water for 2 minutes preserves their color and texture before adding to the rice. ❄️
Nutrition Facts
Frequently Asked Questions
Can I use a different type of rice?
Long-grain white rice works best for fluffy texture. Avoid instant or minute rice as they turn mushy. Brown rice requires more liquid and 45-50 minutes of cooking.
What if my rice is undercooked after 20 minutes?
Add 1/4 cup more broth, cover, and cook for another 5 minutes. Check again and repeat if needed. Avoid stirring to prevent mushy rice.
Can I make this ahead of time?
Yes! Prepare the dish fully, let it cool, then refrigerate for up to 4 days. Reheat gently with a splash of broth to restore moisture.

- Ground Beef Rice and Beans Recipe: Slow-Simmered Savory Harmony - October 17, 2026
- Guyanese Fried Rice Recipe: Caribbean Spice With Wok-Charred Aromatics - October 17, 2026
- Hakka Thunder Tea Rice Recipe: Wok-Charred Herbal Infusion - October 17, 2026