
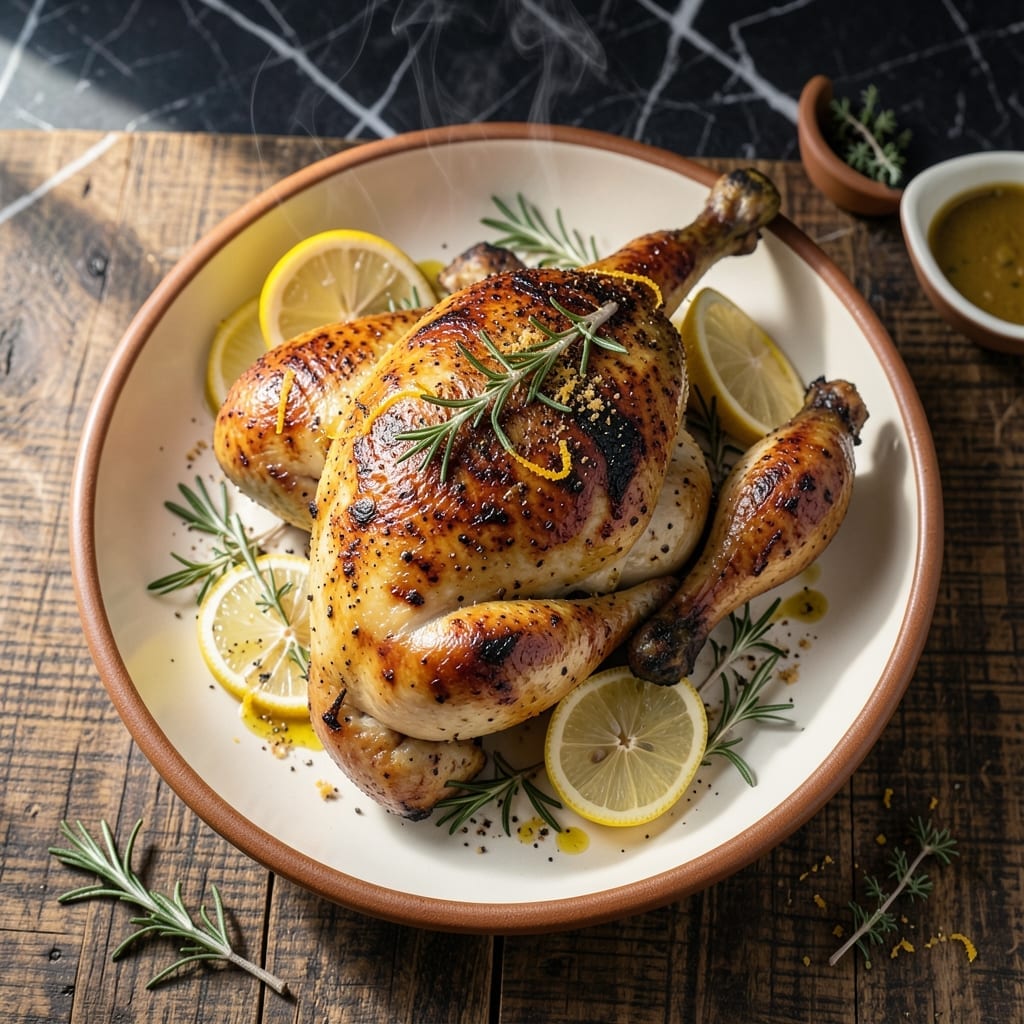
There’s a simple joy in mastering grilled half chicken—achieving that perfect balance of crisp skin and juicy meat every time. This method transforms an affordable cut into a showstopping main course with minimal effort.
The key lies in proper preparation and heat management. I’ve found that scoring the skin and using a dry brine before grilling makes all the difference in both texture and flavor. The result is chicken that’s deeply savory with a smoky char.
You’ll end up with meat that pulls away from the bone with ease, skin that shatters with each bite, and a dish that impresses without complicated techniques. The grill does most of the work once you’ve set it up correctly.
Serve with seasonal vegetables or a fresh salad for a complete meal. This technique works as well for weeknight dinners as it does for weekend gatherings.
Ingredients for Grilled Half Chicken
Simple ingredients elevate this dish to restaurant-quality with crisp skin and juicy meat.
| Ingredient | Amount | Notes |
|---|---|---|
| Whole Chicken 🍗 | 2 whole | Split into halves, backbone removed |
| Kosher Salt 🧂 | 2 tbsp | Diamond Crystal preferred for dry brine |
| Black Pepper 🌶️ | 1 tsp | Freshly ground for best flavor |
| Garlic Powder 🧄 | 1 tsp | Not garlic salt |
| Smoked Paprika 🌶️ | 1 tsp | Adds depth to the rub |
| Olive Oil 🫒 | 2 tbsp | For coating the skin |
| Lemon 🍋 | 1 whole | Juiced and zested for brightness |
| Fresh Rosemary 🌿 | 2 tbsp | Chopped, for herb rub |
| Fresh Thyme 🍃 | 2 tbsp | Chopped, for herb rub |
| Unsalted Butter 🧈 | 4 tbsp | Melted for basting |
| Vegetable Oil 💧 | 1 tbsp | High smoke point for grill |
The chicken quality is paramount. Look for air-chilled birds at Whole Foods or specialty butchers—they retain moisture better than water-chilled. Organic or free-range often yields more flavorful meat. For the dry brine, Diamond Crystal kosher salt is the gold standard (its coarse texture adheres better). If you’re splitting the chicken yourself, a sharp chef’s knife and kitchen shears make quick work of it.
No fresh herbs? Dried rosemary and thyme at one-third the amount work in a pinch. Short on time? Pre-made poultry seasoning can substitute for the herb blend. The smoked paprika is non-negotiable for that signature char—Penzeys carries an excellent version. For the butter baste, European-style butter adds extra richness, but standard unsalted works fine (don’t use salted—it can overpower).
The dry-brined chicken can rest uncovered in the fridge for up to 24 hours. Leftovers keep 3-4 days refrigerated—reheat gently to avoid drying. For best results, bring the chicken to room temperature before grilling (about 30 minutes on the counter).
Why You’ll Love This Recipe
- Minimal Effort: I just split the chicken, season with salt, pepper, and smoked paprika, then grill—no fancy steps.
- Smoky Depth: The garlic powder and smoked paprika give it that rich, smoky flavor I crave every time.
- Feeds the Gang: One whole chicken split into halves means I can serve a crowd or meal prep for days.
- Budget Winner: A whole chicken costs less than individual parts, and this method stretches it into multiple meals.
Step-by-Step Instructions for Grilled Half Chicken
Master the technique for smoky, crisp-skinned halves with juicy meat every time.
Step 1: Dry Brine and Season the Chicken
Pat the whole chicken halves completely dry with paper towels to ensure crispy skin. In a small bowl, combine the 2 tbsp Kosher Salt, 1 tsp Black Pepper, 1 tsp Garlic Powder, and 1 tsp Smoked Paprika.
Rub this seasoning blend evenly over all surfaces of the chicken, including under the skin. Place the halves on a wire rack set over a baking sheet, skin-side up, and refrigerate uncovered for 12-24 hours. This dry brine draws moisture to the surface while seasoning deeply.
Remove the chicken from the refrigerator 1 hour before grilling to allow it to come to room temperature, which ensures even cooking.
Step 2: Prepare the Herb Butter and Preheat the Grill
Zest and juice the 1 whole Lemon, then finely chop the 2 tbsp Fresh Rosemary and 2 tbsp Fresh Thyme. In a small saucepan, melt the 4 tbsp Unsalted Butter over low heat.
Stir in the lemon zest, lemon juice, chopped rosemary, and thyme. Keep the herb butter warm on the grill’s side burner or in a heatproof dish near the grill. Preheat your grill to medium-high heat (400-450°F), cleaning the grates thoroughly with a brush.
Step 3: Sear and Baste the Chicken
Lightly brush the grill grates with the 1 tbsp Vegetable Oil to prevent sticking. Place the chicken halves skin-side down on the grill. Brush the exposed meat with the 2 tbsp Olive Oil to help it brown.
Sear undisturbed for 8-10 minutes until the skin is deep golden brown and releases easily from the grates. Flip the chicken and baste the skin side with the herb butter. Cook for another 6-8 minutes on the second side.
Step 4: Finish Cooking Indirectly
Move the chicken to the cooler side of the grill or reduce heat to medium (350°F). Continue basting with the herb butter and turning occasionally until the internal temperature reaches 165°F at the thickest part of the thigh.
This indirect cooking ensures the meat stays juicy while the skin achieves maximum crispness. Total cooking time will be approximately 30-40 minutes, depending on the size of your chicken halves.
Step 5: Rest and Serve
Transfer the chicken to a cutting board and let it rest for 10 minutes before serving. This allows the juices to redistribute, ensuring moist, flavorful meat.
Carve each half into quarters or serve whole. Any remaining herb butter can be drizzled over the chicken just before serving for an extra burst of flavor.
Pro Tips For Making Grilled Half Chicken
- Dry the Skin: Pat the chicken halves completely dry with paper towels before seasoning—this guarantees crispy skin and helps the smoked paprika stick better.
- Start Hot, Finish Slow: Sear the chicken skin-side down over high heat for 3-4 minutes, then move to indirect heat to cook through without burning the spices.
- Season Under Skin: Loosen the skin and rub some of the salt, garlic powder, and smoked paprika directly onto the meat—this keeps the flavor from washing off and infuses every bite.
- Rest Before Carving: Let the chicken rest for 8-10 minutes after grilling to keep the juices from running all over your cutting board—I learned this the hard way with dry meat.
Storing and Reheating This Recipe
Refrigerator Storage
Let your grilled chicken cool for no more than 2 hours before storing. I use airtight glass containers to maintain freshness. Properly stored, your creation keeps beautifully in the fridge at 40°F or below for 3-4 days. ❄️
Freezer Storage
For longer storage, wrap each half tightly in heavy-duty aluminum foil, then place in a freezer bag. Squeeze out excess air to prevent freezer burn. This method preserves quality for up to 3 months without drying out the meat.
Stovetop Reheating
Place chicken in a skillet with 2 tbsp water or chicken broth over medium-low heat. Cover and warm for 8-10 minutes, turning occasionally. This keeps the skin crisp while ensuring the meat stays juicy. 🔥
Oven Reheating
Preheat oven to 350°F. Place chicken on a baking sheet, brush with a little olive oil, and cover loosely with foil. Heat for 15-20 minutes, then uncover for the last 5 minutes to crisp the skin.
Microwave Option
For quick reheating, place portions on a microwave-safe plate with a damp paper towel. Heat on 70% power for 2-3 minutes, checking and turning halfway. This prevents the meat from drying out.
Nutrition Facts
Frequently Asked Questions
What temperature should I grill the chicken at?
Start with medium-high heat (400-450°F) for searing. Reduce to medium (350°F) for indirect cooking until the internal temp hits 165°F.
How long should I dry brine the chicken?
Refrigerate uncovered for 12-24 hours after seasoning. This step ensures crisp skin and deeply seasoned meat.
Can I use frozen chicken?
Thaw completely in the fridge first (24 hours for whole halves). Never grill frozen chicken—it cooks unevenly and risks bacteria.
How do I prevent the skin from sticking?
Clean and oil the grates well. Don’t move the chicken for the first 8-10 minutes of searing.

- Jollof Rice Sauce Recipe: West African Tomato and Spice Infusion - September 25, 2026
- Japanese Rice Soup Recipe: Umami-Rich Comfort in a Bowl - September 25, 2026
- Homemade Cream Of Rice Recipe: Silk-Smooth Breakfast in Minutes - September 25, 2026