
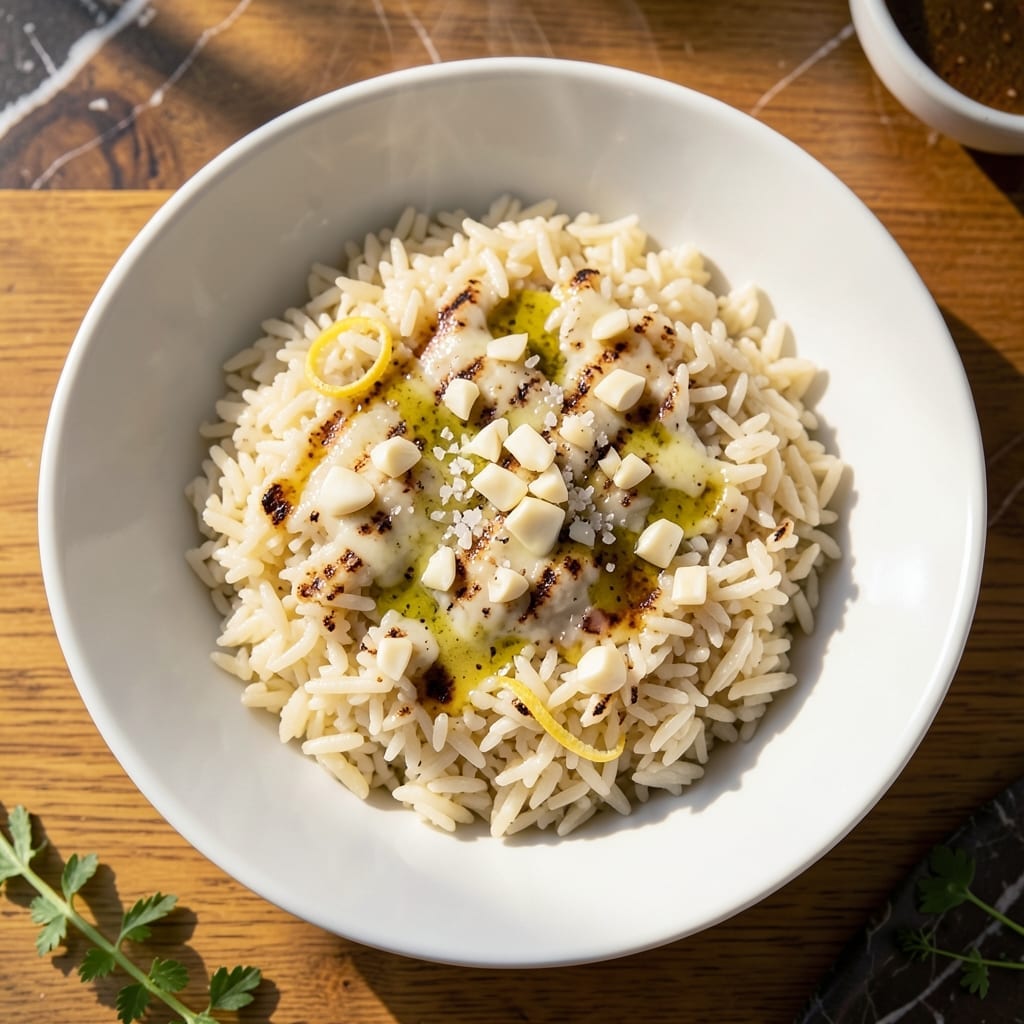
There’s a reason grilled rice has become my go-to for adding depth to simple meals. This method transforms plain rice into a dish with nutty complexity and charred aroma that elevates any plate.
I first tried this while camping, using a cast-iron skillet over open flame. The direct heat creates a toasted crust on the grains while keeping the inside tender. It’s a technique that works just as well on a backyard grill or stovetop.
The key is patience—let the rice develop a golden crust before stirring. You’ll end up with grains that have a satisfying chew and layers of smoky flavor that taste far more complex than the effort required.
Perfect as a base for proteins or as a standalone side. This is one dish that proves simple ingredients can deliver extraordinary results.
Ingredients for Grilled Rice
Transform plain rice with charred depth using simple, pantry-friendly ingredients you likely already have.
| Ingredient | Amount | Notes |
|---|---|---|
| Long-Grain White Rice 🍚 | 1 ½ cups | Uncooked, rinsed thoroughly |
| Water 💧 | 3 cups | For cooking rice |
| Olive Oil 🫒 | 2 tbsp | Divided, for grilling and finishing |
| Unsalted Butter 🧈 | 1 tbsp | Optional for richness |
| Garlic Cloves 🧄 | 2 cloves | Minced for aroma |
| Salt 🧂 | 1 tsp | Kosher or sea salt |
| Black Pepper 🌶️ | ½ tsp | Freshly ground preferred |
| Fresh Parsley 🌿 | ¼ cup | Chopped, for garnish |
| Green Onions 🧅 | 3 whole | Thinly sliced for topping |
| Lemon 🍋 | ½ whole | Zested and juiced for brightness |
| Soy Sauce 🥢 | 1 tbsp | Low-sodium preferred |
| Sesame Oil 🫒 | ½ tsp | Toasted for depth |
The rice quality matters here. Jasmine or basmati works best for separate grains, but any long-grain white rice will do. Rinsing the rice removes excess starch for better texture—don’t skip this step. For the fat, olive oil is standard, but avocado oil handles high heat even better if you’re grilling over direct flame. I grab mine from Trader Joe’s (the cold-pressed stuff).
No fresh herbs? Dried parsley at half the amount works in a pinch. Out of green onions? Chives or shallots add a similar mild bite. The soy sauce can be swapped for tamari or coconut aminos if needed, but avoid dark soy—it’s too sweet. If you don’t have sesame oil, a drizzle of toasted walnut oil (found at Whole Foods) gives a similar nutty finish.
Cooked rice keeps in the fridge for 4-5 days—reheat with a splash of water to revive. The grilled rice actually tastes better the next day as the flavors meld. Freeze for up to 3 months (portion before freezing). Always let it cool completely before storing.
Why You’ll Love This Recipe
- One-Pan Wonder: I love that I just toss rice, water, and butter in one pan and let the grill do the work.
- Garlic Butter Magic: That sizzle when the garlic hits the butter? It makes the rice taste like a restaurant dish.
- Weeknight Hero: Honestly, it’s ready by the time I finish setting the table—perfect for busy evenings.
- Budget Stretcher: A pound of rice feeds my family for days, and the garlic butter makes it feel like a treat.
Step-by-Step Instructions for Grilled Rice
Master this method and you will achieve perfectly charred grains with deep, nutty flavor every time.
Step 1: Cook the Rice with Aromatics
Rinse the 1.5 cups long-grain white rice thoroughly under cold water until the water runs clear. This removes excess starch and prevents gummy texture. In a medium pot, combine the rinsed rice with the 3 cups water and bring to a boil over high heat.
Once boiling, reduce to low heat, cover, and simmer for 15 minutes until the rice is tender and the water is absorbed. Stir in 1 tbsp unsalted butter and 1 tsp salt, then remove from heat. Let it sit covered for 10 minutes to steam and finish cooking. The grains should be separate and fluffy, not sticky.
Step 2: Season and Prepare for Grilling
Transfer the cooked rice to a large mixing bowl and let it cool slightly for 5 minutes. Drizzle with 1 tbsp olive oil and 1 tbsp soy sauce, then add 2 minced garlic cloves and 0.5 tsp black pepper. Gently fold everything together with a spatula, ensuring the seasonings are evenly distributed.
The rice should be moist but not wet—if it seems too sticky, spread it on a baking sheet to cool and dry out slightly. This step is crucial for achieving those coveted charred edges on the grill. Taste and adjust seasoning if needed before proceeding.
Step 3: Grill the Rice Until Charred
Heat a grill or grill pan over medium-high heat. Brush the grates with the remaining 1 tbsp olive oil to prevent sticking. Spread the seasoned rice in an even layer on the grill, using a spatula to press it down gently. You want direct contact with the grates for maximum char.
Let the rice cook undisturbed for 4-5 minutes until the bottom layer is deep golden brown and slightly crispy. Stir the rice, breaking up any clumps, and spread it out again. Repeat for another 4-5 minutes until you see charred bits throughout. The aroma should be nutty and toasty, signaling it is ready.
Step 4: Finish and Garnish
Remove the rice from the grill and transfer it to a serving bowl. Drizzle with 0.5 tsp sesame oil and stir gently to incorporate. This adds a final layer of richness and aroma. Taste one last time and adjust salt if necessary—the grilling process can intensify the flavors.
Garnish with the 0.25 cup chopped fresh parsley, 3 thinly sliced green onions, and the zest and juice of the 0.5 lemon. These fresh elements brighten the dish and balance the deep, smoky notes from the grill. Serve immediately while the charred edges are still crisp.
Pro Tips For Making Grilled Rice
- Parcook the Rice: Boil the rice until it’s just 70% done—it should still have a firm bite. I learned this the hard way after burning several batches trying to grill raw rice directly.
- Use Day-Old Rice: Freshly cooked rice is too moist and will steam instead of grill. Spread leftover rice on a tray and refrigerate overnight for the best texture.
- Skip the Overcrowding: Press the rice into the grill pan in a thin, even layer with some space between portions. After burning three batches, I finally figured out that crowding traps steam and prevents crisping.
- Butter Last: Brush the grilled rice with melted butter and minced garlic only after it’s crisped. Sounds weird, but it works—adding it too early makes the rice soggy instead of golden.
Storing and Reheating grilled rice
Refrigerator Storage
Let your grilled rice cool completely—no more than 2 hours at room temperature—before transferring to airtight containers. I use glass containers from IKEA for easy stacking. It’ll stay fresh in the fridge at 40°F or below for up to 5 days. 💡
Freezer Storage
For longer storage, portion the rice into freezer bags, squeezing out excess air to prevent freezer burn. It freezes beautifully for up to 3 months without losing texture. I’ve found that quart-sized bags work best for single servings.
Stovetop Reheating
My preferred method: heat a skillet over medium heat, add the rice with a splash of water or broth (2-3 tbsp), and stir occasionally. This revives the grains and restores moisture in about 5 minutes. 🔥
Microwave Reheating
Spread rice on a microwave-safe plate, drizzle with 1-2 tbsp water, and cover with a damp paper towel. Heat on 70% power for 1-2 minutes, stir, then repeat until heated through. This prevents drying out.
Oven Reheating
For larger batches, preheat oven to 300°F, spread rice on a baking sheet, and cover with foil. Heat for 10-15 minutes, stirring once halfway. This method works well if you’re reheating enough for a crowd.
Nutrition Facts
Frequently Asked Questions
What type of rice works best for this?
Long-grain white rice like jasmine or basmati gives the best texture. Their lower starch content keeps grains separate when charred. Avoid sticky rice varieties.
Can I make this on a stovetop?
Use a cast-iron skillet over medium-high heat for 4-5 minutes per side. Press the rice down to maximize contact for crispy edges.
Why is my rice not getting charred?
Make sure your rice is dry and the grill is hot enough. Press it firmly against the grates and resist stirring too soon. Patience is key.
Can I add vegetables while grilling?
Yes! Toss in bell peppers or zucchini during the last 2-3 minutes. Their moisture helps prevent burning while adding color.

- Ground Beef Rice and Beans Recipe: Slow-Simmered Savory Harmony - October 17, 2026
- Guyanese Fried Rice Recipe: Caribbean Spice With Wok-Charred Aromatics - October 17, 2026
- Hakka Thunder Tea Rice Recipe: Wok-Charred Herbal Infusion - October 17, 2026