
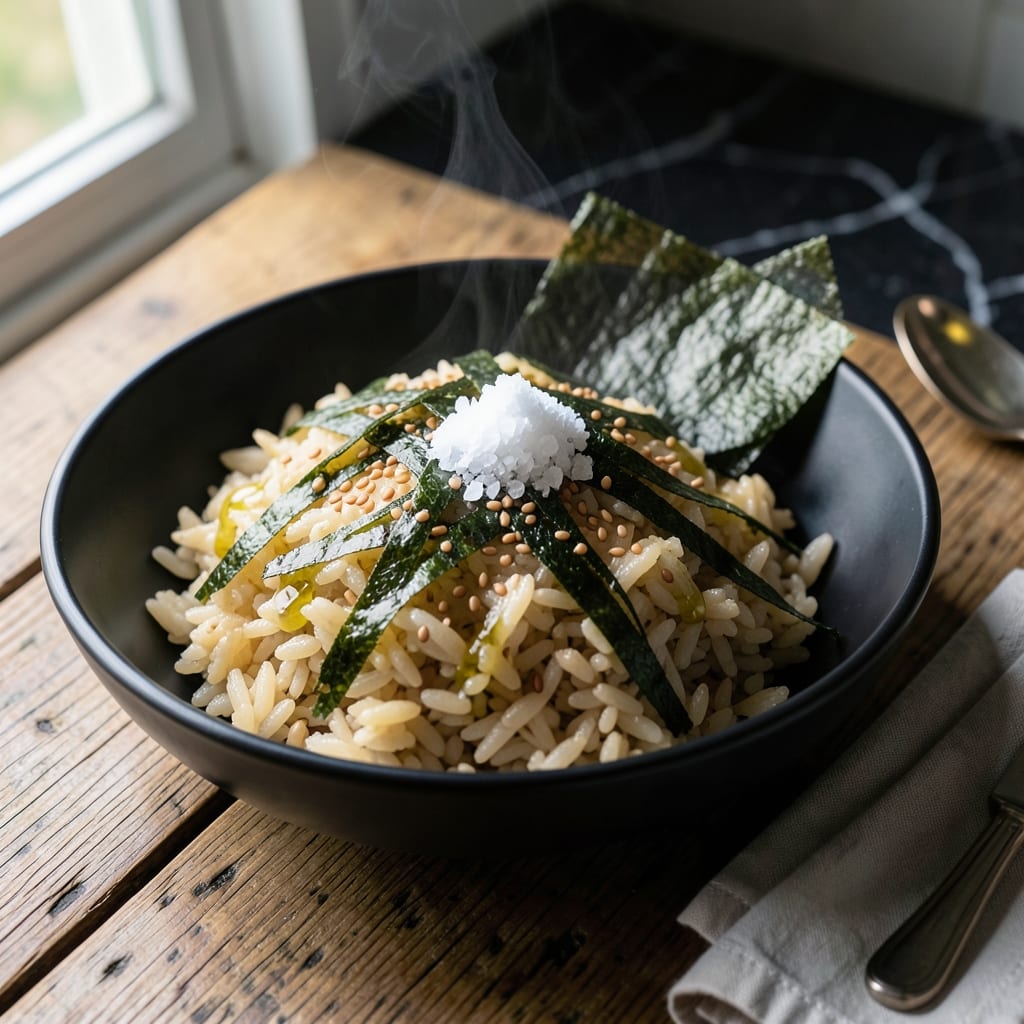
I discovered haiga rice through Japanese cooking, and its toasted aroma and chewy texture set it apart from regular white rice. The partial milling process preserves the bran layer, creating a nutty flavor profile that’s both comforting and distinctive.
This method brings out the best in haiga rice, delivering perfectly cooked grains with a satisfying bite. The simple technique requires just rice and water, with a precise ratio that ensures consistent results every time you make it.
Ingredients for Haiga Rice
Minimal ingredients deliver maximum flavor with this distinctive Japanese rice variety and its nutty depth.
| Ingredient | Amount | Notes |
|---|---|---|
| Haiga Rice 🍚 | 2 cups | Rinsed until water runs clear |
| Water 💧 | 2 ½ cups | Filtered or spring water preferred |
| Sea Salt 🧂 | ½ tsp | Optional, for seasoning |
| Rice Vinegar 🍯 | 1 tbsp | For finishing, enhances aroma |
| Toasted Sesame Seeds 🌰 | 1 tsp | Garnish, adds nutty crunch |
| Nori Sheets 🍱 | 1 sheet | Thinly sliced, optional garnish |
| Scallions 🧅 | 2 whole | Thinly sliced, for garnish |
| Soy Sauce 🫒 | 1 tsp | Optional, for drizzling |
Haiga rice is the star here. Look for it at Asian markets or well-stocked grocery stores like Whole Foods or H Mart. The partial milling gives it that signature chew—don’t substitute regular white rice, as the texture won’t be the same. Brands like Koshihikari or Nishiki offer reliable quality. Rinse it well to remove excess starch, which ensures each grain stays separate after cooking.
No haiga rice? Brown rice at a 1:2.5 ratio gets you closest in texture, though the flavor won’t be as nuanced. For extra aroma, toast the rice in the pot for 2 minutes before adding water. The rice vinegar is optional but highly recommended—it brightens the nutty notes. If using soy sauce, go for low-sodium to avoid overpowering the rice’s natural flavor.
Cooked haiga rice keeps well in the fridge for 4-5 days. Store it in an airtight container to maintain moisture. Reheat with a splash of water to revive the texture. For best results, use within 1 week or freeze for up to 3 months.
Why You’ll Love This Recipe
- One Pot Wonder: I just rinse the haiga rice, add water, and let it simmer—no fancy steps, no stress.
- Nutty Crunch: That toasted sesame seed topping with a splash of rice vinegar? Honestly, it’s the little flavor pop that keeps me coming back.
- Meal Prep Star: I make a big batch on Sunday and it pairs with everything—grilled veggies, teriyaki chicken, even just a fried egg.
- Budget Friendly: A bag of haiga rice stretches for days, and the ingredients are all pantry staples I already have. Between us, it’s cheaper than takeout.
Step-by-Step Instructions for Haiga Rice
Follow this precise method to achieve perfectly cooked grains with the signature nutty aroma and satisfying bite.
Step 1: Rinse and Prepare the Rice
Place the 2 cups Haiga Rice in a fine-mesh strainer and rinse under cold running water. Agitate the grains gently with your hand, changing the water frequently until it runs perfectly clear—this removes excess starch that would otherwise make your rice gummy.
This step is non-negotiable for optimal texture. I typically rinse for 2-3 minutes to ensure all cloudiness disappears. Once rinsed, drain thoroughly and transfer the rice to your cooking vessel. The grains should look distinct and separate, not clumped together.
Step 2: Combine with Water and Seasoning
Add the 2.5 cups Water to the rinsed Haiga Rice. I use filtered water for the cleanest flavor, but spring water works equally well. Stir in the 0.5 tsp Sea Salt if using—this enhances the natural sweetness of the rice without overpowering it.
Let the mixture sit for 5 minutes before cooking. This brief soaking period allows the grains to absorb some moisture, promoting more even cooking. You’ll notice the rice plumps slightly during this time, a good indicator it’s ready for the heat.
Step 3: Cook with Precise Heat Control
Bring the rice and water mixture to a full boil over medium-high heat. Once boiling, immediately reduce the heat to low, cover with a tight-fitting lid, and maintain a gentle simmer. The lid must stay on—no peeking—for the first 15 minutes of cooking.
After 15 minutes, check that the water has been mostly absorbed and small steam holes appear on the surface. If not, continue cooking for another 2-3 minutes until you see these visual cues. The rice should be tender but still have a slight bite in the center.
Remove from heat and let it steam, covered, for an additional 10 minutes. This resting period is crucial for achieving the ideal chewy texture Haiga Rice is known for.
Step 4: Fluff and Finish with Aromatic Touches
Gently fluff the rice with a fork, breaking up any large clumps while preserving the individual grain structure. Drizzle the 1 tbsp Rice Vinegar over the surface and fold it in gently. The vinegar brightens the flavor profile and enhances the rice’s natural aroma without making it taste sour.
At this stage, the grains should be glossy and separate easily. The rice will have a subtle toasted fragrance that distinguishes Haiga Rice from regular white rice. This is when you know you’ve achieved the proper texture.
Step 5: Garnish and Serve Immediately
Transfer the rice to a serving bowl. For garnish, sprinkle the 1 tsp Toasted Sesame Seeds evenly over the top. Thinly slice the 2 whole Scallions and scatter them across the surface for a fresh, oniony contrast. If using, cut the 1 sheet Nori Sheets into thin strips with kitchen shears.
For an extra layer of umami, drizzle the 1 tsp Soy Sauce lightly over the rice just before serving. Serve immediately while hot—the texture is best when freshly cooked. Each bite should offer a perfect balance of chewiness, nutty flavor, and aromatic complexity.
Pro Tips For Making Haiga Rice
- Rinse the Rice: Haiga rice still needs a quick rinse to remove excess starch, or your finished dish will be gummy. I learned this the hard way after my first few batches came out pasty.
- Use Less Water: Haiga rice absorbs liquid faster than white rice, so cut the water by about 10%. After burning a pot of mushy rice, I now stick to a 1:1.25 rice-to-water ratio.
- Toast Before Cooking: Lightly toasting the rice in the pot for 2-3 minutes before adding water brings out a nutty depth. Sounds weird, but it works—especially with haiga’s already toasty flavor.
- Salt the Vinegar: Mix the sea salt into the rice vinegar before stirring it into the cooked rice. This ensures even seasoning and prevents clumps of salt from ruining a bite.
Make-Ahead Tips for This Dish
Overnight Soaking
For the fluffiest texture, soak the 2 cups Haiga Rice overnight in 2.5 cups Water before cooking. This softens the bran layer, reducing cooking time by about 5 minutes. I find this method enhances the nutty flavor significantly. 💡
Pre-Portion for Meals
Cook a double batch and divide into 1-cup portions in airtight containers. These keep beautifully in the fridge for 4-5 days. The rice reheats perfectly for quick lunches or as a base for grain bowls.
Freezing for Long-Term
Spread cooked rice on a baking sheet to cool completely, then transfer to freezer bags. Squeeze out excess air and freeze flat for up to 3 months. This prevents freezer burn and makes storage efficient.
Reheating Methods
For stovetop reheating, add 2 tbsp water per cup of rice and warm over low heat for 5-7 minutes. In the microwave, sprinkle 1 tbsp water and heat in 30-second intervals, stirring between each. ❄️
Reviving Texture
If your rice seems dry after storage, sprinkle 1-2 tsp water and cover with a damp paper towel before reheating. This steams the grains back to their original chewy consistency.
Make-Ahead Garnishes
Pre-toast sesame seeds and slice scallions up to 2 days ahead. Store separately and add just before serving to maintain freshness and crunch.
Nutrition Facts
Frequently Asked Questions
Can I use a rice cooker for this?
Yes! Use the same 1:1.25 rice-to-water ratio. Most rice cookers will automatically adjust the cooking time and keep it warm afterward.
Why does it need rinsing?
Rinsing removes excess starch that would make the rice gummy. Stop when the water runs clear, usually after 2-3 minutes.
How do I fix undercooked grains?
Add 2 tbsp water, cover, and cook on low heat for another 5 minutes. Let it steam off-heat before checking again.
What dishes pair well with it?
Its nutty flavor complements grilled fish, teriyaki chicken, or miso-glazed vegetables. The chewy texture holds up well in grain bowls too.

- Ground Beef Rice and Beans Recipe: Slow-Simmered Savory Harmony - October 17, 2026
- Guyanese Fried Rice Recipe: Caribbean Spice With Wok-Charred Aromatics - October 17, 2026
- Hakka Thunder Tea Rice Recipe: Wok-Charred Herbal Infusion - October 17, 2026