
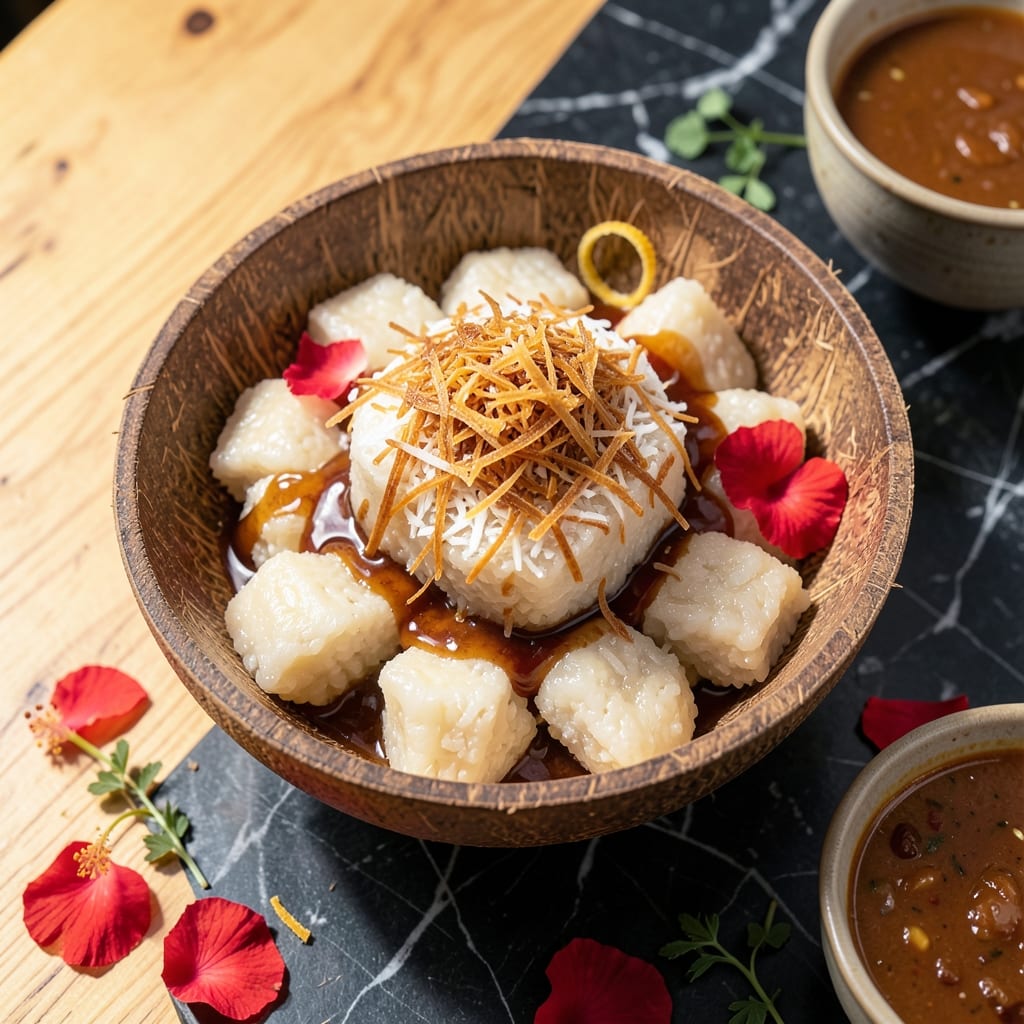
These island-inspired bites blend sweet and savory flavors in every mouthful. The secret lies in the perfect balance of ingredients, creating a texture that’s both soft and slightly chewy.
Ready in under an hour, this dish brings a taste of Hawaii to your kitchen. Whether served as a snack or part of a meal, it’s a simple yet satisfying way to enjoy traditional flavors.
Ingredients for Hawaiian Rice Cake
Sweet, chewy, and packed with island flavors. Probably have most of this already.
| Ingredient | Amount | Notes |
|---|---|---|
| Glutinous Rice Flour 🌾 | 2 cups | Also called sweet rice flour |
| Granulated Sugar 🍚 | ¾ cup | White sugar preferred |
| Water 💧 | 1 ¼ cups | Warm for better mixing |
| Coconut Milk 🥥 | 1 cup | Full-fat for richness |
| Shredded Coconut 🥥 | ½ cup | Unsweetened or sweetened |
| Brown Sugar 🟤 | ¼ cup | Packed for depth |
| Baking Powder ⚗️ | 1 tsp | For slight lift |
| Vanilla Extract 🌿 | 1 tsp | Pure for best flavor |
| Salt 🧂 | ¼ tsp | Fine sea salt |
| Pineapple 🍍 | 1 cup | Finely diced for texture |
| Macadamia Nuts 🌰 | ½ cup | Chopped for crunch |
| Soy Sauce 🫒 | 1 tbsp | For savory depth |
The glutinous rice flour is non-negotiable here—regular rice flour won’t give you that signature chew. I get mine from Asian markets or the international aisle at Whole Foods. The coconut milk should be full-fat (the canned kind, not the carton) for that rich, creamy texture. Look for brands like Thai Kitchen or Native Forest if you want to splurge a little.
No macadamia nuts? Cashews or raw almonds work in a pinch—just chop them fine. Fresh pineapple is ideal, but canned (drained well) works too (the juice can make the batter too wet). If you’re out of coconut milk, heavy cream with a splash of coconut extract gets you close. The soy sauce might seem odd, but it adds that perfect salty contrast to the sweetness.
These keep well at room temp for 2-3 days in an airtight container. For longer storage, refrigerate up to 1 week or freeze for 1 month. Reheat briefly in the microwave (or don’t—honestly, they’re great cold too).
Why You’ll Love This Recipe
- Mix and Bake: I just stir the glutinous rice flour, sugar, and coconut milk together, pour into a pan, and bake—no fancy techniques needed.
- Coconut Dream: The combo of creamy coconut milk and toasted shredded coconut gives every bite that rich, tropical sweetness I crave.
- Party or Snack: I’ve served these at luaus and kept them in the fridge for midnight treats—equally perfect both ways.
- Stretches Far: One batch makes enough to share, and leftovers keep so well I sneak pieces for days.
Step-by-Step Instructions for Hawaiian Rice Cake
Here’s how to make these island-inspired treats with just the right balance of sweet and savory.
Step 1: Mix the Wet and Dry Ingredients
In a large bowl, whisk together the 2 cups Glutinous Rice Flour, 0.75 cup Granulated Sugar, 1 tsp Baking Powder, and 0.25 tsp Salt until fully combined. This dry mix forms the base of your rice cakes, so make sure there are no lumps.
In a separate bowl, combine the 1.25 cups Water, 1 cup Coconut Milk, 0.25 cup Brown Sugar, and 1 tsp Vanilla Extract. Stir until the brown sugar dissolves completely—this ensures even sweetness throughout the batter.
Step 2: Combine and Add Mix-Ins
Gradually pour the wet mixture into the dry ingredients while whisking continuously. This prevents clumping and creates a smooth, pourable batter. Keep mixing until just combined—don’t overdo it, or the rice cakes will turn out tough.
Fold in the 1 cup Pineapple and 0.5 cup Shredded Coconut gently with a spatula. The pineapple should be finely diced so it distributes evenly, and the shredded coconut adds texture. The batter will be thick but still pourable.
Step 3: Steam the Batter
Pour the batter into a greased 9-inch round pan or heatproof dish that fits inside your steamer. Smooth the top with your spatula. Bring 2 inches of water to a boil in your steamer, then reduce the heat to maintain a steady, gentle steam.
Place the pan in the steamer, cover with a lid, and steam for 40-45 minutes. Check at 40 minutes—the rice cake is done when the center springs back when lightly pressed and a toothpick comes out clean.
Step 4: Add the Savory Topping and Finish
While the rice cake steams, heat the 1 tbsp Soy Sauce in a small pan over low heat. Add the 0.5 cup Macadamia Nuts and toss to coat evenly. Toast for 2-3 minutes until the nuts are fragrant and the soy sauce has thickened slightly into a glossy coating.
Once the rice cake is done, let it cool for 10 minutes in the pan. Then, sprinkle the soy-glazed macadamia nuts evenly over the top, pressing them lightly so they stick. Slice into wedges and serve warm or at room temperature.
Pro Tips For Making Hawaiian Rice Cake
- Steam Evenly: Use a bamboo steamer lined with parchment—my first few batches stuck because I skipped the liner, and the rice cakes tore when I tried to remove them. Steam for 20-25 minutes on medium-high heat, no peeking.
- Toast the Coconut: Lightly toast the shredded coconut in a dry pan for 2-3 minutes before mixing it in. I learned this the hard way—raw coconut tastes flat, but toasting brings out that nutty sweetness everyone loves.
- Avoid Lumpy Batter: Whisk the glutinous rice flour and sugar into the coconut milk first, then slowly add water. After burning three batches of lumpy cakes, I finally figured out that rushing this step ruins the texture.
- Use Full-Fat Coconut Milk: Skip the light version—full-fat coconut milk makes the cakes rich and tender. Sounds weird, but it works: the higher fat content keeps them moist long after they cool.
Essential Equipment for Perfect Results
Steamer Setup
You’ll need a large bamboo steamer or a metal steamer insert that fits over a pot. I use a 12-inch bamboo steamer from Asian markets—it accommodates a 9-inch pan perfectly. Ensure the lid fits snugly to trap steam effectively. 🌡️
Mixing Equipment
A sturdy whisk and a large mixing bowl are essential for combining the dry ingredients smoothly. I prefer stainless steel bowls for their durability. For the wet mixture, a second medium bowl ensures you have enough space to stir without spills.
Pan Preparation
Use a 9-inch round cake pan or a heatproof dish that fits inside your steamer. Grease it well with neutral oil or line it with parchment paper to prevent sticking. This step is crucial—the batter is sticky and will cling to ungreased surfaces.
Topping Tools
For the macadamia nut topping, a small saucepan is perfect for toasting the nuts in soy sauce. I use a non-stick skillet to prevent the nuts from sticking as the soy sauce caramelizes. A silicone spatula helps coat them evenly.
Cooling and Serving
After steaming, let the rice cake cool in the pan for 10 minutes before adding toppings. A sharp knife or bench scraper makes clean slices. Serve warm or at room temperature—no special tools needed here!
Nutrition Facts
Frequently Asked Questions
Can I use regular rice flour instead of glutinous?
No, regular rice flour won’t give the right texture. Glutinous rice flour is essential for that signature chewy consistency.
How do I prevent the cake from sticking to the pan?
Grease the pan thoroughly with neutral oil or line it with parchment paper. This sticky batter clings to ungreased surfaces.
What can I substitute for macadamia nuts?
Cashews or raw almonds work well. Chop them finely and toast in soy sauce for the same savory crunch.
How long can I store leftovers?
Keep in an airtight container at room temp for 2-3 days, or refrigerate for up to 1 week. They’re great cold too!

- Jollof Rice Sauce Recipe: West African Tomato and Spice Infusion - September 25, 2026
- Japanese Rice Soup Recipe: Umami-Rich Comfort in a Bowl - September 25, 2026
- Homemade Cream Of Rice Recipe: Silk-Smooth Breakfast in Minutes - September 25, 2026