
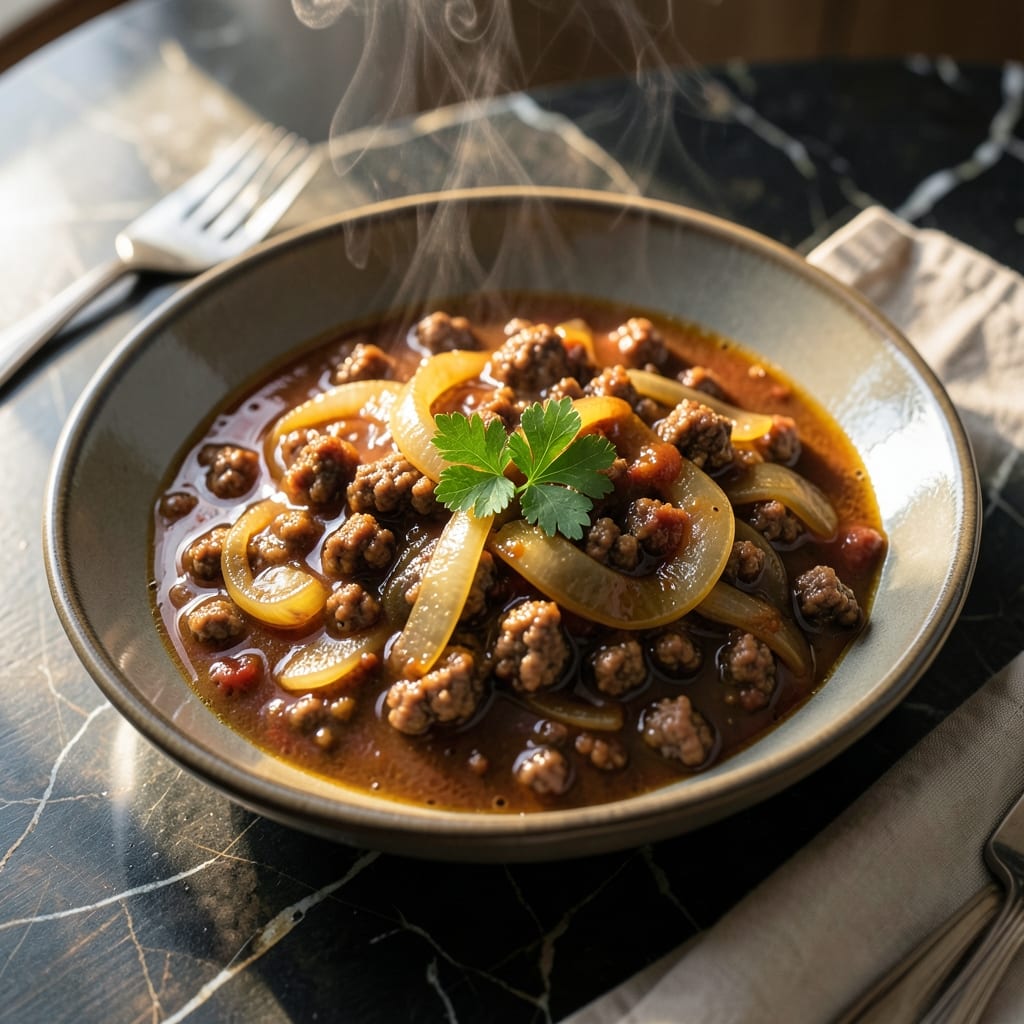
This Japanese demiglace sauce transforms simple rice into a rich, deeply savory meal with minimal effort. I developed this version to bring authentic hayashi flavor to home kitchens without specialty ingredients.
The secret lies in a carefully balanced blend of tomatoes, onions, and beef stock, slowly reduced to a velvety consistency. It keeps well in the fridge for up to a week, making it perfect for quick weeknight dinners.
Ingredients for Hayashi Rice Sauce
Nine simple ingredients deliver that deep, velvety hayashi richness without specialty items.
| Ingredient | Amount | Notes |
|---|---|---|
| Ground Beef 🥩 | ½ lb | Lean or regular, finely ground |
| Yellow Onion 🧅 | 1 whole | Medium size, finely diced |
| Tomato Paste 🍅 | 2 tbsp | Concentrated, no additives |
| Worcestershire Sauce 💧 | 1 tbsp | Anchovy-free if preferred |
| Soy Sauce 💧 | 2 tbsp | Low-sodium for balance |
| Beef Stock 🥩 | 2 cups | Low-sodium preferred |
| Butter 🧈 | 2 tbsp | Unsalted for control |
| All-Purpose Flour 🌾 | 2 tbsp | For thickening roux |
| Granulated Sugar 🍚 | 1 tsp | Balances acidity |
The beef stock is non-negotiable for authentic depth. Better Than Bouillon beef base (dissolved in hot water) is my go-to for home cooks—Swanson or Kitchen Basics are solid store-bought options. Use low-sodium so you control the seasoning. The tomato paste should be double-concentrated; Amor or Mutti brands have the right intensity without bitterness.
No Worcestershire? One tablespoon soy sauce plus a dash of balsamic gets you close. Vegetarian? Swap in mushroom-based Worcestershire or add a teaspoon of Marmite for umami depth. The butter can be replaced with olive oil in a pinch, though the flavor profile shifts slightly. For gluten-free, use cornstarch slurry instead of flour for thickening.
Sauce keeps beautifully for 1 week refrigerated in an airtight container. Freeze in ice cube trays for up to 3 months—perfect for quick hayashi rice nights. Reheat gently to avoid separation.
Why You’ll Love This Recipe
- One Pot Meal: I brown the beef, sauté the onions, and everything else just simmers together—no extra pans, no fuss.
- Rich Umami Bomb: The Worcestershire and soy sauce combo hits that deep, savory note that makes this sauce irresistibly meaty.
- Weeknight Hero: Honestly, between soccer practice and laundry, this comes together faster than takeout and tastes better.
- Budget Stretcher: A pound of ground beef and pantry staples feed my family for two nights, and the leftovers reheat like a dream.
Step-by-Step Instructions for Hayashi Rice Sauce
Master this technique and you’ll create a velvety, deeply flavored demiglace that elevates any dish.
Step 1: Sauté the Aromatics for Maximum Flavor
Heat a heavy-bottomed saucepan over medium heat and add the 0.5 lb ground beef. Break it up with a wooden spoon and cook until it loses its raw color, about 5-7 minutes. The meat should be finely crumbled to distribute evenly in the sauce.
Add the finely diced yellow onion and continue cooking for another 5 minutes until the onion softens and becomes translucent. This builds the aromatic base that gives the sauce its depth. Stir occasionally to prevent browning.
Step 2: Create a Roux for Thickening
Reduce the heat to medium-low and add the 2 tbsp butter. Once melted, sprinkle in the 2 tbsp all-purpose flour and whisk constantly for 2-3 minutes until the mixture forms a smooth paste and turns a light golden color. This roux will thicken the sauce to the perfect consistency.
Cooking the roux until it loses its raw flour taste is critical. You’ll notice the mixture start to bubble and develop a nutty aroma—that’s your signal it’s ready. Don’t let it darken too much, or the sauce will take on a bitter flavor.
Step 3: Build the Sauce Foundation
Increase the heat to medium and gradually pour in the 2 cups beef stock, whisking constantly to prevent lumps. Add the 2 tbsp tomato paste, 1 tbsp Worcestershire sauce, 2 tbsp soy sauce, and 1 tsp granulated sugar. Stir well to combine all ingredients.
The mixture will thicken as it comes to a simmer. The sugar balances the acidity from the tomato paste and Worcestershire, while the soy sauce adds umami depth. Bring the mixture to a gentle boil, then reduce heat to maintain a steady simmer.
Step 4: Simmer to Perfection
Let the sauce simmer uncovered for 15-20 minutes, stirring occasionally. You’ll notice it reduce slightly and develop a glossy sheen. The flavors will meld together, and the sauce will take on a rich, velvety texture that coats the back of a spoon.
As it simmers, taste and adjust seasoning if needed, though the combination of ingredients should provide a well-balanced flavor. The sauce should be thick enough to nappe (lightly coat the back of a spoon) but still pourable. If it becomes too thick, add a splash of water or additional beef stock.
Once finished, the sauce will have a deep, savory aroma with a hint of sweetness. Use it immediately or store it for later use in your hayashi rice or other dishes.
Pro Tips For Making Hayashi Rice Sauce
- Brown the Beef Well: Cook the ground beef until it’s deeply browned, not just gray—I learned this the hard way when my sauce tasted flat because I rushed this step.
- Sauté Onions Low: Let the yellow onions sweat slowly on medium-low heat for about 10 minutes until translucent; it builds a sweeter base for the sauce.
- Deglaze with Worcestershire: After browning the beef, pour in the Worcestershire sauce and scrape up all those browned bits—it’s where the rich flavor hides.
- Simmer Uncovered: Once all ingredients are in, simmer the sauce uncovered for 10-15 minutes to thicken it naturally; covering it makes the sauce watery and weak.
Wine and Beer Pairings for These Flavors
Japanese Beer Pairings
Crisp Japanese lagers like Asahi Super Dry or Sapporo Premium cut through the richness beautifully. Their clean finish and subtle bitterness complement the deep umami without overpowering it. I always keep a few cold ones ready for this dish. 🍺
Light White Wines
A chilled Pinot Grigio with its citrus notes works wonders. The acidity balances the sauce’s savory depth, while the light body doesn’t compete with the flavors. I prefer Italian versions for their minerality.
Rich Red Options
For red wine lovers, a light-bodied Pinot Noir from Oregon or Burgundy pairs surprisingly well. The earthy notes harmonize with the beef stock base, and the tannins are soft enough to not clash with the sauce. 🍷
Non-Alcoholic Choices
Ramune soda (Japanese citrus soda) offers a fun, bubbly contrast. The slight sweetness and effervescence cleanse your palate between bites. I love the traditional marble-topped bottles for presentation.
Sake Recommendations
A dry Junmai sake like Dassai 39 enhances the Japanese profile beautifully. Serve it slightly chilled to highlight its clean, crisp character against the rich sauce. The rice-based alcohol complements the dish’s origins. ✨
Nutrition Facts
Frequently Asked Questions
Can I make this without beef stock?
Use mushroom broth or beef bouillon cubes dissolved in hot water as substitutes. The depth of flavor may vary slightly, but the sauce will still be rich and tasty.
How do I fix a sauce that’s too thin?
Mix 1 tsp cornstarch with 1 tbsp cold water, then stir into simmering sauce. Cook for 2-3 minutes until thickened. Avoid over-thickening—it should coat a spoon lightly.
Is the sugar necessary?
Yes, it balances the acidity from tomato paste and Worcestershire. Skip it only if using naturally sweet tomato paste, but expect a slightly sharper taste.
Can I use ground turkey instead of beef?
Ground turkey works well for a lighter version. Brown it first, then proceed with the recipe as written. The flavor will be milder but still delicious.

- Gambia Jollof Rice Recipe: West African One-Pot Spice Fusion - October 5, 2026
- Cream of Wild Rice Soup Recipe Minnesota: Northwoods Creaminess With Foraged Grains - October 5, 2026
- Frozen Cauliflower Fried Rice Recipe: Quick Low-Carb Wok Magic - October 5, 2026