
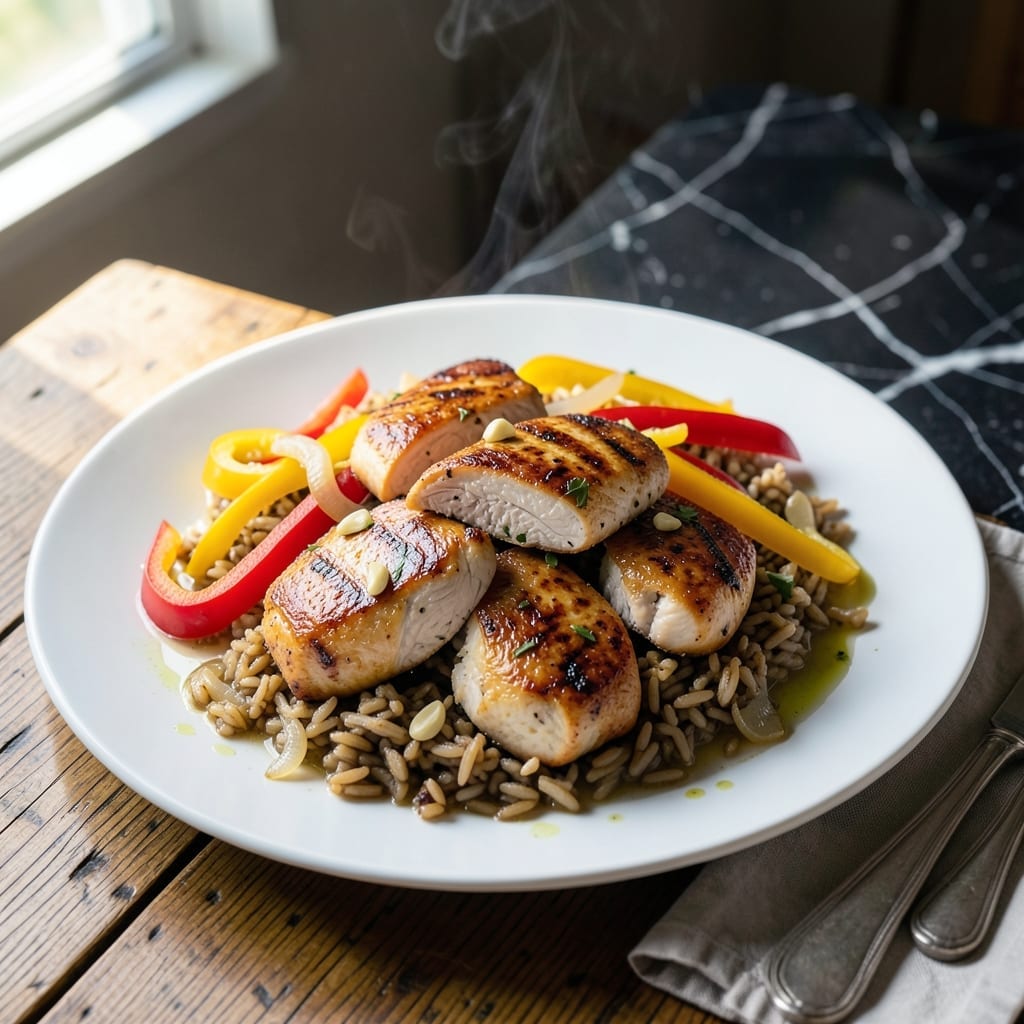
This protein-packed meal delivers nutrition without sacrificing flavor. I’ve refined this recipe to ensure every bite is balanced and satisfying.
The chicken stays tender while the rice absorbs rich, savory notes from the cooking process. It’s a one-bowl solution for busy weeknights or meal prep.
With lean protein, whole grains, and vegetables, this dish checks all the boxes for a healthy dinner. The flavors meld together beautifully with minimal effort.
Perfect for feeding a family or packing for lunch the next day. Here’s how to make it.
Ingredients for Healthy Chicken and Rice
Lean protein, whole grains, and veggies come together in this balanced one-bowl dinner.
| Ingredient | Amount | Notes |
|---|---|---|
| Boneless Skinless Chicken Breast 🍗 | 1 ½ lb | Cut into bite-sized pieces |
| Brown Rice 🍚 | 1 ½ cups | Uncooked, long-grain preferred |
| Low-Sodium Chicken Broth 🥣 | 2 ½ cups | Or substitute vegetable broth |
| Bell Pepper 🌶️ | 1 whole | Any color, diced |
| Onion 🧅 | 1 whole | Yellow or white, finely chopped |
| Garlic Cloves 🧄 | 3 cloves | Minced for maximum flavor |
| Carrots 🥕 | 2 whole | Peeled and diced |
| Peas 🌱 | 1 cup | Fresh or frozen |
| Olive Oil 🫒 | 2 tbsp | Extra-virgin preferred |
| Soy Sauce 🥢 | 2 tbsp | Low-sodium if available |
| Dried Thyme 🌿 | 1 tsp | Or use 1 tbsp fresh |
| Salt 🧂 | ½ tsp | Adjust to taste |
| Black Pepper 🌶️ | ½ tsp | Freshly ground |
| Bay Leaf 🍃 | 1 whole | Remove before serving |
The chicken is the foundation here. Opt for organic or free-range if available—better flavor and texture. Whole Foods and Trader Joe’s carry high-quality options. Brown rice adds fiber and nuttiness, but white rice works in a pinch (adjust liquid ratios). For the broth, low-sodium lets you control the seasoning.
No bell pepper? Zucchini or mushrooms add similar texture. Fresh out of thyme? Oregano or rosemary at equal amounts work well. The soy sauce can be swapped for coconut aminos (gluten-free). Frozen peas are perfectly fine (no need to thaw first). Costco’s organic chicken is a great bulk option for meal prep.
This keeps beautifully in the fridge for 4-5 days—flavors deepen overnight. Freeze portions for up to 3 months in airtight containers. Reheat with a splash of water to revive the rice. Perfect for meal prep or family dinners.
Why You’ll Love This Recipe
- One Pot Wonder: I toss everything in a single pot—chicken, rice, broth, and veggies—then let it simmer while I do something else.
- Rich, Savory Depth: The low-sodium broth soaks into the brown rice, and the bell peppers and onions add a natural sweetness that’s ridiculously good.
- Meal Prep Champion: I make a big batch on Sunday and portion it out for lunches all week—still tastes fresh days later.
- Budget Stretcher: Boneless chicken breast and brown rice feed my family for days without breaking the bank. Honestly, it’s my go-to when I need to save.
Step-by-Step Instructions for Chicken and Rice
This method ensures tender chicken and perfectly cooked rice with minimal effort.
Step 1: Sear the Chicken Breast
Heat 2 tbsp olive oil in a large pot with a tight-fitting lid over medium-high heat. Add the 1.5 lb boneless skinless chicken breast pieces and cook for 5-6 minutes, stirring occasionally, until lightly browned on all sides.
You’ll notice the chicken releasing its juices—this is normal. Resist the urge to stir too often; let it develop a light golden color. The chicken doesn’t need to be fully cooked at this stage, as it will finish in the liquid.
Season with 0.5 tsp salt and 0.5 tsp black pepper while cooking to build flavor from the start.
Step 2: Sauté the Vegetables
Remove the chicken from the pot and set it aside. In the same pot, add the diced 1 whole bell pepper, finely chopped 1 whole onion, and diced 2 whole carrots. Cook for 4-5 minutes until the vegetables begin to soften and the onion turns translucent.
Add the minced 3 cloves garlic cloves and cook for an additional 30 seconds, just until fragrant. Be careful not to let the garlic burn, as it can turn bitter.
This vegetable base adds natural sweetness and depth to the dish, complementing the savory chicken.
Step 3: Combine and Simmer
Return the chicken to the pot. Stir in the 1.5 cups brown rice, 1 tsp dried thyme, and 1 whole bay leaf. Pour in the 2.5 cups low-sodium chicken broth and 2 tbsp soy sauce, stirring to combine all ingredients evenly.
Bring the mixture to a boil, then reduce the heat to low, cover the pot, and let it simmer for 35-40 minutes. This allows the rice to absorb the liquid and cook fully.
Check that the rice is tender and the liquid has been mostly absorbed before moving to the next step.
Step 4: Add Peas and Finish
Once the rice is nearly done, stir in the 1 cup peas and cover the pot again. Let it cook for an additional 5 minutes to heat the peas through and allow them to soften slightly.
Remove the pot from the heat and let it sit, covered, for 5 minutes. This resting time ensures the rice is fully tender and the flavors meld together.
Discard the bay leaf before serving. The dish should have a balanced texture, with tender chicken, fluffy rice, and vibrant vegetables in every bite.
Pro Tips For Making Healthy Chicken And Rice
- Pound the Chicken: Use a rolling pin or meat mallet to even out the chicken breasts to ½-inch thickness—this guarantees they cook through in the same 6-7 minutes without drying out.
- Toast the Rice: Before adding liquid, sauté the brown rice in the pot for 2 minutes with the onions and peppers; it brings out a nutty depth that plain boiled rice lacks.
- Skip Raw Broth: I learned this the hard way—cold broth straight from the fridge drops the temperature and turns the rice mushy; always use hot or room-temp broth.
- Rest Before Serving: Let the chicken rest 5 minutes on a plate while the rice finishes absorbing liquid—it keeps the juices inside instead of pooling on your plate.
Storing and Reheating This Dish
Fridge Storage
Let this creation cool for no more than 2 hours before transferring to airtight containers. I use glass containers with locking lids for best results. Store at 40°F or below for up to 4-5 days. ❄️
Freezer Storage
For longer storage, portion into freezer-safe containers or heavy-duty zip-top bags. Leave 1 inch of headspace for expansion. This meal freezes beautifully for up to 3 months without quality loss.
Stovetop Reheating
My preferred method: transfer to a saucepan with 2 tbsp water or broth. Heat over medium-low for 8-10 minutes, stirring occasionally. The added liquid prevents the rice from drying out. 🔥
Microwave Reheating
Place a single portion in a microwave-safe dish, cover with a damp paper towel. Heat on 70% power for 2-3 minutes, stir, then continue in 30-second intervals until reaching 165°F.
Meal Prep Tip
Divide into 4 equal portions before storing for grab-and-go lunches. I love that the flavors actually improve overnight as everything marries together. The chicken stays moist and the rice absorbs all the delicious juices.
Nutrition Facts
Frequently Asked Questions
Can I use white rice instead of brown?
Yes, but reduce the broth to 2 cups and cook for 18-20 minutes instead. Brown rice needs more liquid and time due to its fiber content.
How do I keep the chicken from drying out?
Don’t overcook it during searing—just 5-6 minutes is enough. The chicken finishes cooking in the simmering liquid, staying juicy.
Can I add other veggies?
Try zucchini, mushrooms, or spinach. Add heartier veggies with the rice and delicate ones (like spinach) near the end.
Is this dish gluten-free?
Swap the soy sauce for tamari or coconut aminos to make it gluten-free. All other ingredients are naturally free of gluten.

- Jollof Rice Sauce Recipe: West African Tomato and Spice Infusion - September 25, 2026
- Japanese Rice Soup Recipe: Umami-Rich Comfort in a Bowl - September 25, 2026
- Homemade Cream Of Rice Recipe: Silk-Smooth Breakfast in Minutes - September 25, 2026