
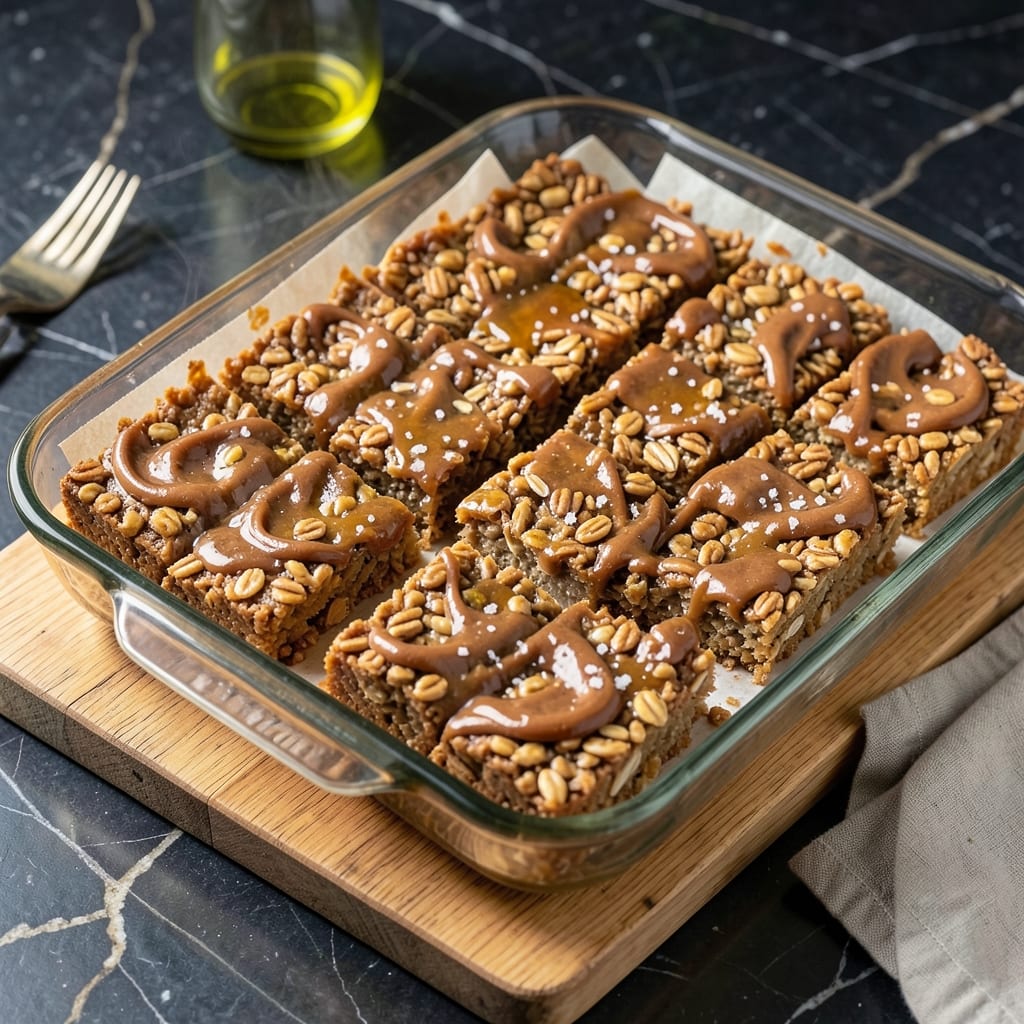
I’ve reimagined classic Rice Krispie treats to deliver a protein-packed version that doesn’t skimp on flavor. This no-bake recipe proves you can enjoy a sweet treat while staying mindful of nutrition.
By swapping traditional ingredients for natural sweeteners and whole-grain cereal, this dish offers a guilt-free indulgence. The peanut butter base adds richness and healthy fats, making it both satisfying and nourishing.
Each bite combines crispy texture with creamy peanut butter, creating a balance that’s hard to resist. It’s the ideal snack for energy-boosting treats without the sugar crash.
Perfect for meal prep or a quick pick-me-up, this recipe keeps things simple while delivering on taste and nutrition.
Ingredients for Healthy Peanut Butter Rice Krispie Treats
Wholesome ingredients for a protein-packed twist on a childhood favorite without the guilt.
| Ingredient | Amount | Notes |
|---|---|---|
| Old-Fashioned Rolled Oats 🌾 | 2 cups | Certified gluten-free if needed |
| Natural Peanut Butter 🥜 | 1 cup | Unsweetened, creamy variety |
| Pure Maple Syrup 🍁 | ½ cup | Grade A or B |
| Vanilla Extract 🌿 | 2 tsp | Pure, not imitation |
| Sea Salt 🧂 | ¼ tsp | Fine grain preferred |
| Whole-Grain Brown Rice Cereal 🍚 | 4 cups | Crispy, unsweetened |
| Vanilla Protein Powder 💪 | ½ cup | Whey or plant-based |
| Chia Seeds 🌱 | 2 tbsp | Optional for extra fiber |
| Cinnamon 🌿 | 1 tsp | Ground, for warmth |
| Coconut Oil 🥥 | 1 tbsp | For greasing pan |
The peanut butter is doing most of the heavy lifting here. Natural, no-sugar-added is ideal—stir it well before measuring since the oil separates. Whole Foods or Costco have great options. For the cereal, Brown Rice Krispies (the organic kind) gives you that classic crunch without the refined carbs. I grab mine at Trader Joe’s—they’ve got a store brand that’s perfect and usually cheaper.
No maple syrup? Honey or agave at a 1:1 ratio works fine (though not vegan). Swap the protein powder for ground flaxseed or hemp seeds if you’re avoiding supplements. The chia seeds are totally optional—add them if you want extra fiber or skip if you’re in a hurry. Any nut butter works too (almond, cashew), but peanut gives that classic flavor.
These keep beautifully in an airtight container at room temp for 5-7 days. Freeze for up to 3 months if you want to prep ahead. Press them into a lined pan for easy cutting—parchment paper (not wax) is your friend here.
Why You’ll Love This Recipe
- One Bowl Wonder: I just dump oats, peanut butter, and maple syrup in a bowl, mix, and press—no stove, no fuss.
- Addictive Crunch: The oats add this hearty texture that makes the usual Rice Krispies taste flat. Honestly, I sneak seconds every time.
- Snack or Dessert: I pack these for lunchboxes or serve them after dinner. Between us, they disappear either way.
- Budget Stretcher: A batch costs me under five dollars and lasts all week. I’ll be real: that’s cheaper than most protein bars.
Step-by-Step Instructions for Healthy Peanut Butter Rice Krispie Treats
No oven required—just mix, press, and let these protein-packed treats set to perfection.
Step 1: Prepare the Pan and Combine Dry Ingredients
Line an 8×8-inch baking pan with parchment paper, leaving overhang on the sides for easy removal. Then grease the paper lightly with the 1 tablespoon Coconut Oil—this prevents sticking without altering the flavor.
In a large mixing bowl, combine the 2 cups Old-Fashioned Rolled Oats, 4 cups Whole-Grain Brown Rice Cereal, 0.5 cup Vanilla Protein Powder, 2 tablespoons Chia Seeds, and 1 teaspoon Cinnamon. Stir until evenly distributed. I like to press the mixture gently with my hands to break up any clumps in the protein powder.
Step 2: Heat the Wet Ingredients to Binding Consistency
In a small saucepan, warm the 1 cup Natural Peanut Butter and 0.5 cup Pure Maple Syrup over low heat, stirring constantly. The goal is to create a smooth, pourable mixture—this should take about 2-3 minutes.
Once combined, remove from heat and stir in the 2 teaspoons Vanilla Extract and 0.25 teaspoon Sea Salt. The mixture should be glossy and slightly runny. If it thickens too much as it cools, return it to low heat for 30 seconds to loosen. This wet base is what binds everything together while keeping the treats moist.
Step 3: Fold Everything Together Until Fully Coated
Pour the warm peanut butter mixture over the dry ingredients. Using a silicone spatula or wooden spoon, fold gently until every flake and oat is evenly coated. The cereal should glisten slightly, and the mixture should hold together when pressed.
Here’s the thing—if it seems too dry, add a splash of warm water, 1 tablespoon at a time, until it reaches the right consistency. If it’s too wet, let it sit for 1 minute to thicken. The texture should resemble thick cookie dough that sticks together when squeezed.
Step 4: Press Firmly and Chill to Set
Transfer the mixture to the prepared pan. Using the back of a spoon, a spatula, or your hands (lightly greased with more coconut oil), press down firmly and evenly. The key is consistent pressure—this ensures the treats hold their shape when sliced.
Place the pan in the refrigerator and let it chill for at least 1 hour. This is non-negotiable for clean slices. I’ve found that 90 minutes is the sweet spot for a firm yet chewy texture. The treats are ready when the top feels solid to the touch.
Step 5: Slice and Serve
Lift the set mixture from the pan using the parchment overhang and transfer it to a cutting board. Using a sharp knife, slice into 12 equal squares (or 16 smaller squares for bite-sized portions). Wipe the knife clean between cuts for neat edges.
Store leftovers in an airtight container at room temperature for up to 5 days, or refrigerate for up to 2 weeks. These taste best slightly chilled, with the peanut butter flavor shining and the cereal still crisp.
Pro Tips For Making Healthy Peanut Butter Rice Krispie Treats
- Warm the Syrup: Heat the maple syrup gently for 30 seconds before mixing—I learned this the hard way after my first batch turned out grainy and uneven.
- Use Runny Peanut Butter: Stir the natural peanut butter until completely smooth and drippy, or you’ll end up with dry, crumbly treats no matter how much you mix.
- Press Firmly: Pack the mixture into the pan with serious pressure (I use the bottom of a glass), or they’ll fall apart when you try to cut them.
- Add Oats Last: Fold in the rolled oats after combining the wet ingredients thoroughly—this prevents the oats from soaking up too much syrup and turning mushy.
Health Benefits of These Flavors
Protein Powerhouse
Each treat packs a serious protein punch with 15-18 grams per serving, thanks to the combination of peanut butter and protein powder. This makes them perfect for post-workout recovery or a mid-afternoon energy boost at my Boston marketing office. 💪
Healthy Fats Boost
Natural peanut butter provides heart-healthy monounsaturated fats that keep you full longer. These good fats help stabilize blood sugar, preventing the energy crash you get from traditional sugary treats. I noticed this immediately when testing these in my tiny kitchen.
Fiber-Rich Base
The whole-grain brown rice cereal and rolled oats deliver 4-5 grams of fiber per treat. This supports digestion and helps you feel satisfied. The chia seeds add even more fiber if you include them—just 2 tablespoons gives you 10 grams of fiber total.
Natural Energy Source
Pure maple syrup provides natural carbohydrates for quick energy, while the protein and fats create sustained fuel. This balance is what makes these treats ideal for hiking the Blue Hills or powering through a busy day in the city. ✨
Reduced Sugar Impact
With only 8-10 grams of natural sugars per serving (compared to 20+ grams in traditional versions), this recipe won’t spike your blood sugar. The cinnamon also helps regulate glucose levels naturally.
Nutrient-Dense Additions
The vanilla protein powder adds essential amino acids, while chia seeds contribute omega-3s. Together they create a treat that’s as nourishing as it is delicious. I love that we’re getting real nutrition from something that tastes this good.
Nutrition Facts
Frequently Asked Questions
How do I keep these treats from falling apart?
Press the mixture firmly into the pan with consistent pressure. Chilling for at least 1 hour is crucial for clean slices.
Can I make these vegan?
Yes! Use plant-based protein powder and ensure your cereal is vegan. The rest of the ingredients are naturally plant-based.
What can I substitute for maple syrup?
Honey or agave work in a 1:1 ratio. Note that honey isn’t vegan, and agave may be slightly sweeter.
How long do these stay fresh?
At room temperature in an airtight container, they last 5 days. Refrigerated, they keep for 2 weeks.

- Ground Beef Rice and Beans Recipe: Slow-Simmered Savory Harmony - October 17, 2026
- Guyanese Fried Rice Recipe: Caribbean Spice With Wok-Charred Aromatics - October 17, 2026
- Hakka Thunder Tea Rice Recipe: Wok-Charred Herbal Infusion - October 17, 2026