
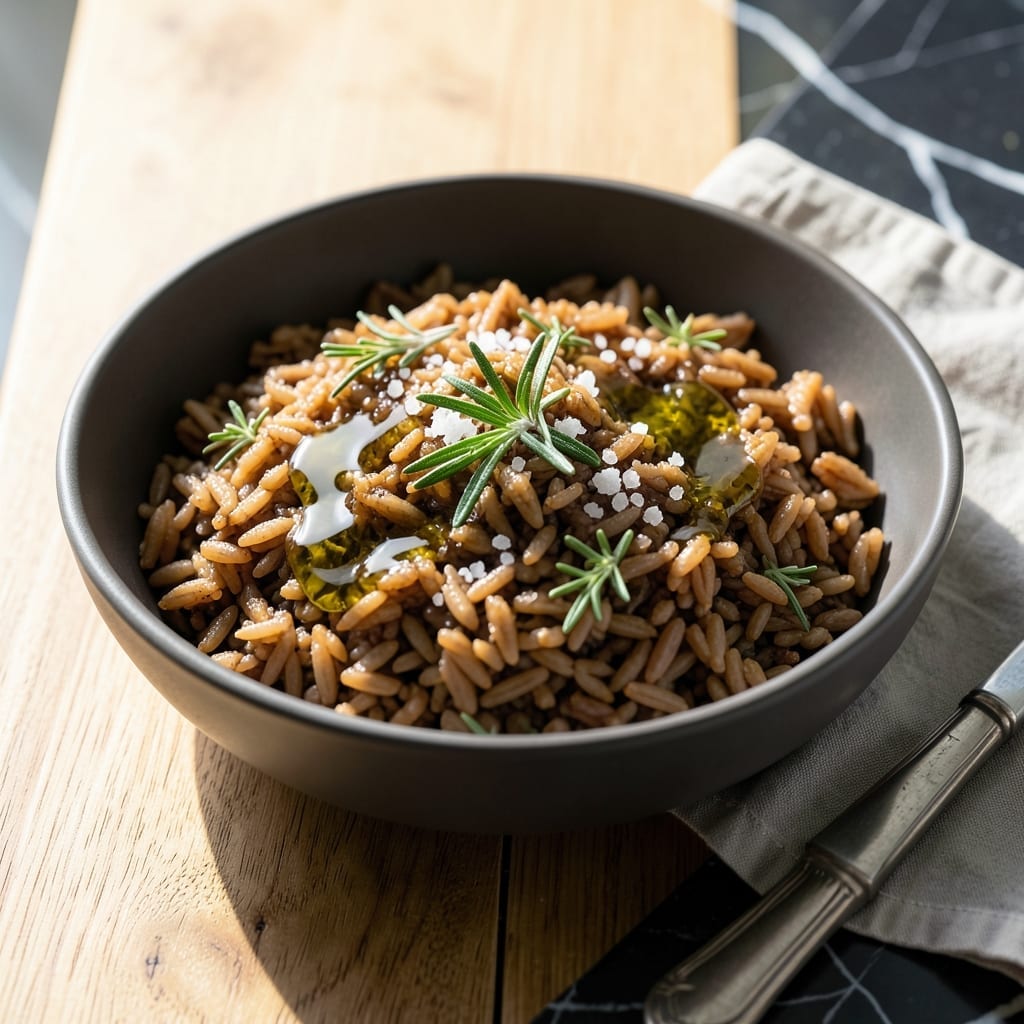
Brown rice doesn’t have to be bland or boring to be healthy. This version delivers a nutty flavor and perfect texture with minimal effort.
I’ve tested this method in my tiny Boston kitchen, adjusting water ratios and cooking times to guarantee consistent results. The secret is using a 2:1 liquid-to-rice ratio and letting it rest after cooking.
The herbs add a subtle depth that elevates the dish without overpowering the natural nuttiness. It’s a simple, foolproof way to make brown rice taste as good as it is good for you.
Serve it as a side or base for bowls, salads, or stir-fries. Here’s how to get it right every time.
Ingredients for Healthy Tasty Brown Rice
Simple, wholesome ingredients bring nutty depth and perfect texture to this dish.
| Ingredient | Amount | Notes |
|---|---|---|
| Long-Grain Brown Rice 🌾 | 2 cups | Rinsed until water runs clear |
| Water 💧 | 4 cups | Filtered or tap works fine |
| Extra-Virgin Olive Oil 🫒 | 1 tbsp | For nutty depth and shine |
| Sea Salt 🧂 | 1 tsp | Fine grain preferred |
| Fresh Rosemary 🌿 | 1 tbsp | Finely chopped, stems removed |
| Fresh Thyme 🍃 | 1 tbsp | Leaves stripped from stems |
| Garlic Cloves 🧄 | 2 cloves | Minced for even distribution |
| Bay Leaf 🌿 | 1 whole | Removed before serving |
| Vegetable Broth 🥕 | 1 cup | Low-sodium preferred |
| Lemon Zest 🍋 | 1 tsp | From 1 medium lemon |
| Black Pepper 🌶️ | ½ tsp | Freshly ground preferred |
The rice is the star here. Long-grain brown rice gives you that chewy texture and nutty flavor—avoid instant or short-grain. I grab mine from Whole Foods bulk bins (cheaper and you can get exactly 2 cups). The herbs matter too: look for bright green rosemary and thyme at the store, not the wilted stuff. Fresh garlic is a must (pre-minced in jars tastes harsh).
No fresh herbs? Dried at one-third the amount works fine—just add them with the liquid. Vegetable broth can be swapped for water, but the broth adds depth. Missing lemon zest? A squeeze of juice at the end gives a similar bright note. The bay leaf is subtle but worth the extra minute to fish it out before serving.
Cooked rice keeps in the fridge for 4-5 days—store in an airtight container. Freezes well for up to 3 months too. I like to make a double batch and freeze half for quick meals later (the texture holds up nicely).
Why You’ll Love This Recipe
- One Pot Wonder: I just toss everything in, cover it, and let the rice soak up the rosemary-infused oil while I do something else.
- Herb-Infused Comfort: The fresh rosemary and olive oil turn plain brown rice into something rich and aromatic.
- Meal Prep Hero: Honestly, this keeps beautifully for lunches all week—just reheat and pair with whatever protein I have.
- Budget Stretch: Between us, a pound of brown rice costs pennies and feeds us for days.
Step-by-Step Instructions for Tasty Brown Rice
Here’s the method. Simple, healthy, and packed with herbed flavor every time.
Step 1: Rinse and Toast the Rice
Place the 2 cups long-grain brown rice in a fine-mesh strainer and rinse under cold water until the water runs clear. This removes excess starch and ensures fluffy, separate grains rather than a gummy texture.
Heat the 1 tbsp extra-virgin olive oil in a medium pot over medium heat. Add the drained rice and toast for 2-3 minutes, stirring frequently, until the grains become lightly golden and emit a nutty aroma. This step deepens the flavor and prevents stickiness.
Step 2: Sauté Aromatics Until Fragrant
Add the 2 cloves minced garlic cloves, 1 tbsp fresh rosemary, and 1 tbsp fresh thyme to the pot with the toasted rice. Stir constantly for 30-45 seconds until the herbs release their fragrance and the garlic just begins to soften.
Be careful not to let the garlic burn—it turns bitter quickly. The herbs should look vibrant and smell fresh, not dried out. This builds the foundation of flavor that will infuse the rice as it cooks.
Step 3: Add Liquids and Seasonings
Pour in the 4 cups water, 1 cup vegetable broth, 1 tsp sea salt, 1 whole bay leaf, 1 tsp lemon zest, and 0.5 tsp black pepper. Stir well to combine all the ingredients and bring the mixture to a boil over high heat.
Once boiling, reduce the heat to low, cover the pot with a tight-fitting lid, and let it simmer. The liquid should be gently bubbling, not rolling, to ensure even cooking without burning.
Step 4: Simmer Until Tender
Let the rice simmer covered for 40-45 minutes without stirring. I know it’s tempting to peek, but resist the urge—releasing steam slows down the cooking process and can lead to unevenly cooked rice.
After 40 minutes, check the rice. It’s done when all the liquid has been absorbed and the grains are tender but still slightly chewy. If it’s still firm, cover and cook for another 5 minutes, then check again.
Step 5: Rest and Serve
Remove the pot from the heat and let it sit covered for 10 minutes. This resting period allows the rice to steam in its own moisture, making it fluffier and more flavorful.
Discard the bay leaf, then fluff the rice gently with a fork to separate the grains. Serve immediately while warm, with the bright, herbed aroma filling your kitchen. The rice should be light, nutty, and perfectly seasoned in every bite.
Pro Tips For Making Healthy Tasty Brown Rice
- Toast the Rice: Heat the rice in olive oil for 2-3 minutes before adding water—it brings out a nutty depth that plain brown rice lacks.
- Double the Water: Brown rice needs more hydration than white; use a 2:1 water-to-rice ratio and don’t peek until at least 30 minutes in.
- Use Fresh Rosemary: Dried rosemary works in a pinch, but fresh sprigs steeped in the cooking water add a bright, piney aroma that dried just can’t match.
- Rest After Cooking: Let the rice sit covered for 10 minutes off the heat—it finishes steaming and absorbs any lingering moisture, so it’s light, not gummy.
Dietary Considerations for These Flavors
Gluten-Free Friendly
This dish is naturally gluten-free, making it perfect for anyone with celiac disease or gluten sensitivity. I’ve served it to gluten-intolerant friends in my Boston kitchen with zero concerns. Just double-check your vegetable broth label—some brands add wheat-based thickeners.
Vegan and Plant-Based
Brown rice is a staple in plant-based diets, and this recipe keeps it 100% vegan with no animal products. The herbs and olive oil add richness without dairy or meat. I love how it fits seamlessly into my meatless Mondays.
Low-Sodium Adaptations
To reduce sodium, use low-sodium vegetable broth and cut the sea salt to ½ tsp. The herbs and lemon zest still pack plenty of flavor. I tested this version for my dad, who watches his salt intake closely. 💪
Nut Allergy Safe
This recipe contains no nuts or nut-derived ingredients, making it safe for nut allergies. Just ensure your cooking environment is free from cross-contamination if allergies are severe. I always wipe down counters before prepping.
Diabetic-Friendly
Brown rice has a lower glycemic index than white rice, helping manage blood sugar levels. The fiber in long-grain brown rice slows digestion, preventing spikes. Portion control is still key—I recommend ½ cup servings for balanced meals.
Pregnancy-Safe
All ingredients here are safe for pregnancy when prepared with proper hygiene. The herbs are used in culinary amounts, well below medicinal doses. I cooked this often during my sister’s pregnancy—she craved the nutty flavor constantly.
Nutrition Facts
Frequently Asked Questions
Can I use a rice cooker instead of a pot?
Yes! Use the same 2:1 liquid-to-rice ratio and add all ingredients to your rice cooker. Cook on the standard setting, then let it rest for 10 minutes after it switches to “keep warm.”
Why do I need to rinse the rice first?
Rinsing removes excess starch that can make brown rice gummy. It also washes away dust or debris from processing. Skip this step and you risk a sticky, pasty texture.
What if my rice is still crunchy after 45 minutes?
Add ¼ cup hot water, cover, and cook for another 5-10 minutes. Check again—old rice or high altitude may need extra time. Never add cold water; it disrupts the cooking process.
Can I make this ahead of time?
Cooked rice keeps in the fridge for 4-5 days in an airtight container. Reheat in the microwave with a splash of water, or enjoy it cold in salads.

- Ground Beef Rice and Beans Recipe: Slow-Simmered Savory Harmony - October 17, 2026
- Guyanese Fried Rice Recipe: Caribbean Spice With Wok-Charred Aromatics - October 17, 2026
- Hakka Thunder Tea Rice Recipe: Wok-Charred Herbal Infusion - October 17, 2026