
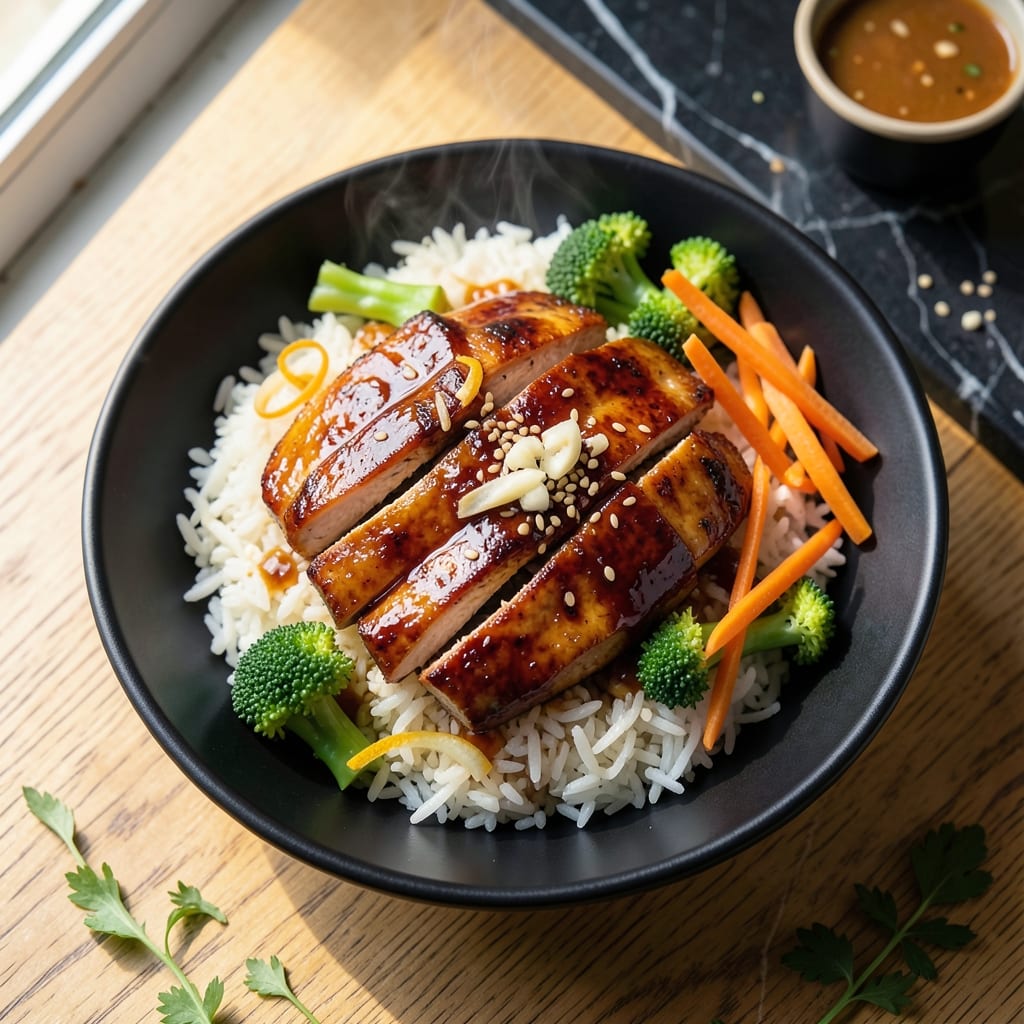
This dish proves healthy eating can be deeply satisfying without sacrifice. My version balances sweet-savory teriyaki with lean chicken and nutritious veggies over fluffy rice.
The secret lies in a homemade teriyaki sauce that skips excess sugar while delivering bold flavor. I developed this method during my Charleston apprenticeship, perfecting the glaze-to-protein ratio.
You’ll achieve restaurant-quality results with simple techniques: proper chicken searing, sauce reduction, and perfectly cooked grains. Each component shines while maintaining nutritional integrity.
Serve this bowl for a meal that’s as nourishing as it is delicious. The balance of textures and flavors makes it a weeknight winner.
Ingredients for Healthy Teriyaki Chicken Rice Bowl
Lean chicken, vibrant veggies, and homemade teriyaki over fluffy rice. Simple, nourishing, restaurant-worthy.
| Ingredient | Amount | Notes |
|---|---|---|
| Boneless Skinless Chicken Breasts 🍗 | 1 ½ lb | Pounded to even thickness |
| Long-Grain White Rice 🍚 | 2 cups | Rinsed until water runs clear |
| Low-Sodium Soy Sauce 🫒 | ½ cup | Tamari for gluten-free option |
| Fresh Ginger Root 🌿 | 1 tbsp | Peeled and finely grated |
| Garlic Cloves 🧄 | 4 cloves | Minced until paste-like |
| Brown Sugar 🍚 | 3 tbsp | Packed, for balanced sweetness |
| Rice Vinegar 🍶 | 2 tbsp | Unseasoned variety preferred |
| Sesame Oil 🫒 | 1 tsp | Toasted for depth |
| Broccoli Florets 🥦 | 3 cups | Cut into bite-sized pieces |
| Red Bell Pepper 🌶️ | 1 whole | Thinly sliced into strips |
| Carrot 🥕 | 1 whole | Julienned or thinly sliced |
| Cornstarch 🌾 | 1 tbsp | Mixed with water for slurry |
| Neutral Cooking Oil 🫒 | 2 tbsp | Avocado or vegetable oil |
| Green Onions 🧅 | 3 whole | Thinly sliced for garnish |
| Sesame Seeds 🌿 | 1 tsp | Toasted for garnish |
The chicken is the foundation here. Boneless, skinless breasts stay lean while soaking up that teriyaki glaze—avoid thighs, they release too much fat. I grab mine from Whole Foods (their butcher cuts thick, even pieces). For the rice, jasmine or basmati give that fluffy texture you want, but any long-grain works. Rinse it well—this removes excess starch so grains stay separate (worth the extra minute).
No brown sugar? Coconut sugar or maple syrup work at a 1:1 ratio. Fresh ginger is non-negotiable—ground ginger at half the amount just doesn’t cut it. Short on veggies? Swap in snap peas, mushrooms, or zucchini (whatever’s in season). The soy sauce should be low-sodium to control the salt content. Kikkoman is my go-to, but San-J makes a solid tamari if you need gluten-free.
Leftovers keep 4-5 days in the fridge—the flavors actually deepen. Freeze the sauce separately for 3 months if you’re meal prepping (it thaws beautifully). Store sesame oil in a cool, dark place—it goes rancid faster than other oils. And pro tip: toast those sesame seeds just before serving (30 seconds in a dry pan).
Why You’ll Love This Recipe
- One Pan Wonder: I love that I can cook the chicken, rice, and sauce all in the same skillet—minimal cleanup, maximum flavor.
- Ginger-Garlic Magic: That fresh ginger and minced garlic in the teriyaki sauce? It’s the reason I keep making this.
- Lunchbox Hero: Pack the leftovers for work—the chicken stays juicy, and the rice soaks up the sauce perfectly overnight.
- Budget Stretcher: Boneless chicken breasts and pantry staples mean I feed my family for less without skimping on taste.
Step-by-Step Instructions for Teriyaki Chicken Rice Bowl
Here’s my method for building this balanced bowl with perfectly glazed chicken and crisp vegetables.
Step 1: Cook Rice and Prepare Teriyaki Sauce Base
Start by cooking the 2 cups long-grain white rice according to package instructions. While it simmers, combine the 0.5 cup low-sodium soy sauce, 3 tbsp brown sugar, 1 tbsp grated fresh ginger root, and 4 minced garlic cloves in a small bowl.
Whisk until the brown sugar dissolves completely. I use packed brown sugar for that perfect caramel depth. The ginger and garlic should be finely grated and minced to paste-like consistency to infuse the sauce properly. This base will transform into your glossy teriyaki glaze.
Step 2: Sear Chicken and Create the Glaze
Heat 1 tbsp neutral cooking oil in a large skillet over medium-high heat. Add the 1.5 lb boneless skinless chicken breasts (pounded to even thickness) and cook for 5-6 minutes per side until golden brown and cooked through.
Transfer the chicken to a plate. In the same skillet, add the soy sauce mixture and 2 tbsp rice vinegar. Bring to a simmer, then create a slurry with 1 tbsp cornstarch mixed with 2 tbsp water. Whisk this into the skillet and cook for 1-2 minutes until the sauce thickens to a glossy consistency.
Step 3: Slice Chicken and Stir-Fry Vegetables
Slice the cooked chicken into thin strips. In a clean skillet, heat the remaining 1 tbsp neutral cooking oil over high heat. Add the 3 cups broccoli florets, thinly sliced red bell pepper, and julienned carrot.
Stir-fry for 4-5 minutes until the vegetables are tender-crisp with bright color. The high heat ensures they retain their nutrients and vibrant texture. Keep them moving constantly to prevent burning while achieving that perfect bite.
Step 4: Combine All Elements with Final Touches
Return the sliced chicken to the skillet with vegetables. Pour the teriyaki glaze over everything and toss gently to coat. Cook for an additional 1-2 minutes until everything is heated through and the chicken is fully glazed.
To serve, divide the cooked rice among bowls. Top with the teriyaki chicken and vegetables. Drizzle any remaining sauce from the pan, then garnish with thinly sliced green onions and 1 tsp toasted sesame seeds. The sesame seeds add a nutty crunch that completes the dish.
Pro Tips For Making Healthy Teriyaki Chicken Rice Bowl
- Velvet the Chicken: Pound the chicken breasts to an even ½-inch thickness before cooking—I learned this the hard way after too many dry, chewy bites from uneven pieces.
- Bloom the Aromatics: Cook the minced ginger and garlic in the pan for 30 seconds until fragrant before adding the soy sauce, or you’ll miss out on the deep, toasty base that makes the teriyaki sing.
- Skip Raw Soy: Always simmer your low-sodium soy sauce with a touch of honey or brown sugar for 2-3 minutes to mellow the sharpness—raw soy can overpower the dish.
- Rest Before Slicing: Let the chicken rest 5 minutes under foil after cooking, or all those juices you worked to preserve will end up on the cutting board instead of in your bowl.
Make-Ahead Tips for healthy teriyaki chicken rice bowl
Prep the Chicken First
Start by pounding your 1.5 lb chicken breasts to even ½-inch thickness the night before. This ensures even cooking and maximum sauce absorption. Store in an airtight container in the fridge for up to 24 hours. 💡
Rice Cooking Hack
Cook your 2 cups rice the morning of serving, then spread it on a baking sheet to cool quickly. This prevents the grains from turning mushy when stored. Refrigerate in a shallow container for up to 3 days.
Sauce Storage
Make the teriyaki sauce base 2-3 days ahead—the flavors deepen beautifully. Store in a glass jar in the fridge. Add the cornstarch slurry fresh when reheating to maintain that perfect glossy texture.
Veggie Prep
Chop all broccoli, bell pepper, and carrot and store in separate containers with damp paper towels. This keeps them crisp for up to 3 days. I learned this trick during my Charleston apprenticeship.
Assembly Shortcut
Cook the chicken and veggies together, then store separately from rice. Reheat components individually in a skillet with 1 tbsp water to prevent drying. Combine just before serving.
Freezer Option
This dish freezes well for up to 3 months. Portion into airtight containers with all components separate. Thaw overnight in the fridge before reheating. ✨
Nutrition Facts
Frequently Asked Questions
Can I use chicken thighs instead of breasts?
Yes, but opt for boneless, skinless thighs. They stay juicier but release more fat, so blot them well before cooking. Reduce cooking time to 4-5 minutes per side since they cook faster.
How do I make this gluten-free?
Swap the soy sauce for tamari (check labels for 100% gluten-free certification). Also ensure your cornstarch is certified gluten-free. The rest of the ingredients are naturally gluten-free.
What if my sauce is too thin?
Mix 1 tsp cornstarch with 1 tbsp cold water and whisk into simmering sauce. Cook for 1-2 minutes until it thickens. Avoid adding dry cornstarch directly—it can clump.
Can I use frozen veggies?
Yes, but thaw and pat them completely dry first. Frozen veggies release moisture that can make your stir-fry soggy. Add them at the same point as fresh, but reduce cooking time by 1-2 minutes.

- Jollof Rice Sauce Recipe: West African Tomato and Spice Infusion - September 25, 2026
- Japanese Rice Soup Recipe: Umami-Rich Comfort in a Bowl - September 25, 2026
- Homemade Cream Of Rice Recipe: Silk-Smooth Breakfast in Minutes - September 25, 2026