
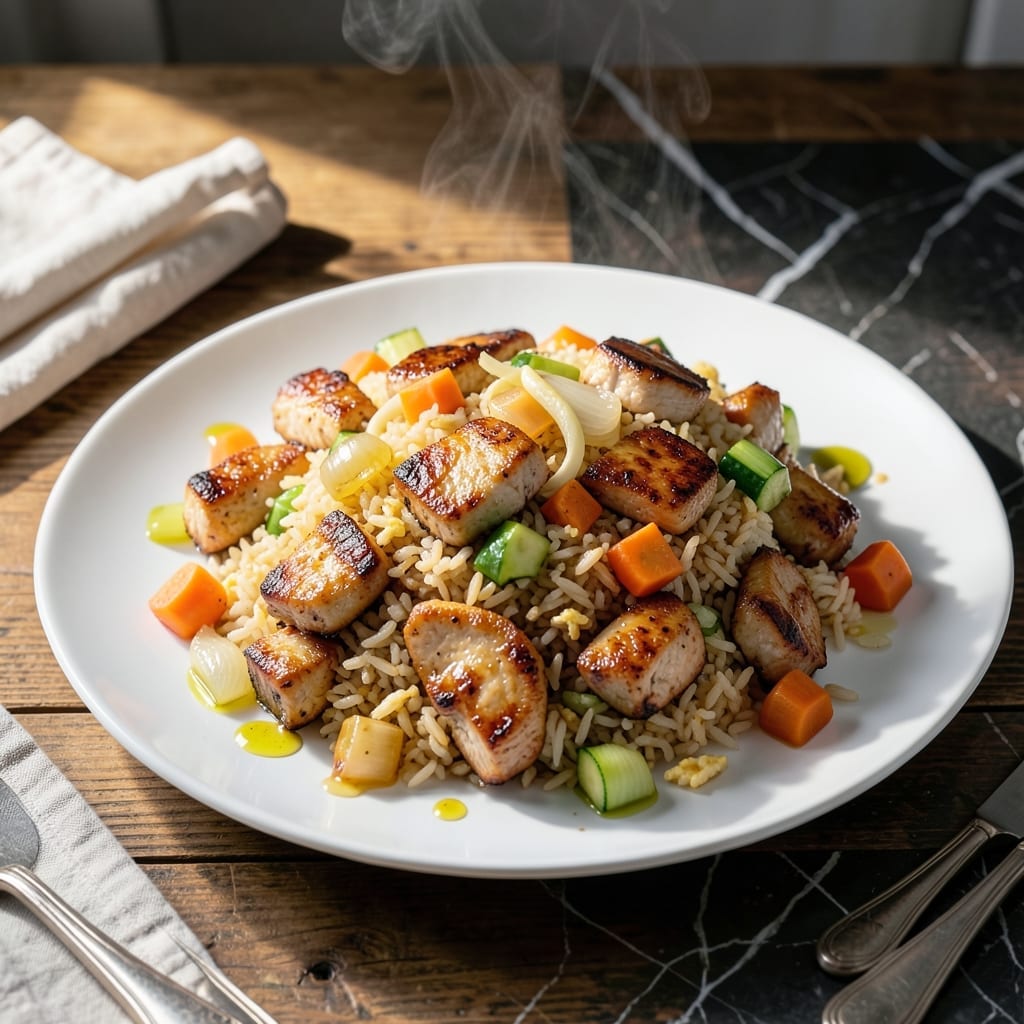
This hibachi-style dish brings restaurant-quality flavors to your home kitchen with minimal effort. The key is high heat and proper technique to achieve that signature wok-seared texture.
I developed this method after years of studying Asian cooking techniques, focusing on the balance between tender chicken and perfectly charred rice. The scrambled egg ribbons add a touch of elegance while keeping the dish approachable.
You’ll love how the umami-rich sauce coats every grain of rice, while the chicken stays juicy and flavorful. The secret is in the layering of ingredients and timing.
Ready in under 30 minutes, this complete meal satisfies cravings for takeout without leaving your kitchen.
Ingredients for Hibachi Chicken Fried Rice
Pantry staples meet fresh produce for this wok-seared, restaurant-worthy complete meal at home.
| Ingredient | Amount | Notes |
|---|---|---|
| Boneless Skinless Chicken Thighs 🍗 | 1 ½ lb | Cut into bite-sized pieces |
| Cooked White Rice 🍚 | 4 cups | Day-old, chilled (critical for texture) |
| Large Eggs 🥚 | 3 whole | Beaten for egg ribbons |
| Yellow Onion 🧅 | 1 whole | Finely diced for even cooking |
| Carrots 🥕 | 2 whole | Julienned or finely diced |
| Zucchini 🥒 | 1 whole | Diced into small cubes |
| Garlic Cloves 🧄 | 4 cloves | Minced for maximum flavor |
| Fresh Ginger 🌿 | 1 tbsp | Finely grated for sauce |
| Soy Sauce 🫒 | ⅓ cup | Low-sodium preferred for control |
| Oyster Sauce 💧 | 2 tbsp | Essential for umami depth |
| Sesame Oil 🫒 | 1 tbsp | Toasted for finishing aroma |
| Vegetable Oil 🫒 | 3 tbsp | High smoke point for searing |
| Green Onions 🧅 | 4 whole | Thinly sliced for garnish |
| Butter 🧈 | 2 tbsp | Unsalted for cooking egg ribbons |
| Salt 🧂 | ½ tsp | Adjust to taste at end |
The chicken thighs are non-negotiable here—boneless, skinless from Costco or Whole Foods gives you the juiciest results (breasts dry out too fast). Day-old rice is critical for that signature char; fresh rice turns to mush. For soy sauce, Kikkoman low-sodium lets you control the salt. Oyster sauce? Lee Kum Kee is the gold standard, but vegetarian oyster sauce works if that’s your preference.
No oyster sauce? Hoisin plus a splash of fish sauce gets you 80% there. Swap chicken for shrimp (peeled, deveined) or tofu (extra-firm, pressed). Frozen peas at one-third the amount can replace carrots or zucchini. Skip the ginger? Ground ginger at one-quarter the amount works in a pinch, but fresh is worth the minute it takes to grate.
Cooked rice keeps in the fridge for 3-4 days (perfect for meal prep). The finished dish reheats beautifully—store in airtight containers for up to 4 days. Freezing isn’t ideal for texture, but it’ll keep for 2 months if needed.
Why You’ll Love This Recipe
- One Pan Wonder: I love that everything—chicken, eggs, veggies—cooks together in one skillet. No extra dishes, just flavor.
- Umami Bomb: The chicken thighs and carrots soak up the soy sauce in a way that makes every bite ridiculously good.
- Meal Prep Hero: I make a big batch on Sunday and it reheats beautifully for lunches all week.
- Budget Stretcher: Honestly, it’s filling, uses simple ingredients, and feeds my family for two meals without breaking the bank.
Step-by-Step Instructions for Hibachi Chicken Fried Rice
Here’s the method. Straightforward, tested, works every time.
Step 1: Sear and Cook the Chicken Thighs
Heat 1 tablespoon of the vegetable oil in a large wok or heavy skillet over medium-high heat until shimmering. Add the 1.5 lb boneless skinless chicken thighs, cut into bite-sized pieces, in a single layer. Let them sear undisturbed for 2-3 minutes until the edges are golden brown.
Stir-fry the chicken for another 3-4 minutes until fully cooked through and no pink remains. The pieces should be lightly caramelized on all sides. Transfer to a plate and set aside, leaving the rendered juices in the pan.
Season lightly with 0.5 tsp salt while still warm. This layering of flavors builds depth in the final dish.
Step 2: Scramble the Eggs into Ribbons
In the same wok, melt the 2 tbsp butter over medium heat. Pour in the 3 whole large eggs, beaten until just combined. Let them sit for 10 seconds until the edges begin to set, then gently push the eggs with a spatula, creating soft, ribbony folds.
Cook for another 20-30 seconds until the eggs are just set but still slightly runny in spots—this ensures they stay tender in the final dish. Remove from the wok and set aside with the chicken. The residual heat will finish cooking them perfectly.
Step 3: Stir-Fry the Vegetables Until Tender-Crisp
Add the remaining 2 tbsp vegetable oil to the wok and increase heat to high. Add the yellow onion, finely diced, 2 whole carrots, and 1 whole zucchini, both cut into small, even pieces. Stir-fry for 3-4 minutes until the vegetables soften slightly but retain a bite.
Add the 4 cloves garlic cloves, minced, and 1 tbsp fresh ginger, grated, then cook for 30 seconds until fragrant. Be careful not to burn the garlic—it should turn just light golden and release its aroma without bitterness.
Step 4: Combine Everything with Sauce and Rice
Add the 4 cups cooked white rice to the wok, breaking up any clumps with your spatula. The chilled rice should sizzle as it hits the hot surface. Drizzle the 0.33 cup soy sauce and 2 tbsp oyster sauce evenly over the rice and vegetables.
Stir-fry for 2-3 minutes until the rice is heated through and begins to crisp slightly in spots. Return the chicken and eggs to the wok, tossing everything together until uniformly coated and heated. The rice should take on a light golden hue from the sauces.
Step 5: Finish and Garnish
Remove from heat and drizzle with the 1 tbsp sesame oil, stirring to incorporate. Taste and adjust seasoning if needed, though the soy and oyster sauces should provide sufficient saltiness. The dish should have a glossy sheen and a balanced umami flavor.
Garnish with the 4 whole green onions, thinly sliced, distributing them evenly over the top. The green onions add a fresh, sharp contrast to the rich, savory base. Serve immediately while hot, with the rice slightly crispy at the edges and all components evenly distributed.
Pro Tips For Making Hibachi Chicken Fried Rice
- Chill the Rice: Use day-old, cold rice straight from the fridge—it fries up dry and separate instead of mushy. I learned this the hard way after making sad, clumpy rice more times than I’ll admit.
- Velvet the Chicken: Toss the chicken thighs with 1 teaspoon baking soda and 1 tablespoon water for 15 minutes before cooking. Sounds weird, but it keeps them stupidly tender, even when cooked at high heat.
- Skip Fresh Rice: Resist the urge to cook rice fresh for this dish—it’ll steam instead of fry, and you’ll end up with a soggy mess. Cold rice is non-negotiable for that classic hibachi texture.
- Prep Veggies Small: Dice the onion and carrots into tiny, uniform pieces—about ¼-inch cubes. They’ll cook fast and evenly, so you’re not left with crunchy carrots while the chicken overcooks.
Wine and Beer Pairings for This Dish
Light Beer Choices
I love pairing this dish with a crisp Japanese lager like Sapporo or Asahi—their clean, slightly sweet profiles complement the umami without overpowering. The carbonation cuts through the richness beautifully. 🍺
Wheat Beer Options
A German-style hefeweizen with its banana and clove notes provides an interesting contrast to the savory flavors. Weihenstephaner is my go-to, but any quality wheat beer works well.
White Wine Pairings
For wine lovers, a chilled Pinot Grigio from Northern Italy offers crisp acidity that refreshes your palate between bites. The citrus notes harmonize with the ginger and garlic in the dish. 🍷
Rosé Alternative
A dry Provence rosé with its subtle red fruit flavors and mineral finish can be a surprising but excellent match. Serve it well-chilled at 45-50°F for best results.
Sake Recommendation
For an authentic pairing, try a junmai sake like Dassai 39. Its clean, slightly fruity profile enhances the dish’s Asian origins. Serve chilled in small cups to appreciate the nuances. ✨
Non-Alcoholic Option
For those avoiding alcohol, lychee iced tea or a ginger beer offers complementary flavors. The lychee’s floral notes and ginger’s spice both work wonderfully with the dish’s profile.
Nutrition Facts
Frequently Asked Questions
Can I use fresh rice instead of day-old?
No, fresh rice contains too much moisture and will turn mushy when stir-fried. Always use chilled, day-old rice for that perfect charred texture.
What’s the best substitute for oyster sauce?
Mix 1 tbsp hoisin sauce with 1 tsp fish sauce for a similar umami depth. Vegetarian? Use mushroom stir-fry sauce instead.
How do I prevent the eggs from drying out?
Cook the eggs separately in butter over medium heat for just 30-40 seconds until softly set. Remove immediately to keep them tender.
Can I make this dish gluten-free?
Yes! Swap soy sauce for tamari and verify oyster sauce is gluten-free. All other ingredients are naturally safe for gluten-free diets.

- Jollof Rice Sauce Recipe: West African Tomato and Spice Infusion - September 25, 2026
- Japanese Rice Soup Recipe: Umami-Rich Comfort in a Bowl - September 25, 2026
- Homemade Cream Of Rice Recipe: Silk-Smooth Breakfast in Minutes - September 25, 2026