
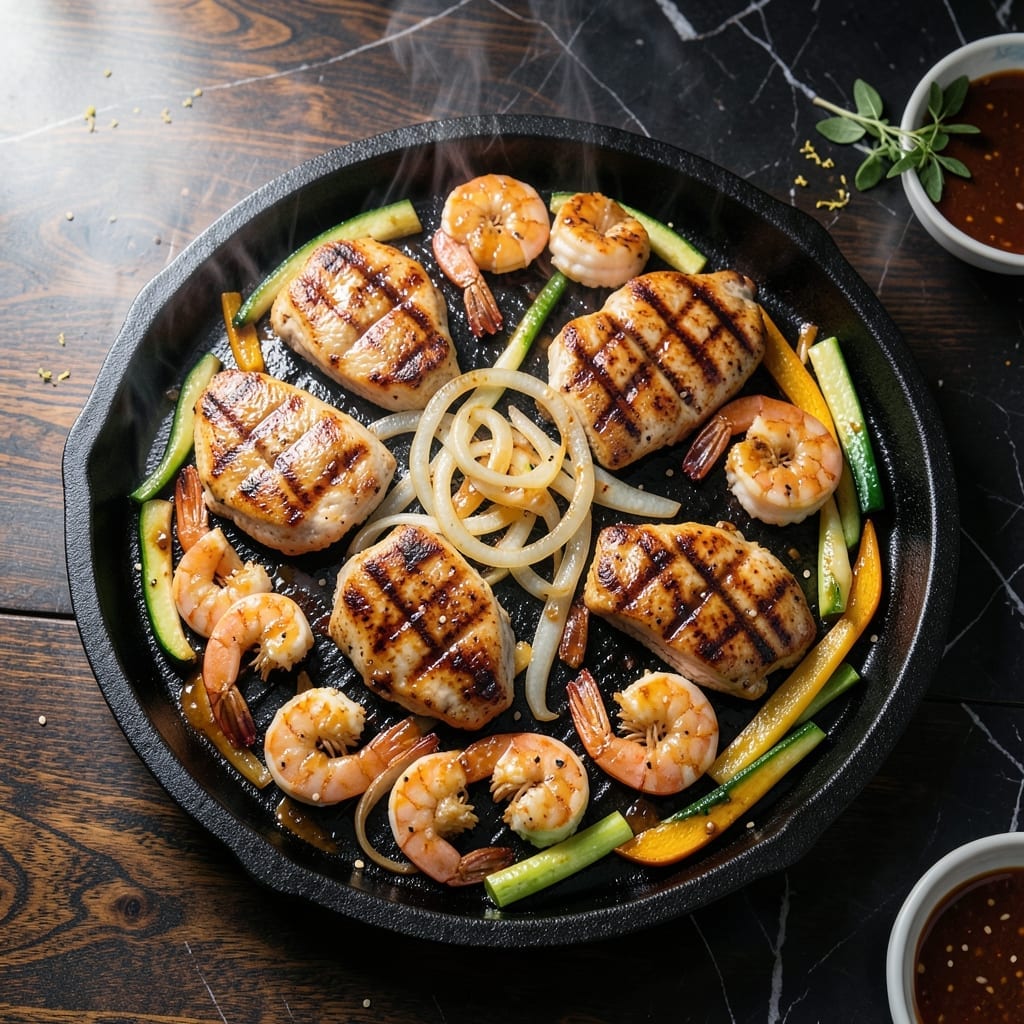
Bring the sizzle of a Japanese steakhouse to your kitchen with this authentic teppanyaki-style dish.
This method delivers perfectly cooked tender chicken and juicy shrimp with that signature hibachi flavor. The secret lies in a simple marinade and high-heat cooking that locks in moisture while creating a caramelized exterior.
What sets this apart is the restaurant-quality presentation on your home stove. The same pan-searing technique creates that unmistakable sizzle as the proteins cook to perfection in minutes.
Serve immediately with steamed rice and vegetables for a complete meal that rivals your favorite hibachi grill.
Ingredients for Hibachi Recipe Chicken and Shrimp
Tender chicken, juicy shrimp, and a bold marinade bring teppanyaki flavors to your table.
| Ingredient | Amount | Notes |
|---|---|---|
| Boneless Skinless Chicken Breasts 🍗 | 1 ½ lb | Cut into bite-sized pieces |
| Large Shrimp 🍤 | 1 lb | Peeled, deveined, tails on |
| Soy Sauce 🥢 | ½ cup | Low-sodium preferred |
| Garlic Cloves 🧄 | 4 cloves | Minced finely |
| Fresh Ginger 🌿 | 1 tbsp | Grated or minced |
| Rice Vinegar 🍚 | 2 tbsp | Unseasoned variety |
| Brown Sugar 🍯 | 2 tbsp | Light or dark |
| Sesame Oil 🫒 | 1 tbsp | Toasted for best flavor |
| Vegetable Oil 🫒 | 3 tbsp | High smoke point, for cooking |
| Green Onions 🧅 | 4 whole | Thinly sliced for garnish |
| Sesame Seeds 🌰 | 1 tbsp | Toasted for garnish |
| Salt 🧂 | 1 tsp | Kosher or sea salt |
| Black Pepper 🌶️ | ½ tsp | Freshly ground preferred |
| Steamed White Rice 🍚 | 4 cups | Cooked, for serving |
The shrimp and chicken need to be fresh—Whole Foods or your local seafood counter for shrimp (look for wild-caught if possible), and organic chicken breasts from Trader Joe’s or Costco work great. Size matters: aim for large shrimp (16-20 count per pound) and chicken cut into even, bite-sized pieces so everything cooks at the same rate. The ginger and garlic should be fresh for that authentic hibachi punch.
No low-sodium soy sauce? Regular works, just reduce the added salt. Tamari is a great gluten-free swap. Brown sugar can be swapped for honey or maple syrup (use the same amount). If you’re out of rice vinegar, apple cider vinegar in a pinch, but it’ll have a slightly sharper tang. The sesame oil is non-negotiable for that nutty aroma—don’t skip it.
Leftovers keep in the fridge for 3-4 days (the shrimp’s best eaten fresh, though). Reheat gently in a skillet to avoid drying out the chicken. Freezing isn’t ideal for shrimp texture, but the cooked chicken freezes well for up to 2 months.
Why You’ll Love This Recipe
- 20-Minute Marvel: I can have this sizzling on the table faster than waiting for delivery, and honestly, the fresh ginger and garlic make it taste even better.
- Umami Bomb: That first bite with the soy-kissed chicken and shrimp? Ridiculously good, like a restaurant-quality flavor explosion at home.
- Feeds the Crew: Perfect for when the kids have friends over or we need leftovers for lunch the next day—everyone cleans their plate.
- One Pan, Done: Cleanup is a breeze with just my skillet and a spatula. Between us, that’s half the reason I make this weekly.
Step-by-Step Instructions for Hibachi Chicken and Shrimp
Master the teppanyaki technique at home with these simple, foolproof steps.
Step 1: Prepare the Hibachi Sauce Base
In a small bowl, whisk together the 0.5 cup soy sauce, 2 tablespoons rice vinegar, 2 tablespoons brown sugar, 1 tablespoon sesame oil, 4 cloves minced garlic, and 1 tablespoon grated fresh ginger. Stir until the brown sugar fully dissolves and the mixture becomes smooth and glossy.
This sauce forms the flavor foundation for both the chicken and shrimp. I always let it sit for 5 minutes before using to allow the garlic and ginger flavors to meld together. The balance of salty, tangy, and sweet is what makes hibachi sauce so addictive.
Step 2: Cook the Chicken to Juicy Perfection
Heat 2 tablespoons vegetable oil in a large skillet or griddle over medium-high heat until shimmering. Add the 1.5 lb bite-sized chicken pieces in a single layer, being careful not to overcrowd the pan. Sprinkle with 1 teaspoon salt and 0.5 teaspoon black pepper.
Cook undisturbed for 3-4 minutes until the chicken develops a golden brown crust and releases easily from the pan. Flip and cook for another 3-4 minutes until cooked through. Pour half of the prepared sauce over the chicken and toss to coat evenly. Cook for an additional 1-2 minutes until the sauce thickens slightly and glazes the chicken.
Step 3: Sear the Shrimp with Flawless Timing
In the same skillet, add the remaining 1 tablespoon vegetable oil and increase heat to high. Add the 1 lb large shrimp in a single layer. Sear for 1-2 minutes per side until the shrimp turn opaque pink with a slight char. Shrimp cook quickly, so keep an eye on them—they’re done as soon as they curl into a C shape.
Pour the remaining sauce over the shrimp and toss to coat. Cook for another 30 seconds to allow the flavors to penetrate. The shrimp should be glossy and coated with the sauce, not dry or rubbery. Remove from heat immediately to prevent overcooking.
Step 4: Garnish and Serve Over Rice
Divide the 4 cups steamed white rice among four plates. Arrange the cooked chicken and shrimp over the rice, drizzling any remaining sauce from the pan on top. Garnish with thinly sliced green onions and 1 tablespoon toasted sesame seeds for that authentic hibachi presentation.
Serve immediately while hot. The combination of tender chicken, perfectly cooked shrimp, and that irresistible sauce over fluffy rice is what makes this dish so satisfying. The sesame seeds add a delightful crunch and nutty flavor that ties everything together beautifully.
Pro Tips For Making Hibachi Recipe Chicken And Shrimp
- Cut Evenly: Slice the chicken breasts into uniform 1-inch cubes so they cook at the same rate—no more dry, overdone bits while waiting for thicker pieces to finish.
- Dry the Shrimp: Pat the shrimp completely dry before cooking; I learned this the hard way after my first batch steamed in its own moisture instead of searing.
- Skip Overcrowding: Cook the chicken and shrimp in batches if needed—crowding the pan drops the temperature and turns your stir-fry into a sad, soggy mess.
- Bloom Aromatics First: Sauté the garlic and ginger in oil for 30 seconds before adding anything else to wake up their flavors and build a solid base for the soy sauce to cling to.
Health Benefits of This hibachi recipe chicken and shrimp
Protein Powerhouse
This dish packs a serious protein punch with 1.5 lb chicken and 1 lb shrimp, delivering about 40g of protein per serving. That’s nearly your entire daily protein needs in one delicious meal, perfect for muscle repair and growth. 💪
Heart-Healthy Fats
The vegetable oil and sesame oil provide unsaturated fats that support heart health. These good fats help lower bad cholesterol while maintaining the dish’s authentic flavor. I always choose toasted sesame oil for its rich, nutty aroma.
Low-Calorie Option
At approximately 350-400 calories per serving (without rice), this is a lighter alternative to many takeout meals. The high protein content keeps you full longer, helping with portion control and weight management.
Rich in Micronutrients
The garlic and ginger aren’t just for flavor—they’re packed with antioxidants. Garlic supports immune function, while ginger aids digestion. The combination makes this dish as nutritious as it is tasty. ✨
Sodium Awareness
While the soy sauce adds flavor, you can reduce sodium by using low-sodium soy sauce or tamari. This small change cuts sodium by nearly 40% without sacrificing taste. I always recommend this swap for health-conscious cooks.
Vitamin B Boost
Both chicken and shrimp are excellent sources of B vitamins, particularly B6 and B12. These vitamins are essential for energy metabolism and nervous system health, making this meal a great choice for an energy-boosting dinner.
Nutrition Facts
Frequently Asked Questions
What’s the best oil for hibachi cooking?
Use vegetable oil for its high smoke point during searing. Sesame oil adds flavor but burns at high heat, so save it for the sauce.
How do I prevent overcooking the shrimp?
Sear shrimp on high heat for just 1-2 minutes per side. Remove immediately when they curl into a C shape. They’ll continue cooking slightly off heat.
Can I prepare this recipe ahead of time?
Marinate chicken and shrimp separately up to 4 hours in advance. Cook just before serving for best texture and flavor.
What if I don’t have a griddle?
A large skillet or cast iron pan works perfectly. Use medium-high heat and cook in batches to avoid overcrowding.

- Jollof Rice Sauce Recipe: West African Tomato and Spice Infusion - September 25, 2026
- Japanese Rice Soup Recipe: Umami-Rich Comfort in a Bowl - September 25, 2026
- Homemade Cream Of Rice Recipe: Silk-Smooth Breakfast in Minutes - September 25, 2026