
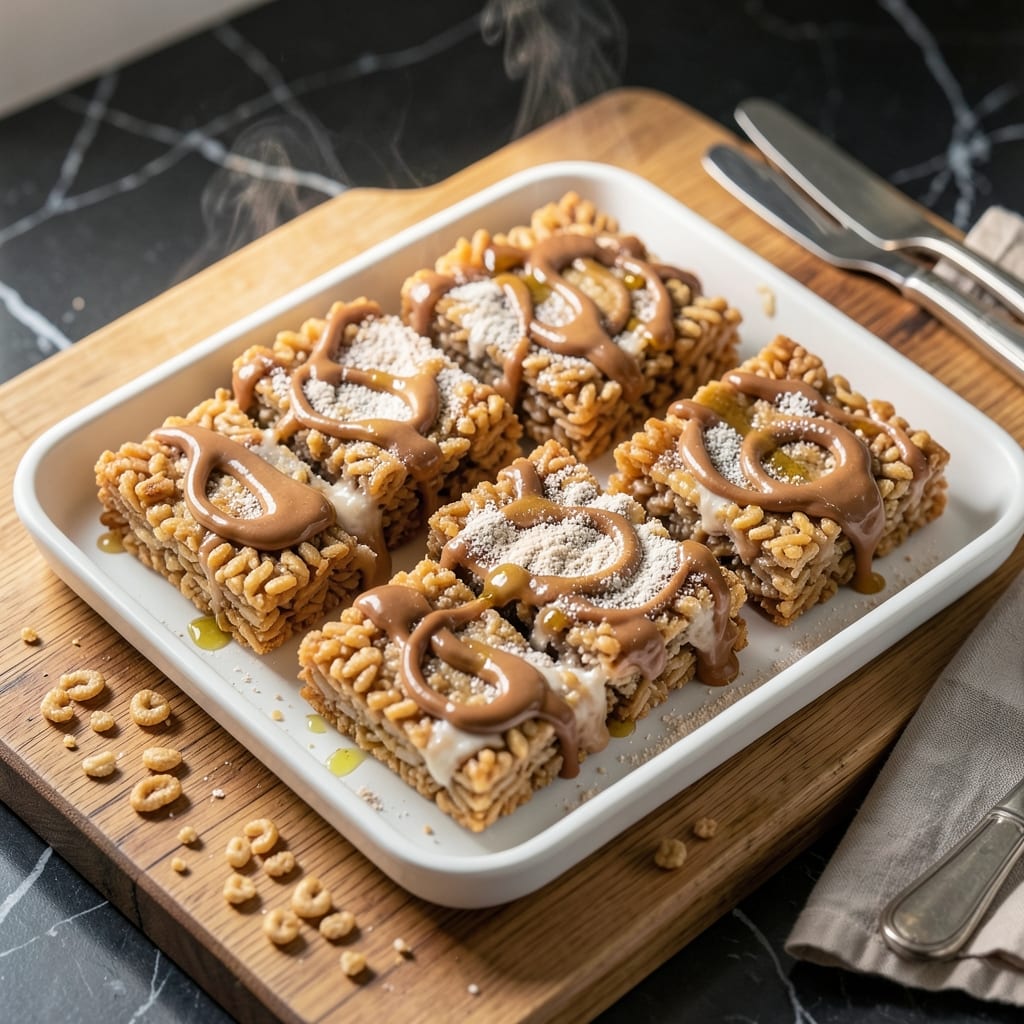
This recipe transforms a classic treat into a high-protein powerhouse without sacrificing the chewy texture we all love. After testing multiple versions, I’ve perfected the balance of protein and taste.
With simple ingredients and a few strategic tweaks, these treats deliver muscle-boosting benefits while keeping that nostalgic crunch. Perfect for post-workout fuel or a satisfying snack.
Ingredients for High Protein Rice Crispy Treats
Nothing exotic here—just smart swaps for a protein-packed version of a childhood favorite.
| Ingredient | Amount | Notes |
|---|---|---|
| Rice Cereal 🥣 | 6 cups | Crispy rice cereal preferred |
| Marshmallows 🍬 | 10 oz | Mini marshmallows melt faster |
| Vanilla Protein Powder 💪 | 1 cup | Whey or plant-based blend |
| Peanut Butter 🥜 | ¾ cup | Natural, unsweetened variety |
| Butter 🧈 | 2 tbsp | Unsalted for best control |
| Honey 🍯 | ¼ cup | Helps bind protein powder |
| Vanilla Extract 🌿 | 1 tsp | Pure vanilla preferred |
| Sea Salt 🧂 | ¼ tsp | Fine grain for even distribution |
| Chia Seeds 🌱 | 2 tbsp | Optional for extra fiber |
| Dark Chocolate Chips 🍫 | ½ cup | 70% cacao or higher |
| Coconut Flakes 🥥 | ¼ cup | Unsweetened for texture |
| Almond Butter 🥜 | ¼ cup | Creamy for better mixing |
The protein powder is doing most of the work here. Whey isolate gives the cleanest flavor, but plant-based blends work too (pea + rice combo is my go-to). Costco has great prices on big tubs, or Orgain if you’re shopping at Whole Foods. Make sure it’s unflavored or vanilla—chocolate can overpower. For the cereal, generic crispy rice works fine, but Kellogg’s Rice Krispies have that classic snap.
No peanut butter? Almond or cashew butter at a 1:1 swap. Skip the honey and use maple syrup instead if you’re vegan. The marshmallows can be Dandies brand for a gel-free version. Want extra crunch? Puffed quinoa instead of rice cereal. The chocolate chips are optional but highly recommended—Enjoy Life makes great dairy-free ones.
These keep 1 week at room temp in an airtight container, or 2 weeks in the fridge. Freeze for 3 months if you’re batching. The texture softens over time, but a quick toast in the oven brings back the crunch (don’t skip this part).
Why You’ll Love This Recipe
- One Bowl Magic: I just melt, mix, and press—no fancy equipment, and the peanut butter does half the work for me.
- That PB-Protein Combo: Honestly, the vanilla protein powder and peanut butter make these taste like a dessert I shouldn’t feel good about eating.
- Post-Gym Hero: I pack these for the gym, toss in lunchboxes, or leave on the counter for when the kids crash through the door starving.
- Budget-Friendly Batch: A box of cereal and a scoop of protein powder stretch further than any store-bought bar, and they disappear just as fast.
Step-by-Step Instructions for High Protein Rice Crispy Treats
This method delivers chewy, protein-packed treats with the perfect texture every time.
Step 1: Melt and Combine the Wet Ingredients
In a large saucepan, melt the 2 tbsp Butter over low heat. Add the 10 oz Marshmallows and stir constantly until fully melted and smooth. This should take about 5-7 minutes—be patient, as rushing can cause burning.
Once melted, immediately stir in the 0.25 cup Honey, 1 tsp Vanilla Extract, and 0.25 tsp Sea Salt. Mix well for 30 seconds to ensure even distribution. The honey helps bind the 1 cup Vanilla Protein Powder later, so don’t skip this step.
Step 2: Incorporate Protein and Nut Butters
Remove the saucepan from heat and let it cool for 1 minute—this prevents the protein powder from clumping. Stir in the 1 cup Vanilla Protein Powder until fully dissolved. I’ve found that whisking vigorously helps eliminate any lumps.
Next, add the 0.75 cup Peanut Butter and 0.25 cup Almond Butter, stirring until the mixture is smooth and glossy. The natural oils in the nut butters will create a rich, creamy base that binds everything together beautifully.
Step 3: Fold in Rice Cereal and Mix-Ins
Add all 6 cups Rice Cereal to the saucepan and fold gently with a silicone spatula until every piece is evenly coated. Avoid pressing too hard—you want to maintain the cereal’s crispy texture.
Now, fold in the 2 tbsp Chia Seeds, 0.5 cup Dark Chocolate Chips, and 0.25 cup Coconut Flakes. The chia seeds add a subtle crunch, while the chocolate chips and coconut flakes provide bursts of flavor in every bite. Stir just until distributed.
Step 4: Press and Set the Treats
Transfer the mixture to a greased 9×13-inch pan (or line with parchment paper for easy removal). Using a spatula or your hands (lightly greased to prevent sticking), press the mixture evenly into the pan. Press firmly but not too hard—you want the treats to hold together without becoming dense.
Let the treats set at room temperature for 1 hour, or refrigerate for 30 minutes if you’re short on time. They’re ready when the edges pull away slightly from the pan and the top is firm to the touch. Cut into squares and enjoy the perfect balance of chewy and crispy!
Pro Tips For Making High Protein Rice Crispy Treats
- Melt Butter First: Start by melting the butter completely before adding marshmallows—this prevents uneven melting and ensures a smooth base for mixing in the protein powder.
- Warm the Protein Powder: I learned this the hard way: mix the vanilla protein powder with a tablespoon of peanut butter first to prevent clumping when it hits the warm marshmallow mixture.
- Skip Overmixing: Stir just until the cereal is coated, or the rice crispy treats will turn dense instead of light and crispy.
- Press Firmly: Use a greased spatula or your hands to press the mixture into the pan with even pressure—this guarantees uniform thickness and better texture.
Best Sauces and Condiments for high protein rice crispy treats
Protein-Packed Drizzles
I love drizzling melted peanut butter over these treats for an extra protein boost. Warm ¼ cup in the microwave for 20 seconds, then add 1 tsp honey to thin it slightly. It adds a glossy finish and rich flavor. 💛
Chocolate Enhancements
Melt ½ cup dark chocolate chips with 1 tbsp coconut oil for a smooth, drizzle-able topping. This pairs perfectly with the nutty undertones. For a crunchier texture, sprinkle flaky sea salt on top before the chocolate sets.
Yogurt Sauce
Mix ½ cup Greek yogurt with 1 tbsp honey and ½ tsp vanilla extract for a creamy dip. This adds a tangy contrast to the sweetness and boosts the protein content even further. I use Fage 2% for the best texture.
Nut Butter Swirl
Combine ¼ cup almond butter with 1 tbsp maple syrup and swirl it into the mixture before pressing into the pan. This creates beautiful marbled patterns and adds depth to every bite.
For a nut-free option, use sunflower seed butter instead. It has a similar consistency and works just as well.
Spiced Honey Drizzle
Warm ¼ cup honey with ½ tsp cinnamon and a pinch of cayenne for a sweet-spicy kick. Drizzle lightly over the treats after they’ve set. This adds a subtle warmth that complements the chocolate and nut flavors beautifully. ✨
Nutrition Facts
Frequently Asked Questions
Can I use a different protein powder?
Yes! Whey isolate or plant-based blends both work. Avoid chocolate flavor unless you want a stronger taste. Unflavored or vanilla keeps the classic flavor intact.
How do I prevent them from getting too hard?
Press the mixture firmly but gently into the pan. Over-pressing can make them dense. Let them set for 1 hour at room temperature for the best texture.
What can I substitute for honey?
Use maple syrup or agave nectar in the same amount. These alternatives maintain the right consistency and sweetness.
How long will they stay fresh?
Store in an airtight container at room temperature for up to 1 week. For longer storage, refrigerate for 2 weeks or freeze for 3 months.

- Jamaican Jollof Rice Recipe: Island Spice in Every Bite - October 18, 2026
- Hamburger Rice Hot Dish Recipe: Midwest Comfort in One Pan - October 18, 2026
- Iranian Cabbage Rice Recipe: Aromatic Herbs and Spiced Layers - October 18, 2026