
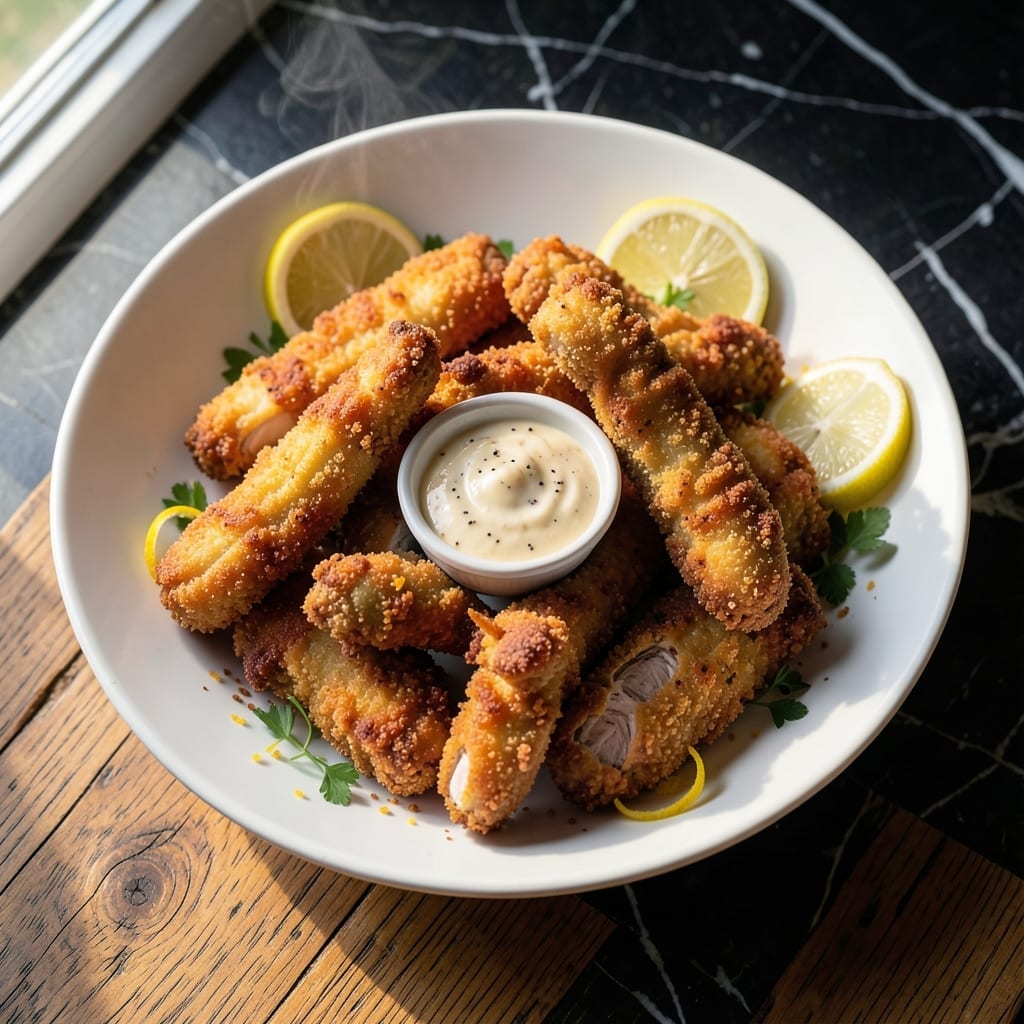
This recipe delivers crispy, golden chicken tenders with a juicy, tender center every time. The secret is a buttermilk brine that keeps the meat moist while the coating fries to perfection.
I developed this method after years of testing to replicate that signature restaurant texture at home. The key is double-dredging and hot oil at the right temperature for even cooking and maximum crunch.
What you’ll get are tenders with a shatteringly crisp exterior and meat so tender it falls apart at the touch of a fork. The buttermilk brine ensures they stay succulent, even after frying.
Serve with your favorite dipping sauces for a meal that rivals any restaurant. Here’s how to make them.
Ingredients for Hillstone Chicken Tenders
A few pantry staples plus chicken create these restaurant-quality tenders with shatteringly crisp coating.
| Ingredient | Amount | Notes |
|---|---|---|
| Chicken Breast Tenders 🍗 | 1 ½ lb | Boneless, skinless, uniform size |
| Buttermilk 🥛 | 2 cups | Full-fat for best brine |
| All-Purpose Flour 🌾 | 1 ½ cups | Divided for dredging |
| Large Eggs 🥚 | 2 whole | Beaten for binding |
| Cornstarch 🌾 | ½ cup | For extra crispiness |
| Kosher Salt 🧂 | 1 tbsp | Diamond Crystal preferred |
| Black Pepper 🌶️ | 1 tsp | Freshly ground |
| Garlic Powder 🧄 | 1 tsp | For seasoning flour |
| Onion Powder 🧅 | 1 tsp | For seasoning flour |
| Paprika 🌶️ | 1 tsp | Sweet or smoked variety |
| Vegetable Oil 🫒 | 4 cups | For frying, high smoke point |
| Hot Sauce 🔥 | 1 tbsp | Optional for brine kick |
The chicken is everything here. Look for uniform-sized tenders—they cook more evenly and give that consistent texture. I grab mine from Whole Foods (their butcher counter has perfect pieces), but any supermarket will work. The buttermilk needs to be full-fat for the brine to do its magic (low-fat just doesn’t cling the same). For the flour, King Arthur all-purpose is my go-to for reliability.
No buttermilk? Mix 2 cups milk with 2 tbsp vinegar or lemon juice and let sit 10 minutes. Out of cornstarch? Swap with half the amount of baking powder for similar crisp. The paprika can be omitted, but it adds that signature golden color. For oil, peanut or canola work too—just avoid olive oil (too low smoke point). The hot sauce in the brine is optional but adds a nice depth (I use Frank’s RedHot).
Brined chicken keeps in the fridge for 24 hours before cooking. Leftovers stay crisp if reheated in a 400°F oven for 10 minutes. Best eaten fresh, but they’ll keep in the fridge for 3-4 days.
Why You’ll Love This Recipe
- One Bowl Magic: I toss the chicken in buttermilk, then straight into the flour-egg-cornstarch mix—no extra dishes, no fuss.
- Crispy Perfection: That cornstarch in the batter? It’s the secret to a crave-worthy crunch with a juicy center every time.
- Weeknight Hero: Honestly, it’s my go-to for picky eaters and last-minute dinners. (Yes, even on a Tuesday night)
- Budget Stretcher: A pound of tenders feeds my family of four, with leftovers that reheat surprisingly well.
Step-by-Step Instructions for Crispy Buttermilk-Brined Chicken Tenders
This method guarantees juicy meat and a shatteringly crisp crust that stays perfect until the last bite.
Step 1: Brine the Chicken Tenders in Buttermilk
In a large bowl, whisk together the 2 cups Buttermilk and 1 tbsp Hot Sauce until fully combined. Add the 1.5 lb Chicken Breast Tenders and ensure they’re completely submerged in the mixture.
Cover the bowl and refrigerate for at least 4 hours, or ideally overnight. This extended brine time allows the buttermilk to tenderize the meat while the hot sauce adds a subtle kick. The tenders should look plump and slightly opaque when ready.
Step 2: Prepare the Seasoned Dredging Mixture
In a shallow dish, combine 1.5 cups All-Purpose Flour, 0.5 cup Cornstarch, 1 tbsp Kosher Salt, 1 tsp Black Pepper, 1 tsp Garlic Powder, 1 tsp Onion Powder, and 1 tsp Paprika. Whisk until evenly distributed and no streaks remain.
The cornstarch is the secret to that ultra-crispy coating, while the seasonings create that signature golden hue and layered flavor. Set this aside while you prepare the egg wash.
Step 3: Coat the Tenders and Set for Frying
Beat the 2 whole Large Eggs in a separate shallow dish until uniform. Remove the brined chicken breast tenders from the buttermilk, letting excess drip off, then dip each piece in the egg wash, ensuring full coverage.
Transfer the tenders to the seasoned flour mixture, pressing firmly to adhere the coating on all sides. Shake off any excess—you want a generous but even layer. Place the coated tenders on a wire rack set over a baking sheet to allow any loose dredge to fall away while maintaining air circulation.
Step 4: Fry to Golden Perfection
In a deep, heavy-bottomed pot or Dutch oven, heat the 4 cups Vegetable Oil to 350°F. Use a deep-fry thermometer for accuracy. Carefully lower a few tenders into the hot oil, avoiding overcrowding which would drop the temperature.
Fry for 4-5 minutes per side until the coating is deep golden brown and the internal temperature reaches 165°F. The tenders should sizzle steadily but not violently. Transfer to a wire rack or paper towels to drain, and sprinkle with a pinch of kosher salt while hot for maximum flavor adhesion.
Step 5: Rest and Serve Immediately
Let the tenders rest for 2-3 minutes before serving. This brief pause allows the crust to set fully while the meat retains its juices. The coating should remain crisp even as the tenders cool slightly.
Serve immediately while hot and crispy. The ideal texture is a crunchy exterior giving way to tender, juicy meat with each bite. Any leftovers can be briefly reheated in a 375°F oven to revive the crispness.
Pro Tips For Making Hillstone Chicken Tenders
- Double-Dredge the Chicken: After the buttermilk soak, dip the tenders in flour, then egg, then flour again—I learned this the hard way, and the extra layer makes the crust actually stay put.
- Rest the Coated Tenders: Give them 10 minutes on a wire rack after breading so the coating sets, otherwise you’ll lose half of it in the pan.
- Use Cold Buttermilk: Straight from the fridge, not room temp, because it clings better to the chicken and keeps the exterior from turning gummy before frying.
- Add Cornstarch to Flour: Mix 2 tablespoons of cornstarch into the flour for that extra crispness—sounds small, but it’s the thing that makes Hillstone’s version so addictive.
Dietary Considerations for This hillstone chicken tenders
Gluten-Free Option
Swap the all-purpose flour for a 1:1 gluten-free baking blend. I recommend King Arthur’s Measure for Measure—it fries up just as crispy. The cornstarch stays the same, so your coating will still have that signature crunch. 💡
Dairy-Free Adaptation
For a dairy-free brine, replace the buttermilk with 2 cups unsweetened almond milk mixed with 2 tbsp lemon juice. Let it sit for 10 minutes to curdle before using. The tang mimics buttermilk perfectly.
Lower-Carb Version
Cut carbs by replacing ½ cup of flour with almond flour. The texture changes slightly but still delivers great crunch. Serve with a side of celery sticks for a satisfying, low-carb meal.
Egg-Free Coating
Use ¼ cup aquafaba (chickpea brine) whipped until frothy as your egg substitute. It binds the flour mixture just as well, and I’ve found it creates an incredibly light, crisp coating.
Spice Sensitivity
Omit the hot sauce in the brine and reduce the black pepper to ½ tsp. The tenders will still be flavorful from the garlic and onion powders without any heat.
For kids, skip all spices except ½ tsp salt—they’ll still love the crispy texture. 💛
Nutrition Facts
Frequently Asked Questions
How long should the chicken brine?
For best results, brine the tenders for at least 4 hours, or overnight for maximum tenderness. The buttermilk works its magic slowly, so don’t rush this step.
Can I bake these instead of frying?
Yes! Bake at 400°F for 15-20 minutes on a wire rack for crispiness. Flip halfway through and spray with oil for even browning.
Why does the coating fall off sometimes?
This usually happens if the oil isn’t hot enough or the tenders aren’t properly dried after brining. Ensure oil reaches 350°F and pat tenders dry before dredging.
What dipping sauces pair well?
Classic choices include honey mustard, ranch, or comeback sauce. For a twist, try a spicy aioli or chipotle mayo.

- Jollof Rice Sauce Recipe: West African Tomato and Spice Infusion - September 25, 2026
- Japanese Rice Soup Recipe: Umami-Rich Comfort in a Bowl - September 25, 2026
- Homemade Cream Of Rice Recipe: Silk-Smooth Breakfast in Minutes - September 25, 2026