
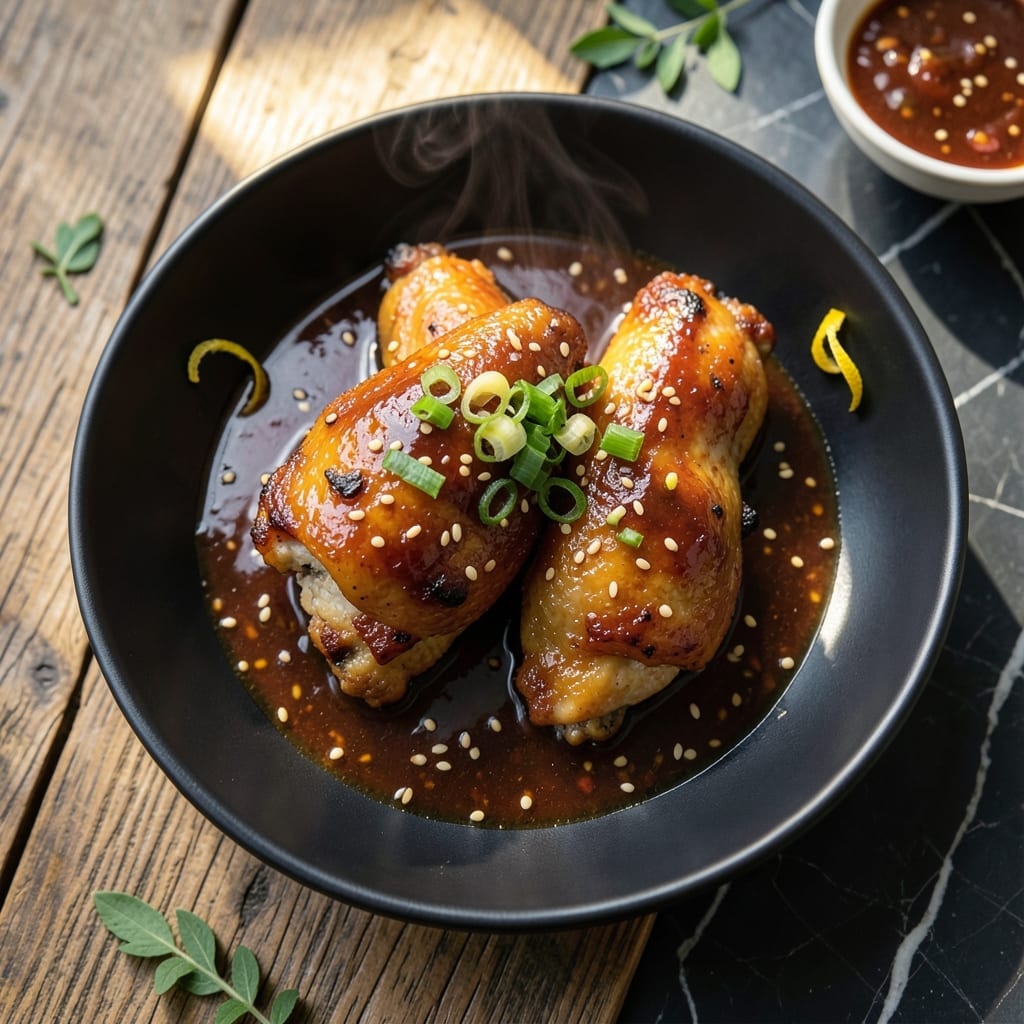
This hoisin chicken delivers perfectly balanced sweet and savory flavors with minimal effort. The glaze caramelizes beautifully, creating a sticky coating that clings to every bite of tender meat.
I developed this method after years of testing to achieve restaurant-quality results at home. A simple marinade infuses the chicken with aromatic depth before it hits the pan.
The sauce reduces to a glossy finish, transforming basic ingredients into something extraordinary. The aroma alone will have everyone gathering in the kitchen.
Serve with steamed rice to soak up every last drop of that rich, complex glaze. This dish proves that impressive meals don’t require complicated techniques.
Ingredients for Hoisin Chicken
Simple ingredients transform into a restaurant-worthy dish with rich, caramelized flavor in every bite.
| Ingredient | Amount | Notes |
|---|---|---|
| Chicken Thighs 🍗 | 1 ½ lb | Boneless, skinless preferred |
| Hoisin Sauce 🥫 | ½ cup | High-quality for best flavor |
| Soy Sauce 🥫 | 3 tbsp | Low-sodium if preferred |
| Honey 🍯 | 2 tbsp | For natural sweetness |
| Rice Vinegar 🍚 | 1 tbsp | Balances the sweetness |
| Garlic Cloves 🧄 | 3 cloves | Minced for maximum flavor |
| Fresh Ginger 🌿 | 1 tbsp | Grated, peeled first |
| Cornstarch 🌾 | 1 tbsp | For thickening the sauce |
| Sesame Oil 🫒 | 1 tsp | Toasted for aroma |
| Vegetable Oil 🫒 | 2 tbsp | For cooking chicken |
| Green Onions 🧅 | 3 whole | Thinly sliced for garnish |
| Sesame Seeds 🌾 | 1 tsp | Toasted, for garnish |
| Red Pepper Flakes 🌶️ | ¼ tsp | Optional for heat |
The hoisin sauce is non-negotiable here—Koon Chun or Lee Kum Kee are my go-tos (find them at Asian markets or the international aisle). Chicken thighs stay juicier than breasts, but either works. Boneless, skinless saves time and mess. Fresh ginger and garlic make all the difference (the jarred stuff just doesn’t compare). Most supermarkets carry these, but specialty stores often have better quality.
No hoisin? Mix 2 tbsp soy sauce + 1 tbsp molasses + 1 tsp five-spice powder for a quick substitute. Swap honey for maple syrup or agave if needed. The cornstarch can be replaced with arrowroot powder at 1:1 ratio. For extra depth, add a splash of Chinese rice wine (Shaoxing) to the marinade. Baby spinach or snap peas would pair well if you want to add veggies.
The glaze thickens as it cools—store leftovers in an airtight container for up to 4 days. Reheat gently to avoid separating the sauce. Chicken tastes even better the next day, making this perfect for meal prep.
Why You’ll Love This Recipe
- One Pan Wonder: I just toss the chicken thighs with hoisin, soy, honey and rice vinegar, then bake—no fuss, no mess.
- Sweet-Savory Magic: That sticky glaze from the hoisin and honey with the tang of rice vinegar? Ridiculously good.
- Weeknight Hero: Honestly, it’s my go-to for busy Tuesdays—ready before the kids finish their homework.
- Budget Stretcher: Chicken thighs stay juicy and cheap, and the sauce makes every bite taste like a treat.
Step-by-Step Instructions for Hoisin Chicken
This method ensures a glossy, restaurant-quality glaze with balanced sweet and savory flavors.
Step 1: Prepare the Aromatic Sauce Base
In a medium bowl, whisk together the 0.5 cup Hoisin Sauce, 3 tbsp Soy Sauce, 2 tbsp Honey, and 1 tbsp Rice Vinegar until completely smooth. The honey may resist at first, but a vigorous whisk for 30 seconds will incorporate it fully.
Add the 3 cloves Garlic Cloves (minced) and 1 tbsp Fresh Ginger (grated) to the sauce. Stir well to distribute the aromatics evenly. This base should be thick but pourable—if it seems too stiff, let it sit for 2 minutes to loosen slightly.
Step 2: Cook the Chicken to Golden Brown
Pat the 1.5 lb Chicken Thighs dry with paper towels to ensure proper browning. Heat the 2 tbsp Vegetable Oil in a large skillet over medium-high heat until it shimmers. Add the chicken thighs and cook undisturbed for 4-5 minutes until the underside is deep golden brown.
Flip the chicken and cook for another 3-4 minutes until cooked through and browned on both sides. The internal temperature should reach 165°F when checked at the thickest part. Transfer the chicken to a plate and set aside.
Step 3: Create the Glossy Glaze
Reduce the heat to medium and pour the sauce mixture into the same skillet. Stir to combine it with the chicken drippings, scraping up any browned bits from the bottom. In a small bowl, mix the 1 tbsp Cornstarch with 2 tbsp water to create a slurry, then whisk it into the sauce.
Bring the mixture to a gentle simmer and cook for 2-3 minutes until it thickens to a syrupy consistency that coats the back of a spoon. Stir in the 1 tsp Sesame Oil and 0.25 tsp Red Pepper Flakes during the last 30 seconds of cooking.
Step 4: Glaze and Garnish the Chicken
Return the chicken to the skillet and turn each piece to coat evenly with the thickened sauce. Cook for an additional 1-2 minutes until the chicken is heated through and the sauce clings in a glossy layer.
Transfer the glazed chicken to a serving platter. Sprinkle with the 3 whole Green Onions (thinly sliced) and 1 tsp Sesame Seeds. The green onions should add a fresh contrast, while the sesame seeds provide a nutty crunch. Serve immediately while the glaze is still sticky and hot.
Pro Tips For Making Hoisin Chicken
- Sear the Skin First: Crank the heat to medium-high and sear the chicken thighs skin-side down for 4-5 minutes until golden—I learned this the hard way after my first few batches turned out pale and soggy.
- Thin the Hoisin: Mix the hoisin sauce with a splash of rice vinegar before brushing it on; it spreads easier and doesn’t clump up like thick paste on the chicken.
- Skip the Overcooking: Pull the chicken at 165°F and let it rest 5 minutes under foil—after burning three batches, I finally figured out that hoisin’s sugar burns fast if left too long.
- Balance the Sweetness: Add a teaspoon of soy sauce to the hoisin-honey glaze to cut the sugar; my grandmother swore by this, and she was right.
Pro Cooking Tips for This Dish
Marinade Time Matters
Don’t rush the marinade—let the chicken soak in the hoisin mixture for at least 30 minutes at room temperature. For even deeper flavor, refrigerate it for up to 4 hours. The acid in the rice vinegar helps tenderize the meat while the aromatics infuse every bite.
Perfect Pan Temperature
Your skillet should be screaming hot before the chicken hits it. I test by flicking a drop of water—it should dance and evaporate instantly. Use medium-high heat and avoid crowding the pan, or the chicken will steam instead of sear. A cast iron skillet gives the best crust. 🔥
Sauce Consistency Check
The glaze should coat the back of a spoon thickly but still drip slowly. If it’s too thin, let it reduce for another 1-2 minutes. If too thick, add 1-2 tbsp water and stir. The cornstarch slurry is key—mix it thoroughly to avoid lumps.
Double-Dip for Flavor
After coating the chicken in the glaze, let it sit for 1 minute off heat, then repeat the coating process. This builds layers of flavor and ensures every piece is evenly covered. The second dip also helps the sauce cling better when serving.
Rest Before Serving
Let the glazed chicken rest for 2-3 minutes before slicing. This allows the juices to redistribute, keeping the meat moist. I garnish just before serving so the green onions stay crisp and the sesame seeds don’t soften. 💡
Cleanup Pro Tip
Soak your skillet in warm, soapy water immediately after cooking. The sugar in the hoisin caramelizes quickly and becomes harder to remove as it cools. A wooden spoon helps scrape off any stubborn bits without damaging the pan.
Nutrition Facts
Frequently Asked Questions
Can I use chicken breasts instead of thighs?
Yes, but thighs stay juicier. If using breasts, reduce cooking time to 3-4 minutes per side to prevent dryness. Pound thicker pieces to even thickness for consistent cooking.
How do I make the sauce thicker?
Simmer the sauce for an extra 1-2 minutes after adding cornstarch. For faster results, mix 1 tsp cornstarch with 1 tbsp cold water and stir in. Avoid over-thickening.
What if I don’t have rice vinegar?
Substitute with apple cider vinegar or lime juice at a 1:1 ratio. The slight acidity helps balance the sweetness. Avoid balsamic—it’s too strong.
How long will leftovers keep?
Store in an airtight container in the fridge for up to 4 days. Reheat gently on the stove to prevent the sauce from separating.

- Jollof Rice Sauce Recipe: West African Tomato and Spice Infusion - September 25, 2026
- Japanese Rice Soup Recipe: Umami-Rich Comfort in a Bowl - September 25, 2026
- Homemade Cream Of Rice Recipe: Silk-Smooth Breakfast in Minutes - September 25, 2026