
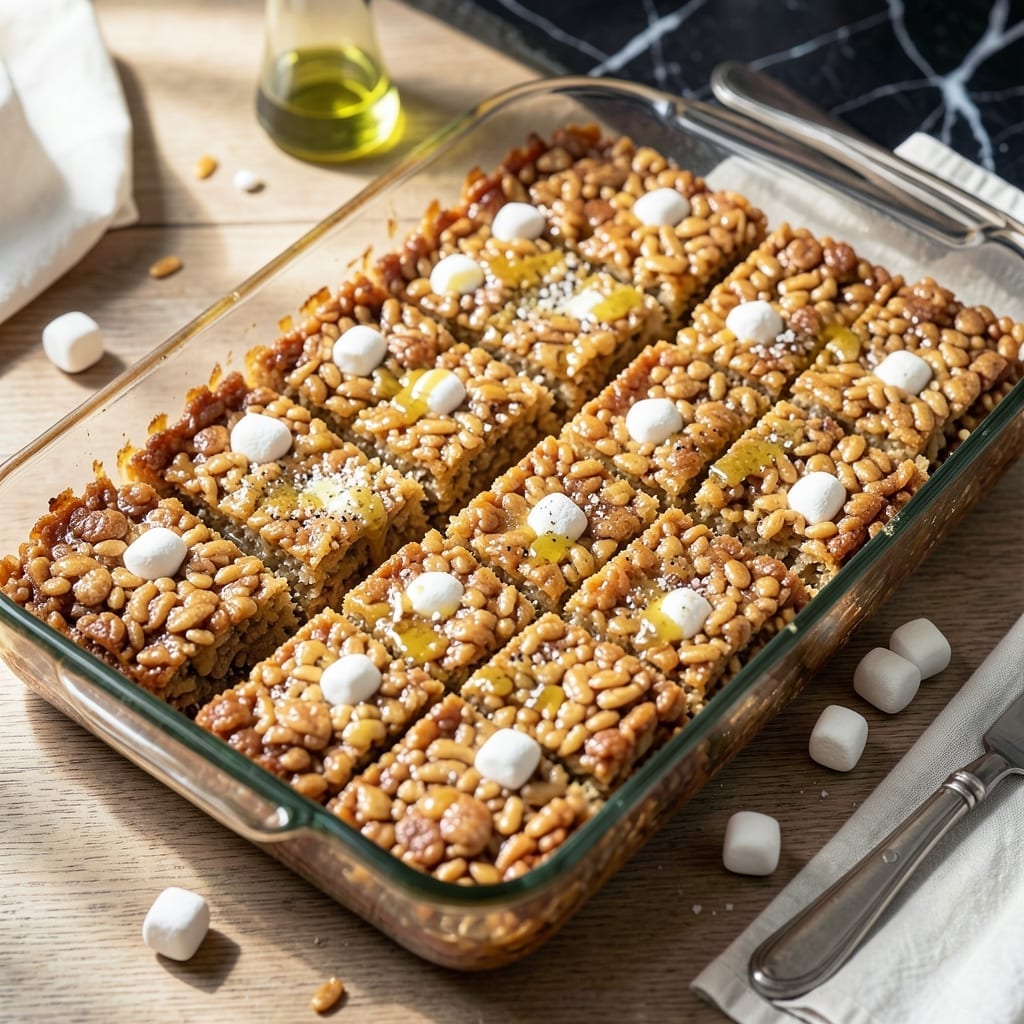
There’s something nostalgic about the simple combination of crispy cereal and melted marshmallows. This recipe delivers that classic texture and flavor without any complicated steps.
I’ve tested this version in my small Boston kitchen, ensuring it works for home cooks with limited space. The key is melting the marshmallows slowly to achieve a smooth, gooey consistency that binds perfectly with the cereal.
You’ll end up with perfectly crispy squares that hold their shape but give way with every bite. The balance of sweetness and crunch is exactly what you remember from childhood.
Ready in under 20 minutes, this is a foolproof treat for any occasion. Here’s how to make them.
Ingredients for Home Made Rice Crispy Treats
Just seven ingredients for that nostalgic crispy, gooey magic you remember from childhood.
| Ingredient | Amount | Notes |
|---|---|---|
| Rice Krispies Cereal 🥣 | 6 cups | Classic brand preferred |
| Mini Marshmallows 🍬 | 10 oz | About 4 cups unpacked |
| Unsalted Butter 🧈 | 3 tbsp | For melting marshmallows |
| Vanilla Extract 🌿 | 1 tsp | Pure extract recommended |
| Salt 🧂 | ¼ tsp | Fine grain for balance |
| Light Corn Syrup 💧 | 2 tbsp | Optional for extra chew |
| Sea Salt Flakes 🧂 | ½ tsp | For finishing sprinkle |
The marshmallows are non-negotiable here—Jet-Puffed mini marshmallows melt the smoothest. I grab mine from Stop & Shop in Boston (the store brand works fine too). For cereal, Kellogg’s Rice Krispies give that signature snap, but any crispy rice cereal will do. Butter quality matters less here since it’s just for melting, but unsalted lets you control the saltiness.
Out of mini marshmallows? Regular marshmallows at 1.5x the weight work but take longer to melt. Skip the corn syrup if you prefer a firmer treat. Want more depth? Swap vanilla for almond extract at half the amount. The cereal can be generic—just check it’s plain crispy rice. No substitutions for butter here though, as margarine can make them greasy.
These keep beautifully at room temp in an airtight container for 3-4 days. For longer storage, wrap individual squares in parchment and freeze for up to 2 months (trust me, they disappear faster than that). Press them gently into the pan—too much pressure kills the crispiness.
Why You’ll Love This Recipe
- One Pot Wonder: I melt the butter, toss in marshmallows, and stir in cereal—no fancy tools, just a spatula and a pot.
- Buttery Vanilla Magic: The butter and vanilla make these taste richer than the boxed version, with that perfect crispy-chewy bite.
- Crowd Pleaser: I bring these to potlucks and they’re always the first to disappear, even with picky eaters.
- Pantry Staples: Between us, I always have these ingredients on hand, so a craving never goes unanswered.
Step-by-Step Instructions for Home Made Rice Crispy Treats
Here’s the method that guarantees perfectly gooey, crispy-edged treats with minimal effort.
Step 1: Melt and Combine the Marshmallow Base
In a large, heavy-bottomed pot, melt the 3 tbsp Unsalted Butter over low heat. As soon as it’s fully melted, add the 10 oz Mini Marshmallows and the 0.25 tsp Salt. Stir constantly with a silicone spatula—the mixture will start to melt slowly.
After about 3-4 minutes, when the marshmallows are about 70% melted, add the 1 tsp Vanilla Extract and the 2 tbsp Light Corn Syrup. The corn syrup adds that signature chewiness. Continue stirring until the mixture is completely smooth and glossy, with no visible marshmallow lumps.
Watch closely—this is when the magic happens. The mixture should pull away from the sides of the pot slightly and form a single, stretchy mass when you lift the spatula. If it starts to brown at all, remove from heat immediately; you want pure white melt.
Step 2: Fold in the Rice Krispies Cereal
Remove the pot from heat and add all 6 cups Rice Krispies Cereal at once. Using the same spatula, fold the cereal into the marshmallow mixture with a gentle pressing motion. I like to scrape the bottom of the pot to catch any hidden pockets of marshmallow.
The cereal will start to soften as it absorbs the warm marshmallow coating. Work quickly but carefully—you want every piece evenly coated without crushing the cereal. After about 30-45 seconds of folding, the mixture should look uniform with a slightly glossy sheen.
If you notice the mixture cooling too quickly and becoming difficult to stir, place the pot back over very low heat for 10-15 seconds just to loosen it. But don’t let it sit too long or the cereal will lose its crispness.
Step 3: Press into the Pan with Precision
Transfer the mixture to a 9×13-inch baking dish lined with parchment paper. I prefer to use an offset spatula or the back of a measuring cup to press it down. Press firmly but don’t compact it too tightly—you want some air pockets for that classic crispy texture.
Pay special attention to the edges and corners where the mixture tends to pull away. Press it flush against the sides of the pan for those coveted crispy edges. The top should be smooth and even, with a slight sheen from the marshmallow coating.
Here’s the thing—resist the temptation to press it into the pan while it’s still in the pot. The heat from the marshmallow mixture needs to distribute through the cereal first, otherwise you’ll end up with dense, hard treats instead of light, crispy ones.
Step 4: Cool and Set Before Cutting
Let the treats cool at room temperature for at least 30 minutes before attempting to cut them. I know it’s hard to wait when they smell this good, but cutting too soon will result in a gooey, sticky mess instead of clean squares.
You’ll know they’re ready when the top loses its glossy sheen and becomes slightly matte. The edges should pull away from the pan slightly, and the treats should hold their shape when gently pressed with a finger.
Once cooled, use a sharp knife to cut into squares. For the cleanest cuts, dip the knife in hot water between each slice. This prevents the marshmallow from sticking to the blade.
Step 5: Finish with Sea Salt Flakes
Just before serving, sprinkle the 0.5 tsp Sea Salt Flakes evenly over the top. This finishing touch enhances all the flavors and adds a sophisticated contrast to the sweetness. The flakes should be visible but not overpowering.
Serve immediately while still slightly warm for the best texture—crispy on the outside, soft and gooey on the inside. If storing, keep in an airtight container at room temperature for up to 3 days, though they’re best enjoyed fresh.
Pro Tips For Making Home Made Rice Crispy Treats
- Melt on Low: Use low heat when melting butter and marshmallows—I learned this the hard way after scorching two batches. The sugar in marshmallows burns fast.
- Butter the Pan: Grease your 9×13 pan with butter, not oil. It adds flavor and keeps the treats from sticking better than any spray.
- Press Lightly: Don’t pack the mixture too tight when pressing into the pan or your treats will turn dense. A light touch keeps them crispy.
- Use Fresh Cereal: Stale Rice Krispies won’t snap, crackle, or pop. Check the box date—fresh cereal makes a real difference in texture.
Perfect Pairings for This home made rice crispy treats
Beverage Pairings
Cold milk is the classic choice—its creamy texture contrasts beautifully with the crispy treats. I always keep a glass of whole milk nearby to balance the sweetness. For a grown-up twist, try vanilla almond milk for nutty depth. 🥛
Coffee Complements
A hot cup of coffee cuts through the richness perfectly. I love a dark roast with these treats—the bitterness enhances the marshmallow’s sweetness. For iced coffee lovers, add 1 tsp cinnamon to your brew for extra warmth.
Dessert Wine
For special occasions, pair with a Moscato d’Asti—its light effervescence and honey notes complement the treats beautifully. Serve chilled in 6-ounce glasses to match the portion size. The Italian in me insists on this pairing.
Fruit Accompaniments
Fresh strawberries add a bright contrast to the gooey sweetness. Slice 1 cup of berries and serve alongside for a refreshing bite. The acidity in the fruit cleanses your palate between squares.
Ice Cream Sandwich
Turn these into an ice cream sandwich by adding a scoop of vanilla ice cream between two squares. Press gently and roll the edges in rainbow sprinkles for a fun, colorful twist that kids love.
Tea Time
Hot tea works wonderfully too. I recommend Earl Grey with its citrus notes or chamomile for a soothing pairing. The warmth of the tea makes the treats taste even more comforting. ✨
Nutrition Facts
Frequently Asked Questions
Why do my treats turn out hard?
Over-melting the marshmallows or pressing too firmly can make them dense. Melt over low heat and press just enough to hold shape, not compact.
Can I use regular marshmallows instead of mini?
Yes! Use 15 oz regular marshmallows (about 6 cups). They take longer to melt—stir patiently for 5-7 minutes on low.
How do I make them extra gooey?
Add 1 extra cup mini marshmallows to the melted mixture before folding in cereal. This boosts the marshmallow-to-cereal ratio.
What’s the best way to store leftovers?
Keep in an airtight container at room temperature for 3 days. For longer storage, freeze individual squares for up to 2 months.

- Ground Beef Rice and Beans Recipe: Slow-Simmered Savory Harmony - October 17, 2026
- Guyanese Fried Rice Recipe: Caribbean Spice With Wok-Charred Aromatics - October 17, 2026
- Hakka Thunder Tea Rice Recipe: Wok-Charred Herbal Infusion - October 17, 2026