
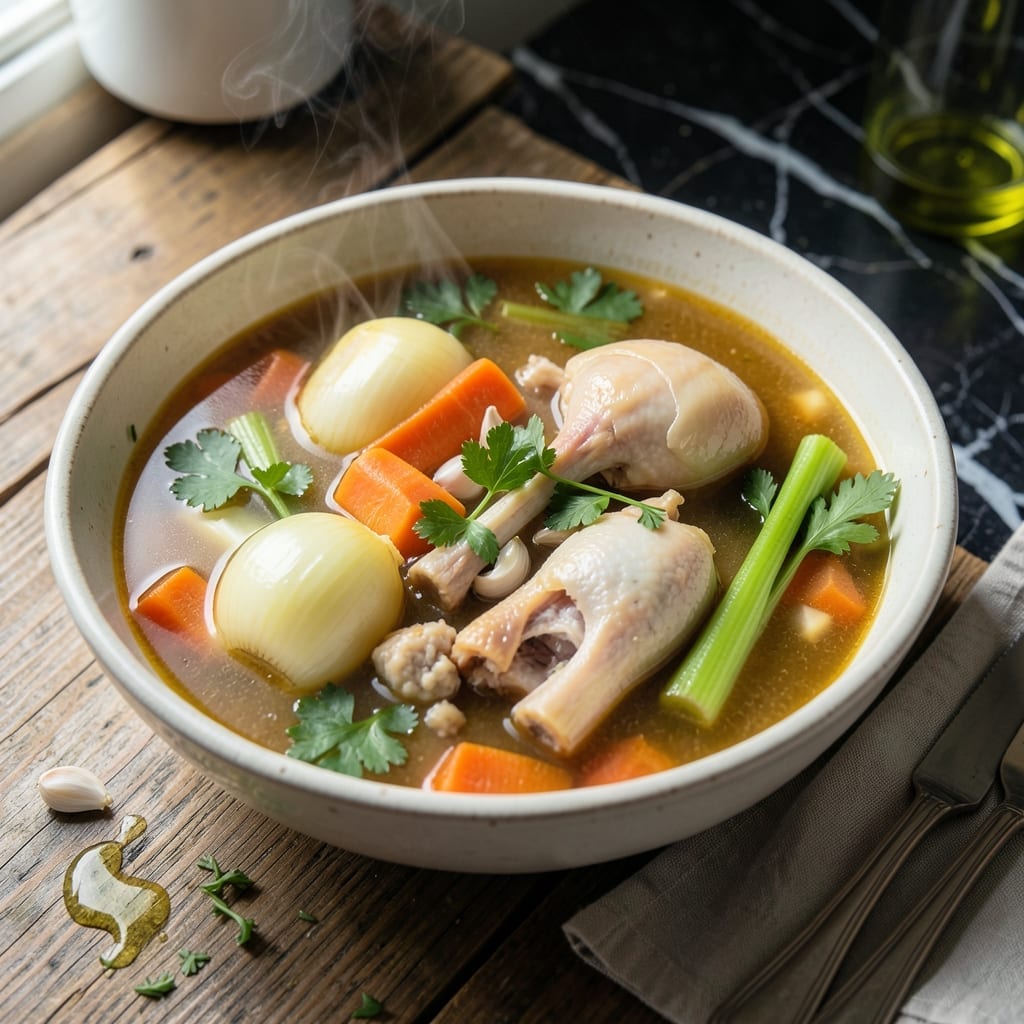
There’s nothing like a pot of homemade chicken bouillon simmering on the stove to fill your kitchen with rich, comforting aromas. This traditional method transforms simple ingredients into a flavorful base for countless dishes.
With just bones, vegetables, and herbs, you can create a golden liquid that outperforms any store-bought version. The slow simmer extracts every bit of flavor, resulting in a clean, robust stock that elevates soups, stews, and sauces.
This recipe requires patience as the broth develops depth over several hours. The reward is a versatile foundation that brings professional quality to your home cooking.
Use it immediately or freeze for future meals. The process is straightforward yet deeply satisfying.
Ingredients for Homemade Chicken Bouillon
Transform simple bones and vegetables into a rich, golden broth foundation for countless dishes.
| Ingredient | Amount | Notes |
|---|---|---|
| Chicken Bones 🍗 | 2 lb | Carcass or backs, raw or roasted |
| Yellow Onions 🧅 | 2 whole | Quartered, skin on for color |
| Carrots 🥕 | 3 whole | Cut into large chunks |
| Celery Stalks 🌿 | 3 whole | Including leafy tops |
| Garlic Cloves 🧄 | 6 cloves | Unpeeled, lightly crushed |
| Fresh Parsley Stems 🌿 | 1 cup | With some leafy portions |
| Fresh Thyme Sprigs 🍃 | 4 whole | Or 1 tbsp dried |
| Bay Leaves 🍃 | 2 whole | Dried, whole leaves |
| Black Peppercorns 🌶️ | 1 tbsp | Whole, not ground |
| Kosher Salt 🧂 | 1 tbsp | Diamond Crystal preferred |
| Cold Water 💧 | 4 cups | To cover all ingredients |
| Apple Cider Vinegar 🍏 | 1 tbsp | Balances minerals in bones |
The chicken bones are non-negotiable for depth. Raw carcasses yield a cleaner flavor than pre-cooked, though both work. Whole Foods or local butchers often give bones away cheaply—ask for necks and backs. Vegetables needn’t be pristine; onion skins and celery tops add color and complexity. For herb quality, organic parsley and thyme from the farmers market pack more aromatic punch than supermarket bundles.
No celery? Fennel bulbs or parsnips offer similar sweetness. Short on fresh herbs? Dried thyme at one-third the amount works, but fresh parsley stems are irreplaceable for their mineral notes. White wine vinegar can sub for apple cider in a pinch. The water should always be cold to start—hot water shocks the proteins, clouding your stock. Skip the salt if using for reductions later.
Strain and cool quickly to preserve freshness. Refrigerate for up to 5 days or freeze in portions for 6 months. For the clearest broth, avoid boiling—maintain a gentle simmer. Skim foam regularly during the first hour for a clean, restaurant-quality result.
Why You’ll Love This Recipe
- Dump and Simmer: It’s just bones, onions, carrots, celery, and garlic in a pot—honestly, the hands-off part is my favorite.
- Deep, Rich Flavor: The slow simmer pulls every bit of goodness from the chicken and veggies, so the broth tastes like it cooked all day.
- Meal Prep Hero: I use this bouillon as a base for soups, grains, or sauces all week long.
- Penny-Wise Stock: Those leftover chicken bones and veggie scraps turn into liquid gold instead of trash.
Step-by-Step Instructions for Chicken Bouillon
This method extracts maximum flavor and gelatin from the bones for a rich, aromatic broth.
Step 1: Prepare and Combine the Aromatics and Bones
Rinse the 2 lb Chicken Bones under cold water and pat them dry with paper towels. In a large stockpot, combine the chicken bones with the 2 whole Yellow Onions (quartered with skin on), 3 whole Carrots (cut into large chunks), and 3 whole Celery Stalks (including leafy tops).
The onion skins add a beautiful golden color to the finished bouillon, while the leafy celery tops contribute subtle herbal notes. This combination forms the classic mirepoix base that builds depth in the broth.
Step 2: Add Remaining Ingredients and Cold Water
Add the 6 cloves Garlic Cloves (unpeeled and lightly crushed), 1 cup Fresh Parsley Stems (with some leafy portions), 4 whole Fresh Thyme Sprigs, 2 whole Bay Leaves, 1 tbsp Black Peppercorns, and 1 tbsp Kosher Salt to the pot.
Pour in the 4 cups Cold Water to cover all ingredients completely. The cold water ensures a gradual temperature rise, which helps extract gelatin from the bones for a richer mouthfeel. Stir in the 1 tbsp Apple Cider Vinegar—this acid helps break down collagen and draw minerals from the bones.
Step 3: Simmer Gently to Extract Flavor
Bring the mixture to a boil over medium-high heat, then immediately reduce to a gentle simmer. Skim off any foam or impurities that rise to the surface during the first 10-15 minutes of simmering.
Maintain a low, steady simmer for 3-4 hours, partially covered. Avoid a rolling boil, as this can make the broth cloudy and break down the ingredients too quickly. You should see occasional small bubbles breaking the surface, not a vigorous boil.
Step 4: Strain and Store the Finished Bouillon
After simmering, the broth should have a deep amber color and rich aroma. Remove the pot from heat and let it cool slightly for 10-15 minutes. This brief rest makes the solids easier to handle during straining.
Set a fine-mesh strainer over a large bowl or another pot and strain the bouillon, pressing gently on the solids to extract all liquid. Discard the spent ingredients. Let the bouillon cool completely before transferring to airtight containers for storage.
Once cooled, the bouillon will have a slightly gelatinous texture, especially when refrigerated—a sign of proper collagen extraction. Store in the refrigerator for up to 5 days or freeze for 3 months.
Pro Tips For Making Homemade Chicken Bouillon
- Roast the Bones: Toss the chicken bones with a little oil and roast at 400°F for 20-25 minutes until golden brown—I learned this the hard way, but skipping this step gives you a pale, weak broth.
- Char the Veggies: Don’t just chop the onions, carrots, and celery—toss them in the pan with the bones to caramelize slightly, about 10 minutes. It adds depth that raw veggies just can’t.
- Skip the Boil: Keep the heat at a gentle simmer, never a rolling boil, or your broth will turn cloudy. I used to crank it up to speed things along, but it just made the final product murky.
- Add Garlic Late: Toss in the garlic cloves only in the last 30 minutes of simmering to prevent bitterness. Sounds weird, but it works—burnt garlic ruins the whole batch.
Make-Ahead Tips for Leftovers
Batch Prep Strategy
I always double this recipe since it freezes beautifully. Use a 12-quart stockpot to accommodate 4 lb chicken bones and double the vegetables. The extra volume doesn’t extend cooking time significantly—just keep that gentle simmer going for 4 hours. 💡
Portioning for Later
Once cooled, I ladle the bouillon into 1-quart freezer bags or mason jars. Lay bags flat to save space, and leave 1-inch headspace for expansion. Label each with the date—it keeps for 3 months but I find it tastes freshest within 6 weeks.
Concentrated Bouillon Cubes
For ultimate convenience, reduce your strained bouillon by half on the stovetop. Pour into ice cube trays and freeze. Each cube equals about 2 tbsp of concentrated stock—perfect for quick pan sauces or deglaing. Pop cubes into a bag once frozen solid.
Fridge Storage Tips
If using within 5 days, store in airtight containers in the fridge. The bouillon will gel when cold—that’s the collagen at work. To use, just scoop out what you need and reheat gently. I love seeing that golden jelly transform back to liquid. ❄️
Reheating Methods
Gently reheat on the stove over medium-low heat until just simmering. For single servings, microwave in 30-second bursts, stirring between each. Never boil reconstituted bouillon—it can make the flavor harsh.
Flavor Boost Before Use
If your bouillon tastes mild after thawing, don’t worry. A quick simmer with 1 bay leaf and 3 peppercorns for 10 minutes refreshes the flavor beautifully. This works especially well with older batches.
Nutrition Facts
Frequently Asked Questions
What bones work best for this?
Chicken backs, necks, and carcasses give the richest flavor. Raw bones yield cleaner taste than cooked. Ask your butcher for these inexpensive cuts.
Can I use a slow cooker instead?
Yes! Cook on low for 8-10 hours or high for 4-5 hours. The gentle heat extracts flavors beautifully without boiling.
Why did my bouillon turn cloudy?
This happens if it boiled too vigorously or wasn’t skimmed. Next time, maintain a gentle simmer and remove foam during the first 15 minutes.
How do I reduce the sodium content?
Skip the salt entirely during cooking. Add it when using the bouillon in recipes instead. This lets you control seasoning.

- Jollof Rice Sauce Recipe: West African Tomato and Spice Infusion - September 25, 2026
- Japanese Rice Soup Recipe: Umami-Rich Comfort in a Bowl - September 25, 2026
- Homemade Cream Of Rice Recipe: Silk-Smooth Breakfast in Minutes - September 25, 2026