
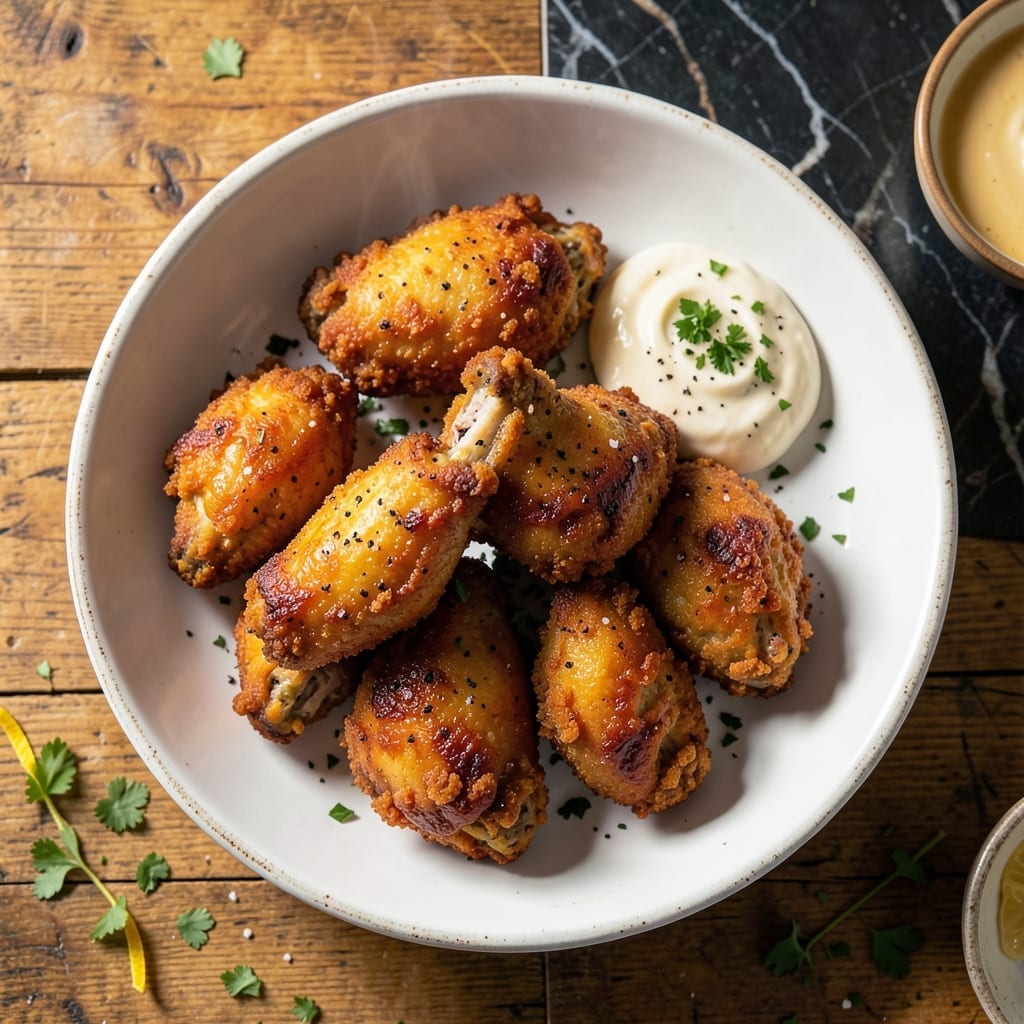
There’s nothing quite like biting into crispy, golden-brown chicken with tender, juicy meat inside. This homemade version delivers restaurant-quality results with a simple, foolproof technique.
The secret lies in the double-dipping method: first in flour, then in egg wash, and finally back into the flour mixture. This creates a thick, crunchy coating that stays put during frying.
Frying at the right temperature ensures even cooking without burning the outside before the inside is done. The result is perfectly cooked chicken with a shatteringly crispy exterior.
Serve hot with mashed potatoes and gravy for a classic comfort meal. Here’s how to make it at home.
Ingredients for Homemade Chicken Fried Chicken
Pantry staples plus fresh chicken create this restaurant-quality fried chicken at home.
| Ingredient | Amount | Notes |
|---|---|---|
| Chicken Thighs 🍗 | 2 lb | Boneless, skinless, pounded even |
| All-Purpose Flour 🌾 | 2 ½ cups | Divided for dredging and coating |
| Large Eggs 🥚 | 2 whole | Beaten with milk for wash |
| Whole Milk 🥛 | ½ cup | For egg wash mixture |
| Kosher Salt 🧂 | 2 tsp | Diamond Crystal preferred |
| Ground Black Pepper 🌶️ | 1 tsp | Freshly cracked for best flavor |
| Paprika 🌶️ | 1 tsp | Sweet or smoked variety |
| Garlic Powder 🧄 | 1 tsp | Not garlic salt |
| Onion Powder 🧅 | 1 tsp | Fine grind preferred |
| Cayenne Pepper 🔥 | ½ tsp | Adjust to heat preference |
| Vegetable Oil 🫒 | 4 cups | For deep frying, high smoke point |
| Buttermilk 🥛 | 1 cup | For marinating chicken |
The chicken is everything here. Boneless, skinless thighs stay juicier than breasts during frying—look for uniform thickness or pound them yourself. For the flour, King Arthur or Bob’s Red Mill all-purpose gives the best crunch. The buttermilk marinade (use full-fat for richness) tenderizes while adding depth. Most supermarkets carry everything you need—no specialty stores required.
No buttermilk? Whole milk plus 1 tbsp lemon juice or vinegar works in a pinch. Swap thighs for breasts if you prefer, but reduce frying time by 2-3 minutes. For extra crunch, replace one-third of the flour with cornstarch. The spices can be adjusted—add smoked paprika for depth or omit cayenne for a milder version.
Marinate the chicken in buttermilk for up to 12 hours for maximum tenderness. Store leftover oil (once cooled) in a sealed container for 1 month, straining out any bits first. Cooked chicken keeps in the fridge for 3-4 days—reheat in the oven to maintain crispiness.
Why You’ll Love This Recipe
- One Pan Magic: I just need a bowl for the flour, one for the egg-milk wash, and a skillet—no fancy equipment.
- Crispy outside, juicy inside: That double-dipped crust with the salted flour makes every bite worth the sizzle.
- Weeknight Hero: It’s my go-to for busy evenings when I need something hearty on the table fast.
- Budget Friendly: Chicken thighs stay cheap, and a little flour plus eggs stretch to feed the whole crew.
Step-by-Step Instructions for Chicken Fried Chicken
Master the technique for achieving that perfect crunch while keeping the meat incredibly juicy.
Step 1: Marinate Chicken in Buttermilk
Place the 2 lb chicken thighs in a large bowl and pour over the 1 cup buttermilk. Ensure each piece is fully submerged. The buttermilk tenderizes the meat while adding subtle tang that balances the rich coating.
Cover and refrigerate for at least 1 hour, or up to 12 hours for maximum flavor penetration. I’ve found this step non-negotiable for achieving that promised juiciness. The acid in buttermilk breaks down proteins, guaranteeing tender results.
Step 2: Prepare the Breading Station
In a shallow dish, whisk together 2 whole large eggs and the 0.5 cup whole milk until fully combined. In a separate wide bowl, mix 2.5 cups all-purpose flour with 2 tsp kosher salt, 1 tsp ground black pepper, 1 tsp paprika, 1 tsp garlic powder, 1 tsp onion powder, and 0.5 tsp cayenne pepper.
The spices should be evenly distributed throughout the flour. This two-bowl setup creates the perfect texture contrast – the egg wash helps the dry coating adhere while forming that signature shatter when fried.
Step 3: Dredge and Double-Coat the Chicken
Remove chicken from buttermilk, letting excess drip off. Dredge each piece thoroughly in the flour mixture, pressing gently to ensure full coverage. Shake off any excess flour, then dip into the egg wash, allowing excess to drip off.
Return to the flour mixture for a second coating. This double-dredging technique creates that extra-crispy exterior. Place breaded pieces on a wire rack set over a baking sheet. Let rest for 10 minutes to help the coating set before frying.
Step 4: Deep-Fry to Golden Perfection
In a heavy Dutch oven, heat the 4 cups vegetable oil to 350°F over medium-high heat. Use a deep-fry thermometer for accuracy – temperature control is critical for even cooking without burning the exterior.
Working in batches to avoid crowding, carefully lower chicken into the hot oil. Fry for 12-15 minutes, turning occasionally, until the coating is deep golden brown and the internal temperature reaches 165°F. The oil temperature will drop initially – maintain between 325-350°F throughout cooking.
Step 5: Drain and Rest Before Serving
Transfer fried chicken to a wire rack set over a paper towel-lined baking sheet. This setup prevents the coating from becoming soggy by allowing air circulation on all sides. Let rest for 5 minutes before serving.
The resting period allows the juices to redistribute throughout the meat, ensuring each bite delivers on that promised tenderness. Serve immediately while still hot and crispy for the optimal texture contrast between the crunchy exterior and juicy interior.
Pro Tips For Making Homemade Chicken Fried Chicken
- Double Dredge: Dip the chicken in the egg-milk wash, then flour, then back in the wash and flour again. I learned this the hard way—single coating falls off in the pan.
- Rest the Chicken: Let the dredged thighs sit for 10 minutes before frying. This helps the coating stick and keeps it from sliding right off.
- Use Thighs, Not Breasts: Chicken thighs stay juicy even when fried at high heat, while breasts tend to dry out. The fat content actually changes the outcome.
- Keep Oil Hot: Maintain 350°F oil temperature—if it drops, the chicken absorbs grease instead of crisping. A candy thermometer is worth the $5.
Flavor Customization for homemade chicken fried chicken
Spice Level Adjustments
For milder flavor, reduce cayenne pepper to ¼ tsp or omit entirely. I often do this for kids—they still get flavor without the heat. For extra kick, add 1 tsp of hot sauce to the buttermilk marinade. 🌶️
Herb Infusions
Add 1 tbsp dried thyme or rosemary to your flour mixture for an earthy twist. These herbs pair beautifully with chicken. Fresh herbs like 2 tbsp chopped parsley can be sprinkled over finished pieces.
Cheesy Crunch
Incorporate ½ cup grated Parmesan into your flour mixture for a savory depth. The cheese melts into the coating, creating a delightful crispness. I love the umami boost this adds to the dish.
Citrus Zing
Add 1 tbsp lemon zest to the flour mixture for a bright, citrusy note. The acidity cuts through the richness. Alternatively, add 1 tsp orange zest for a sweeter citrus profile.
Smoky Flavor
Replace regular paprika with smoked paprika for a deeper, wood-fired taste. Add ½ tsp chipotle powder for a subtle smokiness. This reminds me of backyard barbecues.
Sweet Heat
Mix 1 tbsp brown sugar into the flour for a sweet-spicy balance. The sugar caramelizes during frying, adding a glossy sheen. Pair with ½ tsp cinnamon for warmth.
Nutrition Facts
Frequently Asked Questions
Can I use chicken breasts instead of thighs?
Yes, but adjust cooking time. Breasts cook faster and can dry out. Pound them to ½-inch thickness and reduce frying time by 2-3 minutes. Thighs are preferred for their juiciness.
How do I keep the coating crispy?
Use a wire rack for draining, not paper towels. This allows air circulation on all sides. Also, maintain oil temperature between 325-350°F to prevent sogginess.
Can I bake instead of fry?
Yes, but texture differs. Bake at 400°F for 25-30 minutes on a wire rack. The coating won’t be as crispy as deep-fried, but it’s a healthier option.
Why did my coating fall off?
Likely skipped the resting step. Let breaded chicken rest for 10 minutes before frying so the coating sets. Also, ensure oil is hot enough before adding chicken.

- Jollof Rice Sauce Recipe: West African Tomato and Spice Infusion - September 25, 2026
- Japanese Rice Soup Recipe: Umami-Rich Comfort in a Bowl - September 25, 2026
- Homemade Cream Of Rice Recipe: Silk-Smooth Breakfast in Minutes - September 25, 2026