
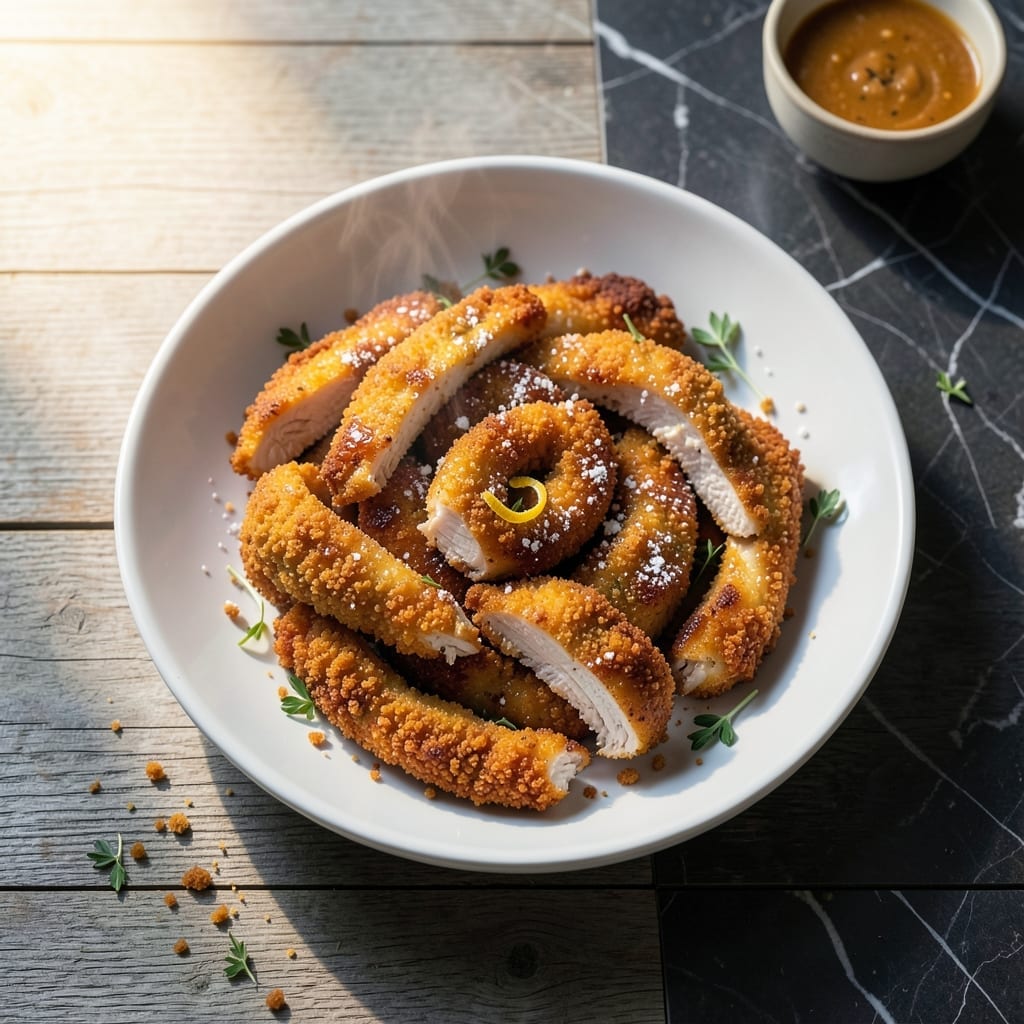
This homemade chicken fry delivers crispy, golden-brown perfection with every bite. The secret lies in a double-dipping technique that ensures an ultra-crunchy coating that stays intact from pan to plate.
Using simple pantry staples and 15 minutes of active prep, this method transforms ordinary chicken into restaurant-quality results. The key is maintaining the right oil temperature for even cooking and maximum crispiness.
Each piece emerges with a shatteringly crispy exterior and juicy, tender meat inside. The seasoned coating adds just the right amount of flavor without overpowering the chicken’s natural taste.
Serve hot with your favorite dipping sauces or as a main dish with sides. This technique guarantees consistent results every time you make it.
Ingredients for Homemade Chicken Fry
Pantry staples plus a few fresh items yield that shatteringly crispy exterior everyone craves.
| Ingredient | Amount | Notes |
|---|---|---|
| Chicken Breast 🍗 | 1 ½ lb | Boneless, skinless, cut into 1-inch strips |
| All-Purpose Flour 🌾 | 1 cup | For initial dredging |
| Large Eggs 🥚 | 2 whole | Beaten for egg wash |
| Buttermilk 🥛 | 1 cup | For second dip, ensures crispiness |
| Panko Breadcrumbs 🍞 | 2 cups | For ultra-crunchy coating |
| Cornstarch 🌾 | ¼ cup | Mixed with flour for extra crisp |
| Paprika 🌶️ | 1 tbsp | Sweet or smoked, for color |
| Garlic Powder 🧄 | 1 tsp | For seasoning coating |
| Onion Powder 🧅 | 1 tsp | For seasoning coating |
| Salt 🧂 | 1 tsp | Diamond Crystal kosher preferred |
| Black Pepper 🌶️ | ½ tsp | Freshly ground for best flavor |
| Vegetable Oil 🫒 | 3 cups | For frying, high smoke point |
| Cayenne Pepper 🔥 | ¼ tsp | Optional, for subtle heat |
The chicken quality matters most here. Boneless, skinless breasts from Whole Foods or a trusted butcher ensure tender meat—avoid pre-packaged options with added solutions. For the buttermilk, organic full-fat from Trader Joe’s gives the best texture. Panko breadcrumbs are non-negotiable for that restaurant-quality crunch; Kikkoman brand is widely available and reliable.
No buttermilk? Stir 1 tbsp lemon juice or vinegar into regular milk and let sit 5 minutes. Swap panko for crushed cornflakes in a pinch. If avoiding gluten, gluten-free breadcrumbs work but may require a splash of water in the egg wash for better adherence. The cornstarch can be omitted, but the coating won’t be as crispy.
Fry in batches to avoid crowding the pan—this keeps oil temperature steady. Leftovers hold up well in the fridge for 2-3 days but lose crispness. Reheat in a 375°F oven for 10 minutes to revive the crunch. Never microwave or they’ll turn soggy.
Why You’ll Love This Recipe
- One Pan Meal: I love that this only dirties one pan—dredge, dip, fry, and you’re done.
- That Crunch Though: The panko-buttermilk combo gives it this insane crispy outside, tender inside situation. Honestly, it’s ridiculous how good it is.
- Weeknight Hero: Between us, this is my go-to for picky eaters and last-minute dinner guests alike.
- Budget Stretcher: A pound of chicken breast turns into a meal that feeds four, and leftovers reheat surprisingly well.
Step-by-Step Instructions for Chicken Fry
Achieve restaurant-quality crispiness at home with this proven frying technique.
Step 1: Prepare the Chicken and Dredging Station
Cut the 1.5 lb chicken breast into 1-inch strips. This uniform size ensures even cooking. Set up three shallow bowls: first with 1 cup all-purpose flour, 0.25 cup cornstarch, 1 tbsp paprika, 1 tsp garlic powder, 1 tsp onion powder, 1 tsp salt, and 0.5 tsp black pepper. The cornstarch is key for extra crunch.
Whisk the dry ingredients until thoroughly combined. The paprika provides color while the powders add depth of flavor. I always sift the flour first to prevent lumps in the coating.
Step 2: Create the Wet and Breadcrumb Stations
In the second bowl, beat the 2 whole large eggs with 1 cup buttermilk until smooth. The buttermilk’s acidity tenderizes the chicken while helping the coating adhere. For the third bowl, place the 2 cups panko breadcrumbs with 0.25 tsp cayenne pepper if using.
Panko’s coarse texture creates superior crunch compared to regular breadcrumbs. Stir the cayenne into the panko for even distribution. This three-step breading process builds layers of texture and flavor that will shatter beautifully when bitten.
Step 3: Bread the Chicken with Precision
Working with one piece at a time, dredge each chicken strip in the flour mixture, pressing gently to adher. Shake off excess flour – too much creates a gummy layer. Then dip into the egg wash, allowing any excess to drip back into the bowl.
Finally, press each piece into the panko mixture, turning to coat completely. I use my left hand for wet ingredients and right for dry to keep one hand clean. Place breaded pieces on a wire rack set over a baking sheet. This prevents soggy bottoms before frying.
Step 4: Fry to Golden Perfection
Heat 3 cups vegetable oil in a deep, heavy pot to 350°F. Use a thermometer for accuracy – oil temperature is critical. The oil should be deep enough to submerge the chicken strips completely for even cooking.
Fry in batches to avoid overcrowding, which lowers oil temperature. Cook for 4-5 minutes until golden brown and internal temperature reaches 165°F. The coating should be deeply colored and crisp. Drain on a wire rack to maintain crispiness rather than paper towels which can steam the coating.
Step 5: Rest and Serve Immediately
Let the chicken rest for 2-3 minutes after frying. This allows the internal juices to settle while the coating stays crisp. The chicken should be moist inside with a shatteringly crisp exterior.
Serve immediately while hot. The contrast between the crispy coating and tender chicken is at its peak right after frying. For best results, keep cooked batches warm in a 200°F oven while finishing the remaining pieces.
Pro Tips For Making Homemade Chicken Fry
- Double Dredge: Dip the chicken in buttermilk, then flour, then buttermilk again, then panko—this builds a shatteringly crisp crust that clings better than a single coat.
- Rest the Chicken: Let the breaded chicken rest for 10 minutes before frying so the coating sets and doesn’t slide off in the oil.
- Use Cold Oil: Start with cold oil and heat it gradually to 350°F—this prevents the outside from burning before the inside cooks through.
- Press the Panko: After dredging, press the panko firmly into the chicken so it adheres tightly and doesn’t flake off during frying.
Dietary Considerations for These Flavors
Gluten-Free Option
Swap the all-purpose flour and panko breadcrumbs for certified gluten-free versions. I recommend Bob’s Red Mill 1-to-1 gluten-free flour and Aleia’s gluten-free panko. Add 1 tbsp water to the egg wash for better adhesion. 💪
Dairy-Free Adaptation
Replace buttermilk with 1 cup unsweetened almond milk mixed with 1 tbsp apple cider vinegar. Let it sit for 5 minutes to curdle. The acidity mimics buttermilk’s tenderizing effect.
Lower-Carb Version
Use crushed pork rinds instead of panko for a crispy, low-carb coating. Mix with 1 tbsp almond flour and 1 tsp seasoning for extra flavor. The texture is slightly different but still delicious.
Egg-Free Alternative
For the egg wash, use ½ cup aquafaba (chickpea brine) whisked until frothy. It binds the coating just as well. This works surprisingly well and keeps the crunch intact.
Reduced-Sodium Option
Cut the salt in half and use low-sodium paprika and garlic powder. Boost flavor with fresh herbs like thyme or rosemary in the coating. You won’t miss the salt!
Nut-Free Note
All ingredients in this recipe are naturally nut-free, but check labels on panko breadcrumbs and seasonings. Some brands process in facilities with nuts, so certified nut-free products are safest. 🌟
Nutrition Facts
Frequently Asked Questions
What oil works best for frying?
Use oils with a high smoke point like vegetable, canola, or peanut oil. Maintain oil at 350°F for perfect crispiness. Avoid olive oil as it can burn at high temperatures.
How do I keep the coating from falling off?
Pat chicken dry before breading and let each layer set for 2-3 minutes. Press panko firmly onto each piece. The buttermilk in the egg wash helps adhesion.
Can I bake instead of fry?
Yes, bake at 400°F for 15-20 minutes, flipping halfway. Spray with oil for extra crispiness. It won’t be as crunchy as frying but still delicious.
Why is my chicken soggy?
Oil temperature was likely too low. Use a thermometer to maintain 350°F. Also, drain on a wire rack, not paper towels, to prevent steaming.

- Jollof Rice Sauce Recipe: West African Tomato and Spice Infusion - September 25, 2026
- Japanese Rice Soup Recipe: Umami-Rich Comfort in a Bowl - September 25, 2026
- Homemade Cream Of Rice Recipe: Silk-Smooth Breakfast in Minutes - September 25, 2026