
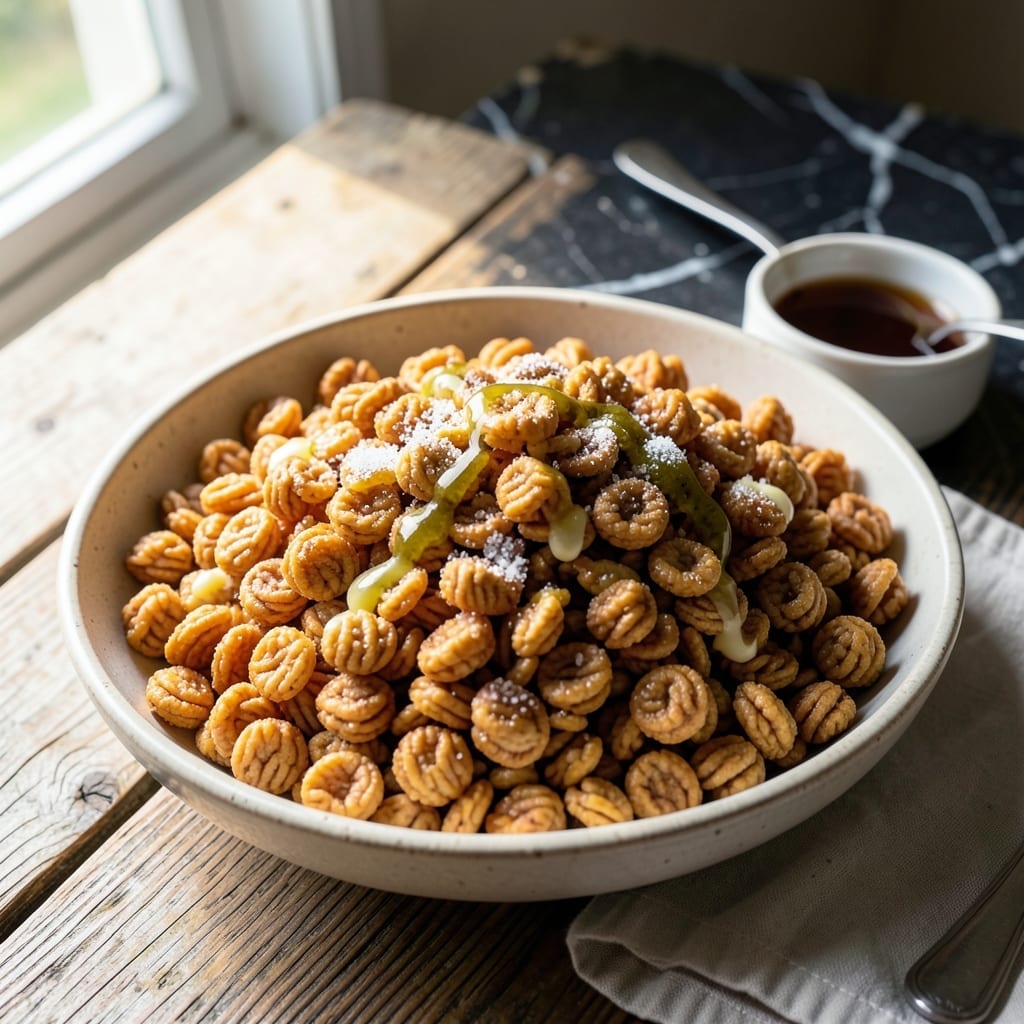
Making crispy rice cereal at home delivers a golden, nutty flavor that store-bought versions can’t match. This recipe transforms simple rice into crispy clusters with perfect texture and depth.
I developed this method after testing multiple approaches to achieve that ideal balance of crunch and toasty richness. The process is straightforward but requires attention to detail for consistent results.
What you get are uniform, golden puffs with a light, airy crunch that holds up in milk. The baking time and temperature are precisely calibrated to create that signature crispness without burning.
Serve as a breakfast cereal or enjoy as a snack straight from the oven. This homemade version redefines what crispy rice cereal can be.
Ingredients for Homemade Crispy Rice Cereal
Simple ingredients for a cereal that’s way better than the boxed stuff. Golden, crispy, and nutty.
| Ingredient | Amount | Notes |
|---|---|---|
| White Rice 🍚 | 2 cups | Long-grain or jasmine preferred |
| Granulated Sugar 🍚 | ½ cup | Adjust to taste preference |
| Salt 🧂 | 1 tsp | Fine sea salt preferred |
| Vanilla Extract 🌿 | 1 tsp | Pure extract for best flavor |
| Unsalted Butter 🧈 | 3 tbsp | Melted for binding clusters |
| Baking Powder 🧂 | ½ tsp | Ensures light, airy texture |
| Ground Cinnamon 🌿 | 1 tsp | Optional for warmth and depth |
| Whole Milk 🥛 | ¼ cup | For cereal serving |
| Egg Whites 🥚 | 2 whole | Whipped to stiff peaks |
| Pure Maple Syrup 🍁 | 2 tbsp | For drizzling on clusters |
The rice is the foundation—long-grain or jasmine works best for that perfect crisp. I grab mine in bulk at Whole Foods (they have great turnover, so it’s always fresh). The butter needs to be unsalted so you control the salt content. Land O’Lakes or Kerrygold are my go-tos. Don’t skip the vanilla; real extract (not the imitation stuff) makes a noticeable difference.
No jasmine rice? Basmatis works in a pinch. Out of vanilla? A pinch of ground vanilla bean (if you’ve got it) or skip it entirely. Need this dairy-free? Swap the butter for coconut oil and use almond milk. The egg whites are key for structure—aquafaba (chickpea brine) can work if you’re vegan. The sugar can be reduced, but don’t go below a quarter cup.
Store the cereal in an airtight container at room temperature for up to 2 weeks. It’ll soften slightly over time, but a quick crisp in the oven revives it. Freeze for up to 3 months if making a big batch. Serve with cold milk for the best crunch.
Why You’ll Love This Recipe
- I’ll be real: five ingredients I always have, and it still tastes better than store-bought.
- One Pot Wonder: I just melt butter, stir in rice and sugar, then let it crisp—no fancy steps.
- Buttery Vanilla Bliss: That rich butter mixed with vanilla makes every bite taste like a warm hug.
- Kid’s Party Hero: Between us, it’s my secret for birthday treats that disappear faster than the candles go out.
Step-by-Step Instructions for Homemade Crispy Rice Cereal
Here’s my tested method for achieving perfectly crispy clusters with nutty depth every time.
Step 1: Cook and Dry the Rice
Cook the 2 cups White Rice according to package instructions, but use slightly less water than called for—this helps keep the grains firm. Spread the cooked rice on a parchment-lined baking sheet in an even layer.
Let it dry at room temperature for 1 hour, or speed it up by placing it in a 200°F oven for 30 minutes. The rice should feel completely dry to the touch with no moisture remaining. This step is crucial for achieving maximum crispness later.
Step 2: Prepare the Binding Mixture
In a small saucepan, melt the 3 tbsp Unsalted Butter over low heat. Once melted, whisk in the 0.5 cup Granulated Sugar, 1 tsp Salt, 1 tsp Vanilla Extract, 0.5 tsp Baking Powder, and 1 tsp Ground Cinnamon until smooth.
Remove from heat and let cool slightly for 2 minutes. The mixture should be warm but not hot to the touch. This syrup will coat the rice grains and help them cluster together while baking.
Step 3: Combine and Form Clusters
Transfer the dried rice to a large bowl. Pour the warm butter mixture over the rice and fold gently with a spatula until evenly coated. The rice should glisten with the syrup but not be soggy.
In a separate bowl, whip the 2 whole Egg Whites to stiff peaks, then fold them into the rice mixture. This adds air and helps create light, crispy clusters. Use your hands to gently press the mixture into small clusters—about 1-inch in size.
Step 4: Bake to Golden Perfection
Preheat your oven to 300°F and line a baking sheet with parchment paper. Arrange the clusters on the sheet, leaving space between them. Bake for 25 minutes, then flip each cluster carefully.
Bake for another 20-25 minutes until the clusters are deep golden brown and crisp throughout. You’ll know they’re done when they feel light and hollow when tapped. Watch closely toward the end to prevent burning.
Step 5: Cool and Serve
Remove the clusters from the oven and let them cool completely on the baking sheet. They’ll continue crisping as they cool. Drizzle with the 2 tbsp Pure Maple Syrup while still warm for a touch of sweetness.
Serve the crispy rice clusters with 0.25 cup Whole Milk poured over the top, just like traditional cereal. Store any leftovers in an airtight container at room temperature for up to 5 days.
Pro Tips For Making Homemade Crispy Rice Cereal
- Toast the Rice: Spread the cooked white rice on a baking sheet and toast it in a 300°F oven for 20-25 minutes until completely dry and slightly golden—I learned this the hard way after my first batch turned out soggy.
- Use Day-Old Rice: Freshly cooked rice holds too much moisture, so make your rice the day before and refrigerate it uncovered. Sounds weird, but it works.
- Skip the Shortcuts: Resist the urge to melt the butter and sugar together too quickly over high heat—medium-low heat and constant stirring prevents burnt, bitter cereal.
- Add Vanilla Last: Stir in the vanilla extract after removing the mixture from heat, or the alcohol can make the sugar seize up and turn grainy. My grandmother swore by this, and she was right.
Creative Variations of These Flavors
Chocolate Lover’s Delight
Fold in ½ cup cocoa powder with your dry ingredients for a chocolatey twist. Add ¼ cup mini chocolate chips to the clusters before baking. I tested this version after my nephew begged for “chocolate cereal” – it’s now his favorite. 💛
Spiced Chai Version
Replace the Ground Cinnamon with 1½ tsp chai spice blend (cardamom, ginger, cloves, and nutmeg). Drizzle with honey instead of maple syrup for a warm, aromatic cereal perfect for cozy Boston mornings.
Tropical Coconut
Swap the Unsalted Butter for coconut oil and add ½ cup toasted coconut flakes to the rice mixture. The coconut adds a subtle sweetness that reminds me of family vacations. Bake at 290°F to prevent over-browning.
Savory Snack Mix
Omit the Granulated Sugar and Vanilla Extract, then add 1 tbsp garlic powder, 1 tsp smoked paprika, and ½ cup grated Parmesan. These savory clusters are perfect with beer – a trick I learned from my Nonna’s Italian kitchen.
Fruity Berry Blast
Add ½ cup freeze-dried strawberries or raspberries to the rice mixture before baking. The berries rehydrate slightly during baking, creating chewy, fruity bits. I grab mine from Trader Joe’s – they’re always fresh and vibrant.
Drizzle with white chocolate after cooling for extra indulgence.
Nutrition Facts
Frequently Asked Questions
Can I use leftover cooked rice for this?
Yes, but ensure it’s completely dry first. Spread it on a baking sheet and dry in a 200°F oven for 30 minutes to remove excess moisture. Freshly cooked rice works best for consistent texture.
Why do my clusters lose crispiness after a day?
Humidity is the culprit. Store in an airtight container with a silica packet if available. Revive by baking at 300°F for 5-10 minutes to restore crunch.
Can I make this without egg whites?
Yes, use 1/4 cup aquafaba (chickpea brine) as a vegan substitute. Whip to stiff peaks just like egg whites. The texture may vary slightly but will still be crispy.
How do I prevent burning during baking?
Bake at 300°F and flip clusters halfway through. Use parchment paper and check frequently after 20 minutes. Lower heat ensures even browning without scorching.

- Ground Beef Rice and Beans Recipe: Slow-Simmered Savory Harmony - October 17, 2026
- Guyanese Fried Rice Recipe: Caribbean Spice With Wok-Charred Aromatics - October 17, 2026
- Hakka Thunder Tea Rice Recipe: Wok-Charred Herbal Infusion - October 17, 2026