
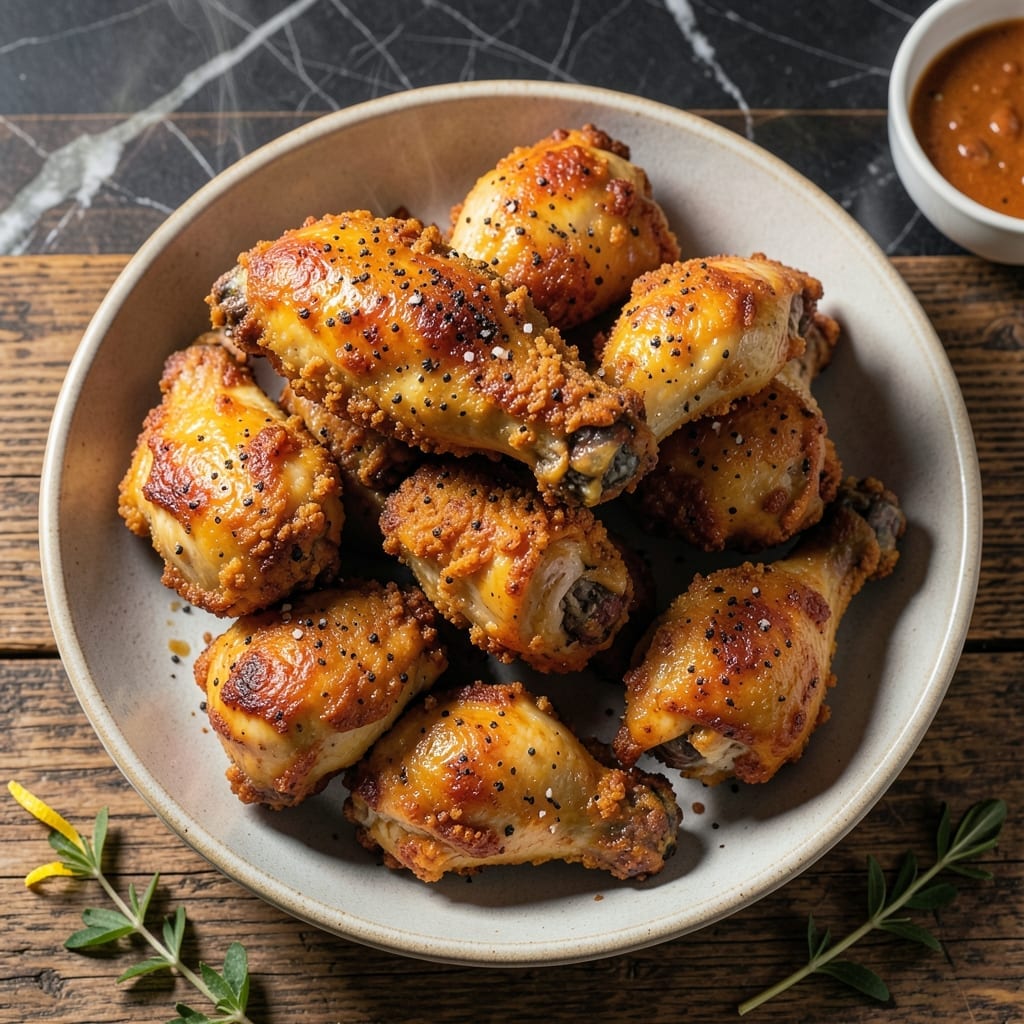
There’s an art to achieving crispy, golden fried chicken that stays juicy inside, and this recipe delivers every time. The secret begins with a buttermilk marinade that tenderizes while adding depth of flavor.
Double-dredging in seasoned flour creates a shatteringly crunchy coating that holds up to frying. I’ve tested countless variations to perfect the balance between spice and texture, ensuring each bite is packed with flavor.
This method uses traditional techniques with precise temperatures and timing for consistent results. The buttermilk works its magic overnight, while the frying process locks in moisture for perfectly tender meat.
What emerges is restaurant-quality fried chicken with a coating so crisp it crackles. Serve hot for the ultimate comfort food experience.
Ingredients for Homemade Fried Chicken Recipe Buttermilk
Quality chicken, buttermilk marinade, and a double-dredge create that signature crunch and juiciness.
| Ingredient | Amount | Notes |
|---|---|---|
| Chicken Thighs and Drumsticks 🍗 | 3 ½ lb | Bone-in, skin-on preferred |
| Buttermilk 🥛 | 2 cups | Full-fat for tenderness |
| All-Purpose Flour 🌾 | 3 cups | Divided for double-dredging |
| Cornstarch 🌽 | ½ cup | For extra crispiness |
| Kosher Salt 🧂 | 2 tbsp | Diamond Crystal preferred |
| Black Pepper 🌶️ | 1 tbsp | Freshly ground coarse |
| Paprika 🌶️ | 2 tsp | Sweet or smoked variety |
| Garlic Powder 🧄 | 1 tbsp | Not garlic salt |
| Onion Powder 🧅 | 1 tbsp | Fresh ground preferred |
| Cayenne Pepper 🔥 | ½ tsp | Adjust to heat preference |
| Dried Thyme 🍃 | 1 tsp | Crushed between fingers |
| Vegetable Oil 🫒 | 4 cups | For frying, high smoke point |
| Hot Sauce 🌶️ | 1 tbsp | Optional, for marinade kick |
The chicken is everything here. Bone-in, skin-on thighs and drumsticks yield the juiciest results—breasts tend to dry out. Source from Whole Foods or a trusted butcher for freshness. Look for pieces with vibrant color and no off odors. For the buttermilk, full-fat versions from organic brands like Organic Valley deliver superior tenderness and flavor development during the overnight marinade.
Swapping chicken cuts? Bone-in breasts work but require adjusted cooking times. No buttermilk? Whole milk with 1 tbsp vinegar per cup creates a suitable substitute. For gluten-free coating, rice flour plus cornstarch at a 2:1 ratio replaces all-purpose flour. The spice blend is flexible—add smoked paprika for depth or omit cayenne for milder heat. Fresh rosemary can replace thyme if preferred.
Marinate the chicken in buttermilk for 12-24 hours for optimal results. Store raw marinated chicken in the fridge for up to 2 days. Fried chicken keeps warm in a 200°F oven for about 30 minutes but is best served immediately. Leftovers refrigerate for 3-4 days—reheat in a 375°F oven to restore crispiness.
Why You’ll Love This Recipe
- I’ll be real: the chicken tastes just as good cold the next day for lunch or chopped into a sandwich.
- One Pan Magic: I just toss the chicken in buttermilk, coat it in flour and cornstarch, and fry—no complicated steps.
- That Crispy Crunch: The buttermilk soak makes the meat ridiculously juicy while the cornstarch gives it that perfect crunch.
- Weeknight Hero: Honestly, it’s my go-to for busy evenings when I need something hearty and satisfying fast.
Step-by-Step Instructions for Buttermilk Fried Chicken
This method delivers consistently crispy, flavorful fried chicken with a perfect crunch every time.
Step 1: Marinate Chicken in Buttermilk
In a large bowl, whisk together the 2 cups Buttermilk and 1 tbsp Hot Sauce until fully combined. Add the 3.5 lb Chicken Thighs and Drumsticks, ensuring each piece is fully submerged in the mixture. The buttermilk tenderizes the meat while the hot sauce adds depth.
Cover the bowl and refrigerate for at least 4 hours, though overnight yields the most tender results. I always set a timer to ensure I don’t exceed 24 hours, as the acidity can start to break down the meat too much. The chicken should look slightly swollen when ready to use.
Step 2: Prepare the Seasoned Dredge
In a shallow dish, combine 3 cups All-Purpose Flour, 0.5 cup Cornstarch, 2 tbsp Kosher Salt, 1 tbsp Black Pepper, 2 tsp Paprika, 1 tbsp Garlic Powder, 1 tbsp Onion Powder, 0.5 tsp Cayenne Pepper, and 1 tsp Dried Thyme. The cornstarch is the secret to that extra-crispy coating.
Mix thoroughly with a fork to break up any lumps. The texture should be uniform and the color a warm, spiced beige. I crush the dried thyme between my fingers as I add it to release its aromatic oils. This ensures every bite carries the full flavor of the seasoning blend.
Step 3: Dredge and Double-Coat the Chicken
Remove the chicken from the buttermilk, allowing excess to drip off. Dredge each piece in the flour mixture, pressing firmly to adhere the coating evenly. Shake off any loose flour—this prevents clumping during frying.
Place the coated chicken on a wire rack set over a baking sheet and let it rest for 10 minutes. This rest period helps the coating set, which is critical for achieving maximum crunch. Repeat the dredging process for an extra-thick crust if you prefer a more substantial bite.
Step 4: Fry to Golden Perfection
Heat the 4 cups Vegetable Oil in a deep, heavy pot to 350°F. Use a thermometer for accuracy—oil temperature is the key to even cooking. Carefully lower the chicken into the hot oil in batches, avoiding overcrowding, which can cause the temperature to drop.
Fry the chicken for 12-15 minutes, turning occasionally, until it reaches an internal temperature of 165°F and the coating is a deep, even golden brown. The oil should bubble steadily but not violently. Drain on a wire rack to maintain crispiness—paper towels can trap steam and make the coating soggy.
Serve immediately while hot. The coating should crackle slightly when bitten into, revealing juicy, flavorful meat underneath. Resting for 5 minutes allows the juices to redistribute, ensuring every piece is moist and tender.
Pro Tips For Making Homemade Fried Chicken Recipe Buttermilk
- Double Dredge: Dip the chicken in buttermilk, then flour, then back in buttermilk and flour again—I learned this the hard way after my first batch had a sad, flimsy crust.
- Rest the Chicken: Let the dredged pieces sit on a wire rack for 10-15 minutes before frying. This gives the coating time to set, so it doesn’t slide off in the oil.
- Use a Thermometer: Keep your oil at a steady 350°F. After burning three batches, I finally figured out that guessing the temperature just doesn’t work.
- Add Cornstarch: Mix a handful of cornstarch into your flour—about ¼ cup for every 2 cups of all-purpose. Sounds weird, but it works for a craggier, crunchier crust.
Common Mistakes When Making This Recipe
Oil Temperature Issues
One of the biggest mistakes is not maintaining consistent oil temperature. If it dips below 325°F, your coating absorbs too much oil, becoming greasy instead of crisp. I always use a candy thermometer clipped to the pot to monitor this precisely.
Overcrowding the Pot
Frying too many pieces at once causes the oil temperature to plummet. This leads to uneven cooking and soggy chicken. I fry in batches with at least 2 inches between pieces, allowing the oil to recover between batches. 🔥
Skipping the Rest
After dredging, letting the coated chicken rest for 10 minutes helps the coating adhere better. Without this step, the breading can slide right off during frying. I set a timer to ensure consistency.
Incorrect Internal Temp
Pulling chicken too early results in undercooked meat, while overcooking dries it out. Use a meat thermometer to check for 165°F in the thickest part. Dark meat can handle slightly higher temps without drying.
Poor Draining Method
Draining on paper towels traps steam, making the crust soft. I use a wire rack set over a baking sheet to allow air circulation on all sides, keeping every piece perfectly crisp.
Marinating Too Long
While the buttermilk marinade is key, exceeding 24 hours can make the meat mushy. I find the sweet spot is 12-18 hours for optimal tenderness without breaking down the texture. 💡
Nutrition Facts
Frequently Asked Questions
Can I use regular milk instead of buttermilk?
Yes! Mix 1 cup whole milk with 1 tablespoon vinegar or lemon juice, let it sit for 5 minutes to curdle. This creates a suitable substitute for buttermilk.
How do I know when the oil is hot enough?
A candy thermometer is best, but you can test with a wooden chopstick. If bubbles form around it, the oil is ready. Maintain 350°F for perfect frying.
Can I bake this instead of frying?
For a lighter version, bake at 400°F for 25-30 minutes on a wire rack. Spray with oil first for crispiness. The texture won’t be identical but still delicious.
Why is my coating falling off?
This usually happens if the chicken is too wet when dredged or not rested after coating. Pat pieces dry before dredging and rest for 10 minutes after coating.

- Jollof Rice Sauce Recipe: West African Tomato and Spice Infusion - September 25, 2026
- Japanese Rice Soup Recipe: Umami-Rich Comfort in a Bowl - September 25, 2026
- Homemade Cream Of Rice Recipe: Silk-Smooth Breakfast in Minutes - September 25, 2026