
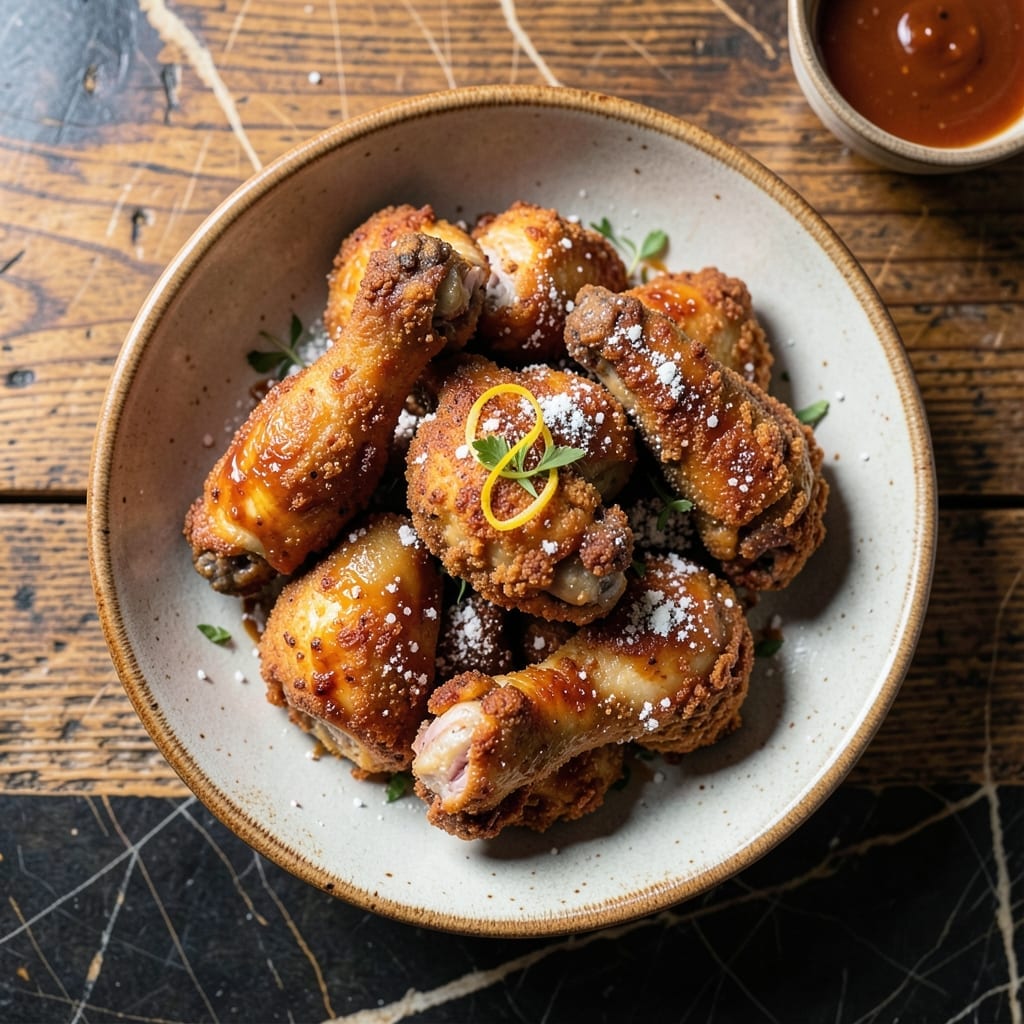
This buttermilk-brined fried chicken delivers the crispy, golden perfection that made JD Bakeshop famous. The secret lies in a 12-hour brine that guarantees juicy meat beneath every shatteringly crisp bite.
I developed this method to replicate that signature restaurant texture at home. The double-dredge coating creates layers of seasoned crust that stay crispy even after resting, while the buttermilk works its magic on the meat.
What emerges from the oil is chicken with a deep amber crust and tender interior. Each piece maintains its crunch thanks to the precise frying temperature and proper draining technique.
Serve hot for maximum crunch, or hold in a warm oven for up to an hour without losing texture. The results speak for themselves.
Ingredients for Jd Bakeshop Fried Chicken
A precise selection of ingredients delivers that signature JD Bakeshop crunch and juiciness at home.
| Ingredient | Amount | Notes |
|---|---|---|
| Chicken Thighs and Drumsticks 🍗 | 3 ½ lb | Bone-in, skin-on, trimmed of excess fat |
| Buttermilk 🥛 | 4 cups | Full-fat for optimal brine penetration |
| Kosher Salt 🧂 | ¼ cup | Diamond Crystal preferred for brining |
| Granulated Sugar 🍚 | 2 tbsp | Balances brine salinity |
| Hot Sauce 🌶️ | 2 tbsp | Crystal or Tabasco recommended |
| All-Purpose Flour 🌾 | 3 cups | Divided for double-dredging |
| Cornstarch 🌽 | ½ cup | For extra crispiness in coating |
| Paprika 🌶️ | 2 tbsp | Sweet or smoked variety |
| Garlic Powder 🧄 | 1 tbsp | Freshly ground preferred |
| Onion Powder 🧅 | 1 tbsp | Fine grind for even distribution |
| Ground Black Pepper 🌶️ | 1 tsp | Freshly cracked for best flavor |
| Cayenne Pepper 🔥 | ½ tsp | Adjust for desired heat level |
| Peanut Oil 🫒 | 8 cups | For deep frying, high smoke point |
| Large Eggs 🥚 | 2 whole | For wash between dredges |
The chicken selection is critical for authentic texture. Bone-in, skin-on thighs and drumsticks provide the juiciest results—avoid breasts as they dry out during frying. Source from Whole Foods or a trusted butcher for consistent sizing. For the buttermilk brine, full-fat versions from Organic Valley or local dairies yield superior tenderness and flavor penetration.
Short on buttermilk? Whole milk with 1 tbsp vinegar per cup works in a pinch. For the coating, swap cornstarch with rice flour for a lighter crust. The hot sauce can be any vinegar-based variety—Frank’s RedHot is ideal. If avoiding gluten, use a 1:1 gluten-free flour blend, but texture may vary slightly.
The brine keeps chicken safe in the fridge for 24 hours max. Frying oil can be reused 2-3 times if strained and stored cool. Completed chicken stays crispy for 1 hour in a 200°F oven—never cover, or steam will ruin the crust.
Why You’ll Love This Recipe
- So Simple: I just toss the chicken in buttermilk, salt, sugar, and hot sauce then let it do its thing—no fancy steps.
- Dangerously Addictive: That buttermilk brine with a kick of hot sauce makes the juiciest, most flavorful chicken I’ve ever fried.
- Feeds a Crowd: Thighs and drumsticks stretch further than breasts, and this recipe works for weeknight dinners or weekend gatherings.
- Next-Day Magic: Honestly, the leftovers make the best sandwiches—still crispy when reheated in the air fryer.
Step-by-Step Instructions for Buttermilk-Brined Fried Chicken
Master the technique behind this crispy, juicy creation with precise timing and temperature control.
Step 1: Brine the Chicken in Buttermilk Mixture
In a large bowl, whisk together the 4 cups Buttermilk, 0.25 cup Kosher Salt, 2 tbsp Granulated Sugar, and 2 tbsp Hot Sauce until the salt and sugar fully dissolve. Submerge the 3.5 lb Chicken Thighs and Drumsticks completely in the brine.
Cover and refrigerate for at least 8 hours (overnight is ideal). This extended brine time ensures the buttermilk tenderizes the meat while the salt and sugar penetrate deeply for maximum flavor and moisture retention.
Step 2: Prepare the Double-Dredge Coating
In a shallow dish, whisk together 2 cups of the 3 cups All-Purpose Flour with the 0.5 cup Cornstarch, 2 tbsp Paprika, 1 tbsp Garlic Powder, 1 tbsp Onion Powder, 1 tsp Ground Black Pepper, and 0.5 tsp Cayenne Pepper.
In a separate bowl, beat the 2 whole Large Eggs with 2 tbsp of the buttermilk brine. Set up a dredging station: first the flour mixture, then the egg wash, then the remaining 1 cup All-Purpose Flour mixed with 1 tbsp of the spice blend from the first dredge.
Step 3: Dredge and Rest the Chicken
Remove the chicken from the brine and pat dry with paper towels. Dredge each piece first in the spiced flour mixture, pressing firmly to adhere. Shake off excess, then dip in the egg wash, letting any excess drip off.
Coat in the second flour mixture, again pressing to create a thick, textured crust. Place on a wire rack and let rest for 10-15 minutes—this crucial step helps the coating adhere and prevents it from sliding off during frying.
Step 4: Deep-Fry to Golden Perfection
In a deep, heavy pot, heat the 8 cups Peanut Oil to 350°F over medium-high heat. Use a deep-fry thermometer for accuracy. Carefully lower 3-4 pieces of chicken into the oil, ensuring they’re fully submerged and not touching.
Fry for 12-15 minutes for thighs and 10-12 minutes for drumsticks, turning occasionally, until the coating is deep golden brown and the internal temperature reaches 165°F. Maintain oil temperature between 325-350°F throughout frying.
Step 5: Drain and Rest Before Serving
Transfer fried chicken to a wire rack set over a baking sheet to drain. Sprinkle immediately with a pinch of Kosher Salt to enhance the crust’s flavor. Let rest for 5-10 minutes—this allows the juices to redistribute and the coating to crisp fully.
Serve hot, when the exterior is at its crispiest and the meat is most tender. The double-dredge technique combined with the buttermilk brine ensures a shatteringly crisp crust giving way to succulent, flavorful meat with every bite.
Pro Tips For Making Jd Bakeshop Fried Chicken
- Brining Time Matters: Soak the chicken in the buttermilk mixture for at least 12 hours—I learned this the hard way after trying to rush it and ending up with bland, dry meat.
- Dry the Chicken: Pat the chicken pieces very dry before frying, even if it seems tedious. My grandmother swore by this, and she was right: it guarantees a crispier crust.
- Skip the Overcrowding: Fry in small batches so the oil temperature stays steady. After burning three batches, I finally figured out that crowding the pan just steams the chicken instead of frying it.
- Sugar the Buttermilk: Don’t skip the granulated sugar in the buttermilk brine—sounds weird, but it works by tenderizing the meat and balancing the heat from the hot sauce.
Common Mistakes When Making Great jd bakeshop fried chicken
Skipping the Brine
Never rush this step—the 12-hour buttermilk brine is non-negotiable for that signature JD Bakeshop tenderness. Even 4 hours makes a difference, but overnight transforms the meat. The lactic acid breaks down proteins, ensuring juiciness no shortcut can replicate. 💡
Overcrowding the Fryer
Frying too many pieces at once drops the oil temperature, leading to greasy, soggy crust. Cook in batches of 3-4 pieces max to maintain 350°F. I use a 5-quart Dutch oven for even heat distribution. Patience here guarantees crispiness.
Inconsistent Oil Temp
Use a deep-fry thermometer—guessing leads to disaster. Oil below 325°F absorbs into the crust; above 375°F burns the outside before the meat cooks. Adjust the heat as needed to keep it steady. This is where most home cooks fail.
Skipping the Rest
The 10-15 minute rest after dredging lets the coating set, preventing it from sliding off in the oil. Similarly, the 5-10 minute rest after frying allows juices to redistribute. Skipping either step risks a dry interior or a coating that peels away. 🔥
Ignoring the Double-Dredge
This two-step process creates the thick, craggy crust that defines JD Bakeshop’s version. Press the flour firmly into the meat during each dredge. The first layer adheres to the brine; the second builds height. Don’t rush—each layer needs 30 seconds of firm pressing.
Using the Wrong Oil
Peanut oil’s high smoke point (450°F) and neutral flavor are ideal. Vegetable or canola oil work in a pinch, but avoid olive oil—it burns at frying temps. I reuse oil 2-3 times if strained and stored cool between uses.
Nutrition Facts
Frequently Asked Questions
Can I use chicken breasts instead of thighs?
Not recommended. Bone-in thighs stay juicier during frying. Breasts dry out quickly and lack the fat needed for crispy skin. Stick to thighs and drumsticks for authentic texture.
How do I know when the oil is ready?
Use a deep-fry thermometer—it should read 350°F. Without one, test with a wooden chopstick: bubbles should form around it vigorously. Maintain this temp for perfect crispiness.
Can I bake this instead of frying?
Yes, but texture differs. Bake at 400°F for 25-30 minutes on a wire rack for crispier results. Flip halfway. It won’t be as crunchy as deep-frying, but it’s a healthier option.
What if my coating falls off during frying?
This happens if the chicken wasn’t dry before dredging or didn’t rest after coating. Pat pieces thoroughly dry and let them rest 10-15 minutes post-dredge to set the crust.

- Jollof Rice Sauce Recipe: West African Tomato and Spice Infusion - September 25, 2026
- Japanese Rice Soup Recipe: Umami-Rich Comfort in a Bowl - September 25, 2026
- Homemade Cream Of Rice Recipe: Silk-Smooth Breakfast in Minutes - September 25, 2026