
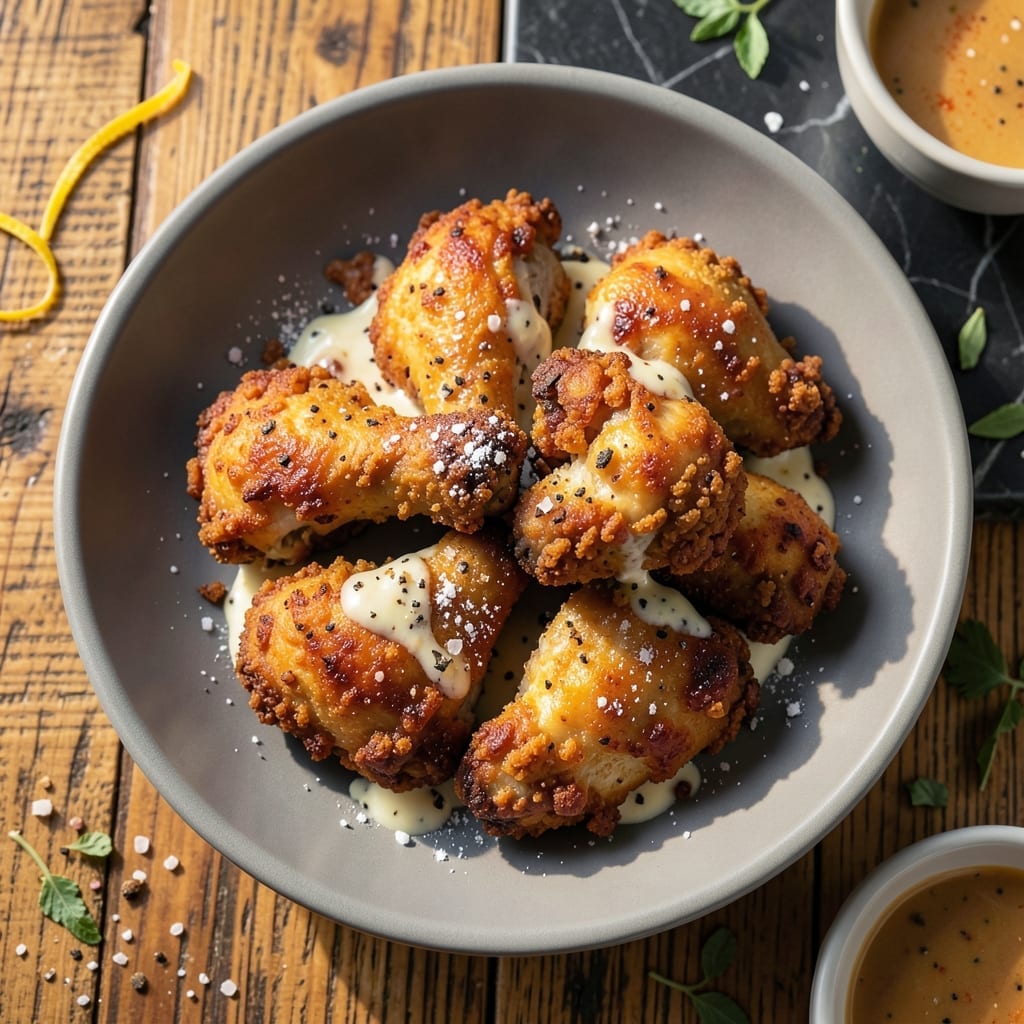
There’s nothing quite like the satisfaction of making crispy, golden fried chicken at home. This proven method delivers professional results with a buttermilk brine that guarantees juicy, flavorful meat every time.
The key is patience—soaking the chicken in buttermilk for at least 4 hours ensures tender, well-seasoned meat. A double-dredge in seasoned flour creates that signature crispy coating that stays shatteringly crunchy even after cooling.
When fried at the right temperature, the chicken emerges with a perfectly golden exterior and moist interior. The buttermilk not only tenderizes but also helps the coating adhere for maximum crunch in every bite.
Serve hot for the ultimate comfort food experience. This recipe proves homemade can rival any restaurant version.
Ingredients for Homemade Fried Chicken
Professional results start with quality ingredients for this buttermilk-brined, double-dredged classic.
| Ingredient | Amount | Notes |
|---|---|---|
| Chicken Thighs 🍗 | 2 ½ lb | Boneless, skin-on preferred for crispiness |
| Buttermilk 🥛 | 2 cups | Full-fat for best tenderness |
| All-Purpose Flour 🌾 | 3 cups | Divided for double-dredging process |
| Cornstarch 🌾 | ½ cup | For extra-crispy coating |
| Kosher Salt 🧂 | 2 tbsp | Diamond Crystal preferred for even seasoning |
| Ground Black Pepper 🌶️ | 1 tbsp | Freshly ground for best flavor |
| Paprika 🌶️ | 1 tbsp | Sweet or smoked variety |
| Garlic Powder 🧄 | 1 tbsp | Not garlic salt substitute |
| Onion Powder 🧅 | 1 tbsp | Essential for depth of flavor |
| Cayenne Pepper 🔥 | ½ tsp | Adjust for desired spice level |
| Vegetable Oil 🫒 | 4 cups | For frying, high smoke point required |
| Large Eggs 🥚 | 2 whole | For binding the dredge |
| Hot Sauce 🌶️ | 1 tbsp | Optional, adds tang to brine |
The chicken is everything here. Thighs stay juicier than breasts—opt for skin-on for maximum crunch. For buttermilk, full-fat from a trusted dairy brand like Organic Valley ensures the brine works its magic. The flour and cornstarch combo is non-negotiable for that restaurant-quality crust. Most supermarkets carry Diamond Crystal kosher salt, but Morton works too (just reduce by 25%).
No buttermilk? Whole milk plus 1 tbsp vinegar per cup gets you close. Out of thighs? Drumsticks work, but reduce frying time by 2-3 minutes. Want more heat? Add 1 tsp more cayenne. For gluten-free, swap the all-purpose flour for rice flour plus cornstarch (same ratio). The hot sauce in the brine is optional but highly recommended for depth.
Brined chicken keeps in the fridge for 2 days max before cooking. Fried chicken stays crispy at room temp for 2 hours, but it’s best eaten fresh. Leftovers reheat well in a 375°F oven for 15 minutes—microwave ruins the crust.
Why You’ll Love This Recipe
- One Bowl Wonder: I mix the buttermilk and flour right in the same dish I’ll dredge in—no extra bowls, no extra mess.
- Crispy Perfection: That buttermilk soak makes the chicken so tender, and the cornstarch in the coating gives it an addictive crunch.
- Crowd Pleaser: I serve this for Sunday dinner, game day, or just because—everyone from my picky nephew to my foodie friend devours it.
- Budget Friendly: Chicken thighs stay juicy and cost way less than breasts, so I get a big batch of comfort food without breaking the bank.
Step-by-Step Instructions for Crispy Buttermilk-Brined Chicken
Master the technique for achieving perfectly crispy, juicy results with this proven method.
Step 1: Brine the Chicken in Buttermilk Mixture
Combine 2 cups Buttermilk, 1 tbsp Hot Sauce, 1 tbsp Kosher Salt, 1 tbsp Ground Black Pepper, 1 tbsp Paprika, 1 tbsp Garlic Powder, 1 tbsp Onion Powder, and 0.5 tsp Cayenne Pepper in a large bowl. Whisk until fully incorporated and the spices are evenly distributed throughout the buttermilk.
Submerge all 2.5 lb Chicken Thighs in the buttermilk mixture, ensuring each piece is fully coated. Cover the bowl and refrigerate for at least 4 hours, or preferably overnight. This brining process tenderizes the chicken and infuses it with flavor while the acid in the buttermilk helps break down proteins for maximum juiciness.
Step 2: Prepare the Double-Dredge Coating
In a large shallow dish, whisk together 2 cups All-Purpose Flour, 0.5 cup Cornstarch, 1 tbsp Kosher Salt, 1 tbsp Ground Black Pepper, 1 tbsp Paprika, 1 tbsp Garlic Powder, and 1 tbsp Onion Powder until thoroughly combined. The cornstarch is essential for creating that ultra-crispy exterior.
In a separate bowl, lightly beat 2 whole Large Eggs with 2 tablespoons of the buttermilk brine. This egg wash will help the flour coating adhere to the chicken. Reserve the remaining buttermilk mixture for potential touch-ups during the dredging process.
Step 3: Dredge and Rest the Chicken
Remove the chicken from the buttermilk brine, allowing excess to drip off. Dredge each piece in the flour mixture, pressing firmly to ensure an even, thick coating. Shake off any excess flour, then dip the piece in the egg wash, allowing any excess to drip off before returning it to the flour mixture for a second coating.
Place the double-dredged chicken on a wire rack set over a baking sheet. Let it rest at room temperature for 15-20 minutes. This resting period allows the coating to adhere better and prevents it from falling off during frying. The coating should appear dry and slightly cracked in places when ready.
Step 4: Fry to Golden Perfection
In a large, heavy-bottomed pot or Dutch oven, heat 4 cups Vegetable Oil to 350°F over medium-high heat. Use a deep-fry thermometer to monitor the temperature accurately. The oil is ready when a small piece of flour sizzles vigorously when dropped in.
Carefully lower the chicken into the hot oil, working in batches to avoid overcrowding the pot. Fry for 12-15 minutes, turning occasionally, until the chicken is golden brown and the internal temperature reaches 165°F. The coating should be deeply browned and crispy, with visible bubbles indicating active frying.
Maintain the oil temperature between 325-350°F throughout cooking. If the oil temperature drops too low, the chicken will absorb oil and become greasy rather than crispy. Transfer the fried chicken to a wire rack or paper towels to drain excess oil.
Pro Tips For Making Homemade Fried Chicken
- Brine the Thighs: Soak the chicken thighs in salted buttermilk for at least 4 hours—overnight if you can. I learned this the hard way: skipping this step means dry, bland meat no matter how crispy the crust.
- Heat the Oil Right: Use a thermometer and keep the oil at 350°F. After burning three batches, I finally figured out that too-hot oil burns the outside before the inside cooks.
- Double Dredge: Dip the thighs in flour, then buttermilk, then flour again. Sounds weird, but it works: this gives you that extra-crispy crust that stays put.
- Rest Before Frying: Let the dredged chicken rest for 10 minutes before hitting the oil. My grandmother swore by this, and she was right: it helps the coating adhere and prevents flaking.
Flavor Customization for homemade fried chicken
Spicy Kick
For heat lovers, increase the cayenne pepper to 1 full tsp in both the brine and flour mixture. I also add ½ tsp chipotle powder for a smoky depth that pairs perfectly with the buttermilk tang. 🌶️
Herb-Infused
Stir 1 tbsp dried thyme and 1 tbsp dried rosemary into your flour dredge. The herbs create aromatic pockets in the crust. For fresh herbs, use 2 tbsp each of finely chopped thyme and rosemary.
Extra-Crispy
Replace ½ cup of the flour with crushed cornflakes or panko breadcrumbs in your dredge. The irregular shapes create more surface area for crunch. Press firmly to ensure the coating adheres well.
Sweet Heat
Add 2 tbsp brown sugar to your flour mixture for a caramelized crust. Balance the sweetness with an extra ½ tsp cayenne. The sugar helps the coating brown faster, so monitor closely.
Cajun Style
Swap the paprika for 1 tbsp Cajun seasoning (I use Tony Chachere’s) and add ½ tsp dried oregano and ½ tsp dried basil to both brine and dredge. This gives a Louisiana-inspired flavor boost. 💛
Lemon Pepper
Add 2 tbsp lemon zest and an extra 1 tbsp black pepper to your dredge. The citrus brightens the rich flavor. For extra zing, add 1 tsp citric acid to the flour mixture.
Nutrition Facts
Frequently Asked Questions
Can I use chicken breasts instead of thighs?
Yes, but they dry out faster. Reduce frying time to 8-10 minutes and check internal temp reaches 165°F. Thighs stay juicier due to higher fat content.
Why does the coating fall off during frying?
Usually from skipping the resting step after dredging. Let coated chicken rest 15-20 minutes so the flour adheres properly. Also ensure oil is at 350°F before adding pieces.
Can I bake instead of fry?
Yes, bake at 400°F for 25-30 minutes on a wire rack. Spray pieces with oil for crispiness. The texture won’t be identical to frying but still delicious.
What’s the best oil for frying?
Use oils with high smoke points like vegetable, peanut, or canola. Avoid olive oil. Maintain temperature between 325-350°F for perfect crispiness without burning.

- Jollof Rice Sauce Recipe: West African Tomato and Spice Infusion - September 25, 2026
- Japanese Rice Soup Recipe: Umami-Rich Comfort in a Bowl - September 25, 2026
- Homemade Cream Of Rice Recipe: Silk-Smooth Breakfast in Minutes - September 25, 2026