
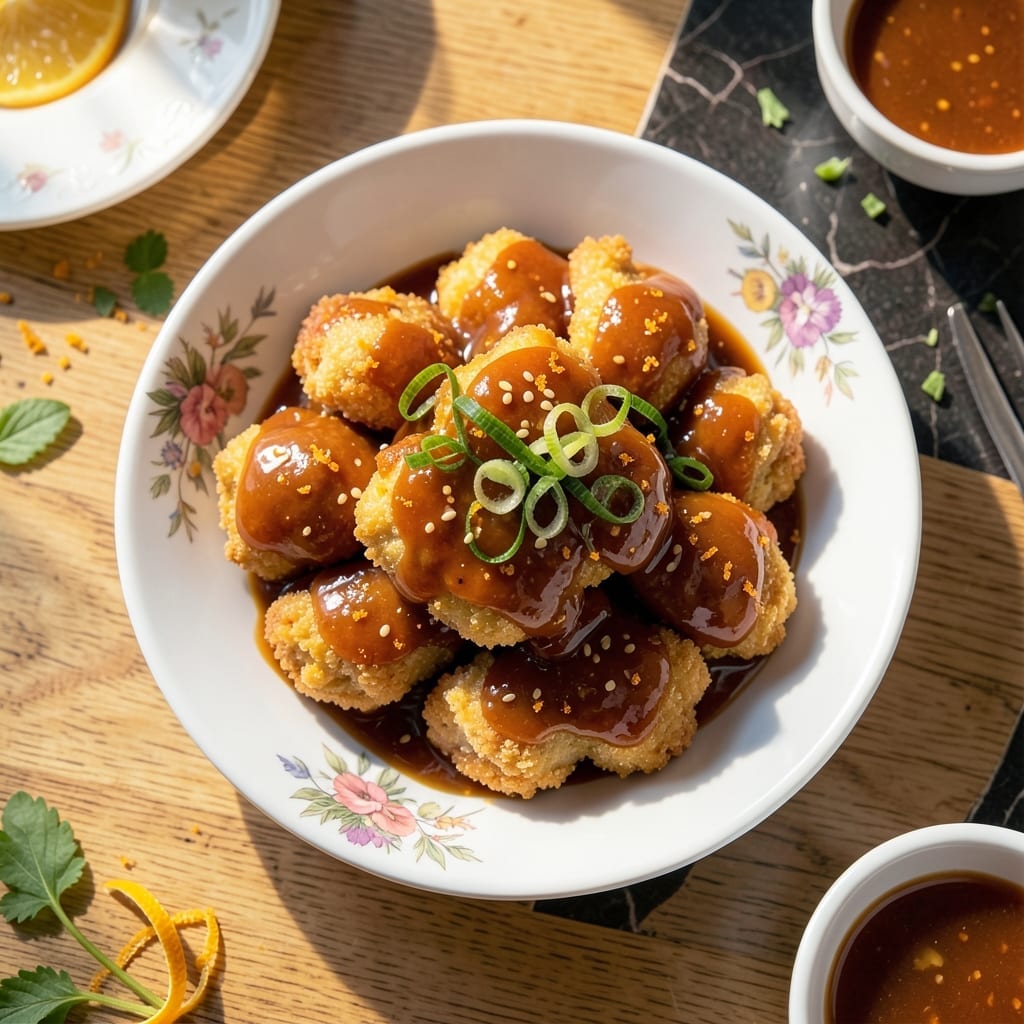
This homemade version delivers crispy chicken pieces coated in a vibrant citrus glaze that’s better than takeout. The secret lies in the double-frying technique that creates an ultra-crunchy exterior while keeping the meat juicy inside.
I’ve perfected this method over years of testing, ensuring the sauce has the right balance of sweet, tangy, and savory notes. The orange flavor shines through without being overwhelming, making it a crowd-pleaser every time.
The chicken achieves that signature crispy texture through careful temperature control and proper coating. Each bite delivers tender meat with a satisfying crunch, all enveloped in that glossy, flavorful glaze.
Serve this with steamed rice and steamed broccoli for a complete meal that rivals your favorite restaurant. The results are consistently impressive and well worth the effort.
Ingredients for Homemade Orange Chicken
Double-frying is the secret to that restaurant-style crispy texture everyone loves.
| Ingredient | Amount | Notes |
|---|---|---|
| Boneless Skinless Chicken Thighs 🍗 | 1 ½ lb | Cut into 1-inch pieces |
| Cornstarch 🌾 | ½ cup | For coating chicken |
| All-Purpose Flour 🌾 | ¼ cup | Lightly coats pieces |
| Large Eggs 🥚 | 2 whole | Beaten for binding |
| Vegetable Oil 🫒 | 4 cups | For double-frying chicken |
| Orange Zest 🍊 | 1 tbsp | Freshly grated for sauce |
| Fresh Orange Juice 🍊 | ¾ cup | Newly squeezed preferred |
| Soy Sauce 🫒 | ¼ cup | Low-sodium recommended |
| Rice Vinegar 🫒 | 2 tbsp | Balances sweetness |
| Granulated Sugar 🍚 | ½ cup | Adjust to taste preference |
| Garlic Cloves 🧄 | 4 cloves | Minced for sauce |
| Fresh Ginger 🌿 | 1 tbsp | Grated fine |
| Red Pepper Flakes 🌶️ | ½ tsp | Optional for heat |
| Green Onions 🧅 | 3 whole | Sliced thin for garnish |
| Sesame Seeds 🌰 | 1 tbsp | Toasted for topping |
The chicken is everything here. Thighs stay juicier than breasts through the double-fry—look for skinless, boneless at Costco or your regular supermarket. Cornstarch is non-negotiable for that shatter-crisp coating (the good stuff, not the clumpy old box). Fresh orange juice makes a huge difference—navel oranges are sweet and easy to juice. I usually grab a bag when they’re in season.
No fresh oranges? Bottled juice works in a pinch (just use 100% juice, not from concentrate). Swap chicken thighs for breasts if you prefer, but they dry out faster. Out of rice vinegar? Apple cider vinegar at the same amount gets you close. For a gluten-free version, tamari instead of soy sauce and rice flour instead of all-purpose. The red pepper flakes can be skipped if you’re sensitive to heat.
The sauce thickens as it cools, so let it sit 5 minutes before tossing with chicken. Leftovers? They keep 3-4 days in the fridge, but the coating softens. Re-crisp in a 400°F oven for 10 minutes. Freezing isn’t ideal—the texture changes too much.
Why You’ll Love This Recipe
- One Pan Wonder: I just coat the chicken in cornstarch and flour, fry it up, and toss it in sauce—hardly any dishes to wash.
- Sweet and Tangy: That orange glaze with the crispy chicken thighs? Honestly, I could eat it every week.
- Crowd Pleaser: Between us, even my pickiest nephew asks for seconds when I make this.
- Budget Friendly: Chicken thighs are cheap, and this recipe stretches to feed four with leftovers for my lunch tomorrow.
Step-by-Step Instructions for Orange Chicken
This method delivers tender, crispy chicken with a sticky citrus glaze that beats takeout every time.
Step 1: Coat and Prepare the Chicken
Pat the 1.5 lb boneless skinless chicken thighs dry with paper towels, then cut them into 1-inch pieces. In a shallow bowl, whisk together the 2 whole large eggs until well combined.
In a separate bowl, blend the 0.5 cup cornstarch and 0.25 cup all-purpose flour. Dip each chicken piece into the egg, letting any excess drip off, then roll it in the cornstarch mixture until fully coated. Press gently to help the coating adhere. This double-layer coating is what creates that signature crispy texture.
Step 2: Double-Fry for Maximum Crispiness
Pour the 4 cups vegetable oil into a deep, heavy pot and heat to 350°F over medium-high heat. Use a thermometer to monitor the temperature—this ensures consistent frying. Carefully add half the chicken pieces and fry for 4-5 minutes until light golden brown.
Remove the chicken with a slotted spoon and drain on a wire rack or paper towels. Increase the oil temperature to 375°F and fry the chicken again for 2-3 minutes until deep golden brown and crispy. This double-fry technique guarantees a shatteringly crisp exterior while keeping the inside juicy. Repeat with the remaining chicken.
Step 3: Make the Orange Glaze
In a large skillet, combine the 0.75 cup fresh orange juice, 1 tbsp orange zest, 0.25 cup soy sauce, 2 tbsp rice vinegar, 0.5 cup granulated sugar, 4 cloves minced garlic cloves, 1 tbsp grated fresh ginger, and 0.5 tsp red pepper flakes. Bring to a simmer over medium heat.
Let the mixture cook for 8-10 minutes, stirring occasionally, until it thickens into a glossy glaze that coats the back of a spoon. The sugar will caramelize slightly, and the sauce will develop a deep, rich flavor with a perfect balance of sweet, tangy, and umami notes.
Step 4: Coat and Serve
Add all the fried chicken to the skillet with the glaze. Toss gently to coat each piece evenly, allowing the sauce to cling to the crispy exterior. Cook for 1-2 minutes to let the flavors meld and the sauce thicken further.
Transfer the orange chicken to a serving platter and garnish with the 3 whole sliced green onions and 1 tbsp toasted sesame seeds. Serve immediately while the chicken is still crispy and the glaze is glossy and sticky. The contrast of textures and flavors in each bite is what makes this dish unforgettable.
Pro Tips For Making Homemade Orange Chicken
- Double Fry for Crisp: Fry the coated chicken once at 350°F for 3 minutes, rest it, then fry again at 375°F for 2 minutes. I learned this the hard way—single frying leaves it soggy under the sauce.
- Cut Evenly: Slice chicken thighs into 1-inch pieces so they cook through at the same rate. Sounds obvious, but uneven bits mean some are dry while others are raw inside.
- Skip the Overcrowding: Fry in batches with at least an inch between pieces, or the oil temp drops and you’ll get greasy, steamed chicken. After burning two batches, I finally figured out patience pays off.
- Use Cold Eggs: Beat the eggs straight from the fridge—the cold helps the coating stick better to the chicken. My grandmother swore by this, and she was right.
Common Mistakes When Making Perfect Results
Overcrowding the Fryer
Frying too many chicken pieces at once lowers the oil temperature, resulting in soggy, greasy chicken. I fry in batches, never exceeding 8-10 pieces at a time in my 5-quart Dutch oven. This keeps the oil at 350°F for that perfect crisp. 🔥
Skipping the Double-Fry
Single-frying won’t give you that restaurant-style crunch. The first fry at 350°F cooks the chicken through, while the second at 375°F creates the shatter-crisp exterior. I use a candy thermometer to monitor temperatures precisely.
Using Cold Chicken
Adding cold chicken straight from the fridge to hot oil causes temperature shock and uneven cooking. I always let my chicken sit at room temperature for 20-30 minutes before frying. Pat the pieces dry again right before dredging.
Thin or Lumpy Sauce
A proper glaze should coat the back of a spoon. If your sauce is too thin, simmer it longer to reduce. If it’s lumpy, whisk in 1 tsp cornstarch mixed with 1 tbsp cold water. The sauce should thicken as it cools slightly. 💡
Saucing Too Early
Tossing the chicken in sauce immediately after frying makes it soggy. I let the fried chicken drain on a rack for 2-3 minutes while I finish the glaze. This preserves the crisp texture until the very last moment.
Neglecting the Garnish
The green onions and sesame seeds aren’t just pretty—they add freshness and crunch. I toast the sesame seeds in a dry pan for 1-2 minutes until golden. Sprinkle them just before serving for maximum impact.
Nutrition Facts
Frequently Asked Questions
Can I use chicken breast instead of thighs?
Yes, but thighs stay juicier through double-frying. If using breasts, reduce second fry time to 1-2 minutes to prevent drying. Always cut into 1-inch pieces for even cooking.
What if I don’t have a thermometer?
Test oil with a wooden chopstick – bubbles should form steadily around it at 350°F. For 375°F, bubbles will be more vigorous. This method works in a pinch for temperature control.
How do I make the sauce thicker?
Simmer longer to reduce or mix 1 tsp cornstarch with 1 tbsp cold water, then whisk into sauce. It should coat the back of a spoon when ready.
Can I bake instead of fry?
For crispiness, frying is best. Baking at 400°F for 20-25 minutes works but texture won’t be as crisp. Toss in sauce after baking to maintain some crunch.

- Jollof Rice Sauce Recipe: West African Tomato and Spice Infusion - September 25, 2026
- Japanese Rice Soup Recipe: Umami-Rich Comfort in a Bowl - September 25, 2026
- Homemade Cream Of Rice Recipe: Silk-Smooth Breakfast in Minutes - September 25, 2026