
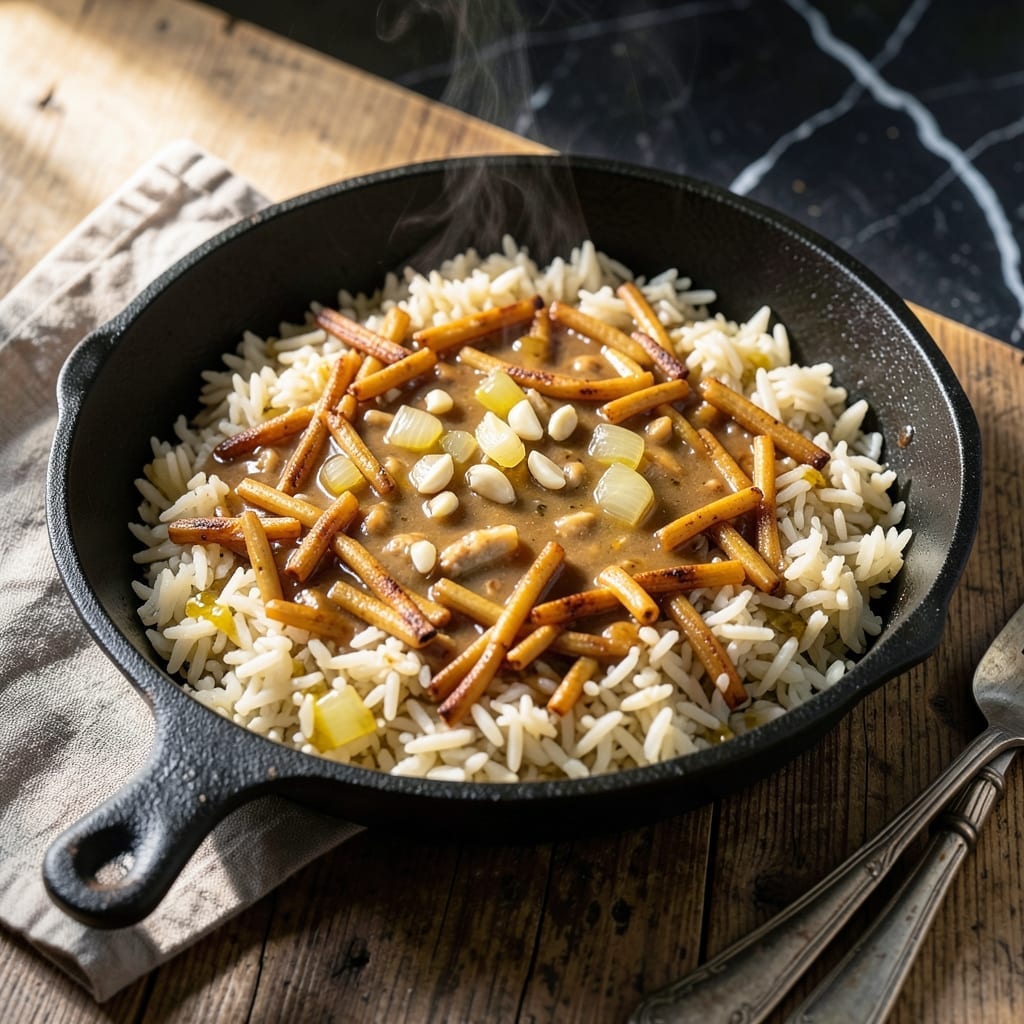
I’ve recreated that nostalgic boxed flavor completely from scratch, using simple pantry staples and a few fresh ingredients. This homemade version delivers the same savory, buttery taste you remember, but with better texture and no preservatives.
The secret is toasting the rice and pasta together before cooking, which builds deep, nutty flavor. It’s ready in 20 minutes and proves that some classics are worth making yourself.
Ingredients for Homemade Rice a Roni
Simple pantry staples recreate that nostalgic boxed flavor with better texture and no preservatives.
| Ingredient | Amount | Notes |
|---|---|---|
| Long-Grain White Rice 🍚 | 1 ½ cups | Uncooked, not instant |
| Vermicelli Pasta 🍝 | ½ cup | Broken into small pieces |
| Unsalted Butter 🧈 | 4 tbsp | Divided for toasting and finishing |
| Chicken-Flavored Vegetable Broth 🥣 | 3 cups | Low-sodium preferred |
| Yellow Onion 🧅 | ½ whole | Finely diced for even cooking |
| Garlic Cloves 🧄 | 3 cloves | Minced for depth of flavor |
| Dried Parsley 🌿 | 2 tsp | For authentic boxed flavor |
| Dried Onion Flakes 🧅 | 1 tbsp | Rehydrated in broth |
| Garlic Powder 🧄 | 1 tsp | Enhances savory profile |
| Salt 🧂 | 1 tsp | Adjust to taste after cooking |
| Black Pepper 🌶️ | ½ tsp | Freshly ground preferred |
| Paprika 🌶️ | ½ tsp | For subtle color and warmth |
| Monosodium Glutamate 🧂 | ¼ tsp | Optional for umami boost |
The rice and pasta are the foundation—long-grain white rice gives the right texture, and vermicelli (found in the pasta aisle at any grocery store) adds that classic look. I like Lundberg or Mahatma for the rice. The broth is key here: chicken-flavored vegetable broth (like Better Than Bouillon) nails the savory depth without the meat. Don’t skip toasting the rice and pasta—it builds that nutty flavor you remember.
No vermicelli? Angel hair pasta broken into bits works in a pinch. Out of chicken-flavored broth? Regular vegetable broth plus a pinch of poultry seasoning gets you close. The MSG is optional but honestly worth it (find it at Asian markets or online). If you’re avoiding additives, just bump up the garlic powder and salt. The parsley and onion flakes are non-negotiable for that boxed taste—don’t sub fresh here.
Store dry ingredients in airtight containers for up to 6 months. The cooked dish keeps 4-5 days in the fridge or 3 months frozen. Reheat with a splash of water to refresh the texture.
Why You’ll Love This Recipe
- I’ll be real: it’s my go-to for potlucks and Sunday suppers alike.
- One Pot Wonder: Honestly, I just toss in the rice, toast the vermicelli in butter, and let the broth do the rest.
- Crave-Worthy Depth: That chicken broth plus caramelized onion combo hits different—rich but not heavy.
- Feeds a Crowd: I’ll be real: it’s my go-to for potlucks and Sunday suppers alike.
Step-by-Step Instructions for Homemade Rice-A-Roni
Here’s the method. Simple, straightforward, and exactly like the boxed version you remember.
Step 1: Toast the Vermicelli and Rice
Melt 2 tbsp unsalted butter in a large skillet over medium heat. Add the 0.5 cup vermicelli pasta broken into small pieces and the 1.5 cups long-grain white rice. Stir constantly for 3-4 minutes until the pasta turns golden brown and the rice becomes lightly toasted.
This toasting step is crucial—it develops the nutty, savory base that defines this dish. Watch closely as vermicelli can burn quickly. You’ll smell a rich, buttery aroma when it’s ready. Remove from heat immediately if it starts to darken too much.
Step 2: Sauté the Aromatics
Push the rice and vermicelli to one side of the skillet. Add the remaining 2 tbsp unsalted butter to the empty space. Once melted, add the 0.5 whole yellow onion finely diced and the 3 cloves garlic cloves minced. Sauté for 2-3 minutes until the onion softens and becomes translucent.
Stir everything together to coat the rice and pasta in the buttery onion mixture. Add the 1 tbsp dried onion flakes—they’ll rehydrate in the next step. The onion should be soft but not browned; we want sweetness, not bitterness.
Step 3: Add Seasonings and Broth
Sprinkle in the 1 tsp garlic powder, 1 tsp salt, 0.5 tsp black pepper, 0.5 tsp paprika, 2 tsp dried parsley, and 0.25 tsp monosodium glutamate. Stir to distribute the seasonings evenly throughout the rice mixture.
Pour in all 3 cups chicken-flavored vegetable broth at once. Stir well to combine, scraping up any browned bits from the bottom of the skillet. These bits are packed with flavor and will dissolve into the liquid as it comes to a simmer.
Step 4: Simmer Until Tender
Increase heat to medium-high and bring the mixture to a boil. Once boiling, reduce heat to low, cover the skillet, and let it simmer for 15-18 minutes or until the liquid is fully absorbed and the rice is tender.
Resist the urge to stir during cooking—this can break the rice grains and make the dish mushy. Instead, give the skillet a gentle shake halfway through if you notice any sticking. The vermicelli will plump up and the rice will become fluffy as it absorbs the flavorful broth.
Remove from heat and let it sit covered for 5 minutes to steam. This final rest ensures even cooking and perfect texture. Fluff with a fork before serving.
Pro Tips For Making Homemade Rice A Roni
- Brown the Vermicelli: Toast the broken vermicelli in the butter until deep golden brown—about 3-4 minutes—before adding liquids. I learned this the hard way after serving pale, bland noodles that tasted like an afterthought.
- Use Hot Broth: Pour in boiling chicken-flavored vegetable broth instead of cold. Sounds weird, but it works: the rice cooks evenly and absorbs flavor faster, cutting 5 minutes off the simmer time.
- Skip the Rinse: Resist the urge to rinse the long-grain white rice—you want that starch to help thicken the dish and give it that classic Rice-A-Roni texture.
- Rest Before Serving: Once it’s done, cover and let it sit off heat for 5-10 minutes. My grandmother swore by this, and she was right: the rice steams through and the flavors meld.
Essential Equipment for This Dish
Must-Have Skillet
A heavy-bottomed 12-inch skillet with a tight-fitting lid is essential. I use my Lodge cast iron—it distributes heat evenly and retains it perfectly for toasting and simmering. A stainless steel skillet works too, but avoid nonstick for this recipe. 🔥
Wooden Spoon
A wooden spoon is my go-to for stirring the rice and vermicelli while toasting. It won’t scratch your skillet and handles the constant stirring without conducting heat. Plus, it’s gentle on the rice grains, preventing breakage.
Chef’s Knife
Finely dicing the onion and mincing the garlic requires a sharp 8-inch chef’s knife. I swear by Wüsthof or Victorinox—both stay sharp and feel comfortable in your hand. A dull knife makes prep slower and more dangerous.
Measuring Cups
Accurate measurements matter here. Use a dry measuring cup for the rice and vermicelli, and a liquid measuring cup for the broth. I keep both Pyrex sets in my kitchen—they’re durable and easy to read. 💡
Tight-Fitting Lid
If your skillet doesn’t have a lid, use a baking sheet or large plate as a cover. The lid traps steam, ensuring the rice cooks evenly and absorbs all the flavorful broth. Without it, you risk uneven cooking or a dry final dish.
Fork for Fluffing
Once cooked, a simple dinner fork is perfect for fluffing the rice. Gently lift and separate the grains to release steam and prevent clumping. This step makes all the difference in achieving that light, airy texture.
Nutrition Facts
Frequently Asked Questions
Can I use brown rice instead of white?
You can, but it will need 45-50 minutes to cook and more broth. The texture will be chewier too.
Why do I need to toast the rice and pasta?
Toasting develops a nutty, savory depth that defines the flavor. It also prevents mushiness by firming up the grains before cooking.
Can I make this gluten-free?
Yes! Swap vermicelli for gluten-free pasta like rice sticks. Ensure your broth is certified gluten-free as well.
What if my rice is undercooked?
Add 1/4 cup broth, cover, and cook 5-10 more minutes on low. Let it steam off-heat afterward.

- Ground Beef Rice and Beans Recipe: Slow-Simmered Savory Harmony - October 17, 2026
- Guyanese Fried Rice Recipe: Caribbean Spice With Wok-Charred Aromatics - October 17, 2026
- Hakka Thunder Tea Rice Recipe: Wok-Charred Herbal Infusion - October 17, 2026