
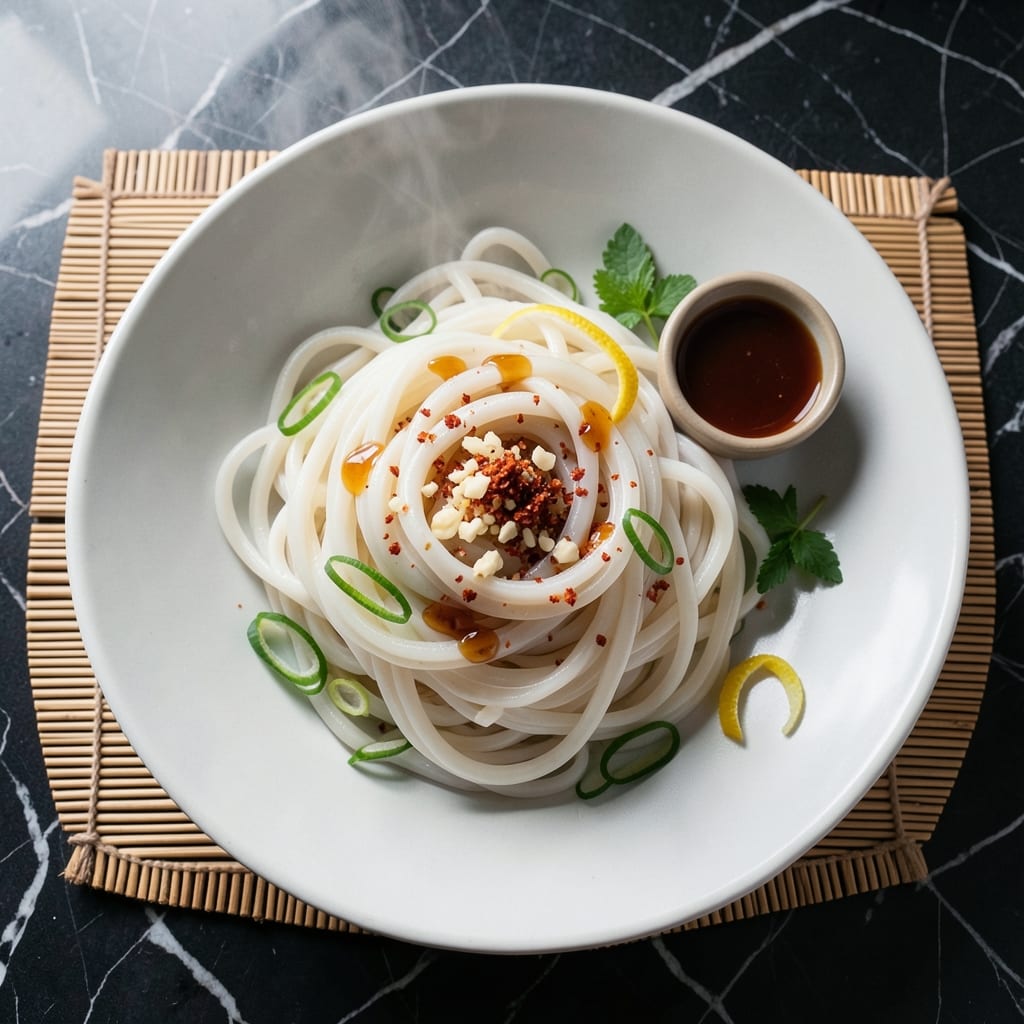
There’s nothing like fresh homemade rice noodles for authentic texture and flavor. This method transforms simple ingredients into chewy, restaurant-quality strands with minimal effort.
Using traditional techniques, you’ll mix, rest, and cook the dough to achieve the perfect bite. The process is straightforward but yields results far superior to store-bought versions.
Ingredients for Homemade Rice Noodle
Simple pantry staples transform into chewy, restaurant-quality strands with minimal effort.
| Ingredient | Amount | Notes |
|---|---|---|
| Rice Flour 🌾 | 2 cups | Fine white rice flour preferred |
| Tapioca Starch 🌾 | ¼ cup | For elasticity and chew |
| Salt 🧂 | ½ tsp | Fine sea salt or kosher |
| Water 💧 | ¾ cup | Warm, about 110°F |
| Vegetable Oil 🫒 | 1 tbsp | Neutral flavor, for dough |
| Cornstarch 🌽 | 2 tbsp | For dusting work surface |
| Turmeric Powder 🌶️ | ¼ tsp | Optional, for golden color |
Rice flour is non-negotiable here—Bob’s Red Mill or King Arthur brands deliver consistent texture. Tapioca starch adds the signature chew; Thai or Asian markets often carry it in bulk for less. Avoid wheat flour substitutes, as they’ll compromise the authenticity. The salt should be fine-grained to distribute evenly throughout the dough (the good stuff, not the pre-shredded kind).
No tapioca starch? Arrowroot powder at a 1:1 ratio works in a pinch. For a gluten-free alternative to cornstarch dusting, use more rice flour. Turmeric is optional but adds a beautiful golden hue—skip if you prefer pure white noodles. Water temperature matters; too hot kills the dough, too cold prevents activation.
Store rice flour and tapioca starch in airtight containers for up to 6 months. The dough rests best at room temperature for 30 minutes. Cooked noodles keep refrigerated for 2 days (worth the extra minute).
Why You’ll Love This Recipe
- Mix and Rest: I just stir rice flour, tapioca starch, salt, and water, then let the batter sit—no kneading, no fuss.
- Chewy Satisfaction: The tapioca starch gives them that perfect bouncy texture I crave in every bite.
- Stir-Fry Ready: Honestly, I make a big batch on Sunday and toss them into stir-fries all week.
- Pantry Staples: Rice flour and tapioca starch are cheap, last forever, and I always have them on hand.
Step-by-Step Instructions for Homemade Rice Noodles
Master the technique for creating fresh rice noodles with the perfect chewy texture at home.
Step 1: Combine Dry Ingredients for the Dough Base
In a large mixing bowl, whisk together the 2 cups Rice Flour, 0.25 cup Tapioca Starch, 0.5 tsp Salt, and 0.25 tsp Turmeric Powder until fully incorporated. The tapioca starch is essential here—it provides the elasticity that gives these noodles their signature chew.
I use fine white rice flour for the smoothest texture. Make sure there are no lumps in your dry mixture before proceeding. The turmeric is optional but adds a beautiful golden hue that makes the noodles visually appealing.
Step 2: Form the Dough with Wet Ingredients
Create a well in the center of your dry ingredients. Pour in the 0.75 cup Water (warm, about 110°F) and 1 tbsp Vegetable Oil. Using a wooden spoon or silicone spatula, gradually incorporate the dry ingredients into the wet until a shaggy dough forms.
The dough will be quite sticky at this stage—that’s normal. The warm water helps activate the starches, while the vegetable oil adds a subtle richness and prevents the noodles from becoming brittle. Continue mixing until no dry spots remain.
Step 3: Knead to Develop the Perfect Texture
Lightly dust your work surface with 1 tbsp Cornstarch to prevent sticking. Turn out the dough and knead vigorously for 8-10 minutes until it becomes smooth and elastic. The dough should be soft but not sticky, with a slight bounce when pressed.
If the dough sticks to your hands or the surface, add the remaining 1 tbsp Cornstarch as needed, but use it sparingly. Over-dusting with cornstarch can make the noodles too dry. The tapioca starch in the dough will continue to develop elasticity as you work it.
Step 4: Rest and Roll the Dough
Shape the dough into a ball, cover it with a damp towel, and let it rest at room temperature for 30 minutes. This resting period allows the starches to fully hydrate and the gluten-like structure from the tapioca to relax, making the dough easier to roll.
After resting, divide the dough into 4 equal portions for manageable rolling. On a surface dusted with more cornstarch, roll each portion as thin as possible—aim for about ⅛-inch thickness. The thinner you roll, the more delicate your noodles will be.
Step 5: Cut and Cook the Noodles
Using a sharp knife or pasta cutter, slice the rolled dough into your desired noodle width. I prefer ¼-inch wide strips for a classic rice noodle appearance. Dust the cut noodles lightly with cornstarch to prevent sticking while you work.
To cook, bring a pot of water to a rolling boil and add the noodles. They’ll cook quickly—usually 2-3 minutes—until they float to the surface and become translucent. Test one for doneness; it should be tender but still have a slight chew. Drain immediately and rinse with cold water to stop the cooking process.
Pro Tips For Making Homemade Rice Noodle
- Steam the Batter: I learned this the hard way—spread the batter thin on a greased tray and steam for 4-5 minutes until translucent, or you’ll end up with gummy noodles instead of chewy ones.
- Use Boiling Water: Sounds weird, but it works: mixing the rice flour and tapioca starch with boiling water first eliminates lumps and gives the noodles a smoother texture.
- Skip Overmixing: After burning three batches, I finally figured out that stirring the batter too much develops gluten-like strands, making the noodles tough rather than tender.
- Oil the Surface: Brush a light coat of vegetable oil on the steamed sheets before cutting—this keeps them from sticking together, and about 1 teaspoon per sheet is all you need.
Dietary Considerations for These Flavors
Naturally Gluten-Free
This creation is inherently gluten-free, relying on rice flour and tapioca starch instead of wheat. It’s perfect for anyone with gluten sensitivities or celiac disease. I always double-check my labels to ensure no cross-contamination.
Vegan and Plant-Based
With no animal products, these noodles fit perfectly into vegan and plant-based diets. The vegetable oil keeps it plant-based while maintaining the right texture. I love that I can enjoy them guilt-free in any vegan dish.
Low Allergen Risk
As a top allergen-free option, this recipe avoids dairy, eggs, nuts, and soy. The simple ingredient list makes it safe for most food allergies. Just ensure your rice flour is processed in a dedicated facility if allergies are severe.
Low Fat Content
The entire recipe contains only 1 tbsp vegetable oil, making it naturally low in fat. This makes the noodles a lighter alternative to egg-based pastas. I appreciate how they fit into my balanced eating plan without excess calories.
Dietary Flexibility
For those on specific diets, you can adjust the recipe easily. Skip the turmeric for a pure white version or use arrowroot powder instead of tapioca starch if needed. The versatility keeps it adaptable to many dietary needs. 💛
Nutrition Facts
Frequently Asked Questions
What can I use instead of tapioca starch?
Arrowroot powder works as a 1:1 substitute for tapioca starch. It provides similar elasticity and chew. Avoid wheat-based substitutes, as they’ll alter the texture.
Why does my dough crack when rolling?
Cracking usually means the dough is too dry. Add 1-2 tsp warm water and knead again. Resting the dough for 30 minutes also helps prevent this.
How thin should I roll the dough?
Aim for ⅛-inch thickness for delicate noodles. Use a pasta machine for even results, or roll by hand on a well-dusted surface. Thinner dough cooks faster.
Can I make these ahead of time?
Yes! Store uncooked noodles dusted with cornstarch in the fridge for 24 hours. For longer storage, freeze for up to 1 month. Thaw before cooking.

- Jollof Rice Sauce Recipe: West African Tomato and Spice Infusion - September 25, 2026
- Japanese Rice Soup Recipe: Umami-Rich Comfort in a Bowl - September 25, 2026
- Homemade Cream Of Rice Recipe: Silk-Smooth Breakfast in Minutes - September 25, 2026